Introducing Rich Text Laravel
A package to integrate Trix into Laravel applications


Articles in the Rich Text Laravel Series:
- Part 1: Introducing Rich Text Laravel
- Part 2: Introducing Rich Text Laravel - Part 2
When we build forms for an application, it's common to need a field where a plain textarea isn't enough. So how do we proceed? We could process it on the backend and treat the input as Markdown, but this requires manual configuration and can often be limiting. A better alternative is to use a rich text editor to maximize options for customization.
There are a lot of options for rich text editors, but time and again I've found I prefer Trix, a rich text editor from 37 Signals. It's a very different kind of editor. It has all the basic functionality you'd expect from any WYSIWYG editor. But it's also capable of much more with its backend integration capabilities.
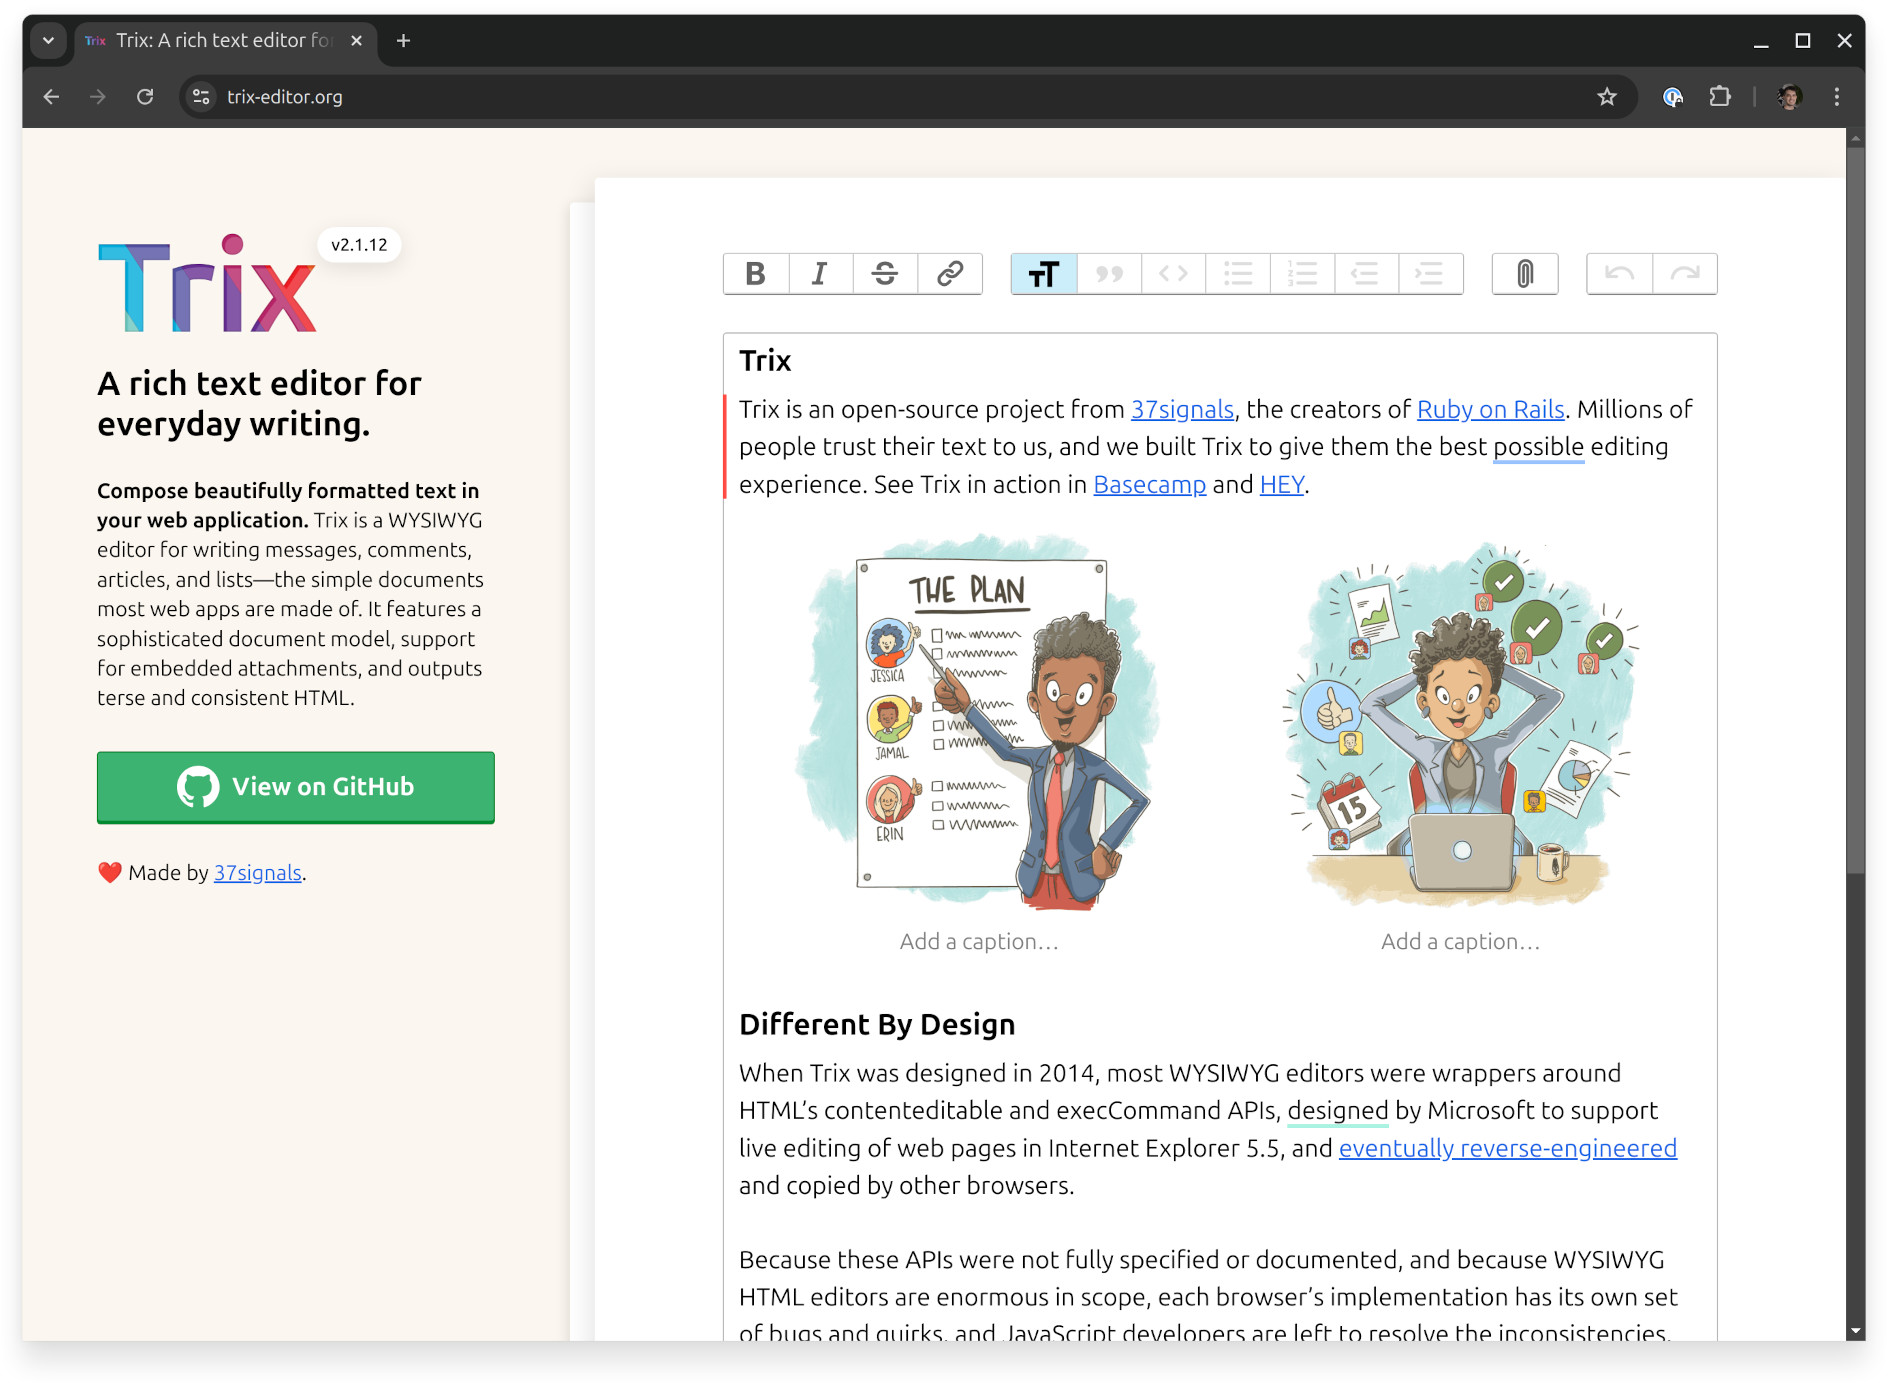
In Rails, you connect Trix to your Rails app using a first-party gem called ActionText. After experimenting with it for a bit, I enjoyed Trix so much that I decided to port ActionText over to Laravel. I've now released that port, as a Composer package called Rich Text Laravel. You can think of the package as ActionText for Laravel.
Let's dive in! In this article, I'll show you:
- How to install Rich Text Laravel and Trix in a Laravel app
- How to add new Rich Text attributes to models
- How to migrate existing content from plain text over to rich text attributes
- How to integrate the file attachment feature of Trix with Laravel
Sound fun? Let's get started!
The Demo App
Instead of starting with a fresh Laravel app, I'll cheat and use the Chirper app (from the Laravel Bootcamp) as the baseline for this demo. To make it easier for you to follow, I've followed through the bootcamp and created this repo with the final result of the application; feel free to clone it and start with that as the baseline. If you prefer to start from scratch, you can follow the "Blade" track of the Laravel Bootcamp and come back here once you're finished.
To setup the finished Bootcamp project, run:
git clone git@github.com:tonysm/laravel-bootcamp-blade-chirper.git chirper
cd chirper/
Next, we need to set up the app:
cp .env.example .env
composer install
php artisan key:generate
php artisan migrate
npm install && npm run build
Since it uses SQLite by default, we don't have to set up a database. To serve the app, you may use the Artisan serve command:
php artisan serve
After that, you should be able to register a new account and create Chirps!
Installing the Rich Text Laravel Package
Now, install the Rich Text Laravel package via Composer:
composer require tonysm/rich-text-laravel
Next, run the install command:
php artisan richtext:install
This should:
- Install Trix.js via NPM
- Add the
<x-rich-text::styles />Blade component to theapp.blade.phpandguest.blade.phplayout views (both inresources/views/layouts/) - Publish a new
<x-trix-input />Blade component to yourresources/views/components/directory - Publish a new migration to create the
rich_textstable (where all rich text field content will live) - Run the migration (after asking for confirmation)
That's it! We're ready to use Trix in our app.
Adding a New Rich Text Attribute
Later, we'll update the Chirp message input to be a Trix field, but since that will include a bit more work to migrate the existing data, we'll start with a simpler option: adding a bio field in the user profile form.
In order to add this field, we're going to modify a few files—the model, the Form Request, and the view.
First, we'll update the User model to add the HasRichText trait, which is required on any model that has Rich Text attributes. We also need to specify which attribute(s) should be Rich Text, and add them to the fillable array. In this example, we'll have a single Rich Text attribute, called bio:
<?php

namespace App\Models;
// [tl! collapse:1,5 add:6,1]
// use Illuminate\Contracts\Auth\MustVerifyEmail;
use Illuminate\Database\Eloquent\Factories\HasFactory;
use Illuminate\Database\Eloquent\Relations\HasMany;
use Illuminate\Foundation\Auth\User as Authenticatable;
use Illuminate\Notifications\Notifiable;
use Tonysm\RichTextLaravel\Models\Traits\HasRichText;

class User extends Authenticatable
{
    use HasFactory, Notifiable;
    use HasRichText; // [tl! add:start]

    /**
     * The dynamic rich text attributes.
     *
     * @var array<int|string, string>
     */
    protected $richTextAttributes = [
        'bio',
    ]; // [tl! add:end]

    /**
     * The attributes that are mass assignable.
     *
     * @var array<int, string>
     */
    protected $fillable = [
        'name',
        'email',
        'password',
        'bio', // [tl! add]
    ];
    // [tl! collapse:start]
    /**
     * The attributes that should be hidden for serialization.
     *
     * @var array<int, string>
     */
    protected $hidden = [
        'password',
        'remember_token',
    ];

    /**
     * Get the attributes that should be cast.
     *
     * @return array<string, string>
     */
    protected function casts(): array
    {
        return [
            'email_verified_at' => 'datetime',
            'password' => 'hashed',
        ];
    }

    public function chirps(): HasMany
    {
        return $this->hasMany(Chirp::class);
    }
    // [tl! collapse:end]
}
Next, let's update the ProfileUpdateRequest request object also to accept the bio input:
<?php

namespace App\Http\Requests;
// [tl! collapse:1,3]
use App\Models\User;
use Illuminate\Foundation\Http\FormRequest;
use Illuminate\Validation\Rule;

class ProfileUpdateRequest extends FormRequest
{
    // [tl! collapse:start]
    /**
     * Get the validation rules that apply to the request.
     *
     * @return array<string, \Illuminate\Contracts\Validation\Rule|array|string>
     */
    // [tl! collapse:end]
    public function rules(): array
    {
        return [
            'name' => ['required', 'string', 'max:255'],
            'email' => ['required', 'string', 'lowercase', 'email', 'max:255', Rule::unique(User::class)->ignore($this->user()->id)],
            'bio' => ['nullable', 'string'], // [tl! add]
        ];
    }
}
Finally, let's update the update-profile-information-form Blade partial, which is where our profile form inputs are rendered, adding the x-trix-input component:
<section>
    <header>
        <h2 class="text-lg font-medium text-gray-900">
            {{ __('Profile Information') }}
        </h2>

        <p class="mt-1 text-sm text-gray-600">
            {{ __("Update your account's profile information and email address.") }}
        </p>
    </header>
    <!-- [tl! collapse:1,3] -->
    <form id="send-verification" method="post" action="{{ route('verification.send') }}">
        @csrf
    </form>

    <form method="post" action="{{ route('profile.update') }}" class="mt-6 space-y-6">
        @csrf
        @method('patch')

        <div>
            <x-input-label for="name" :value="__('Name')" />
            <x-text-input id="name" name="name" type="text" class="mt-1 block w-full" :value="old('name', $user->name)" required autofocus autocomplete="name" />
            <x-input-error class="mt-2" :messages="$errors->get('name')" />
        </div>
        <!-- [tl! add:1,5] -->
        <div>
            <x-input-label for="bio" :value="__('Bio')" class="mb-1" />
            <x-trix-input id="bio" name="bio" class="block w-full" :value="old('bio', $user->bio?->toTrixHtml())" autocomplete="off" />
            <x-input-error class="mt-2" :messages="$errors->get('bio')" />
        </div>
        <!-- [tl! collapse:start] -->
        <div>
            <x-input-label for="email" :value="__('Email')" class="mb-1" />
            <x-text-input id="email" name="email" type="email" class="block w-full" :value="old('email', $user->email)" required autocomplete="username" />
            <x-input-error class="mt-2" :messages="$errors->get('email')" />

            @if ($user instanceof \Illuminate\Contracts\Auth\MustVerifyEmail && ! $user->hasVerifiedEmail())
                <div>
                    <p class="text-sm mt-2 text-gray-800">
                        {{ __('Your email address is unverified.') }}

                        <button form="send-verification" class="underline text-sm text-gray-600 hover:text-gray-900 rounded-md focus:outline-none focus:ring-2 focus:ring-offset-2 focus:ring-indigo-500">
                            {{ __('Click here to re-send the verification email.') }}
                        </button>
                    </p>

                    @if (session('status') === 'verification-link-sent')
                        <p class="mt-2 font-medium text-sm text-green-600">
                            {{ __('A new verification link has been sent to your email address.') }}
                        </p>
                    @endif
                </div>
            @endif
        </div>

        <div class="flex items-center gap-4">
            <x-primary-button>{{ __('Save') }}</x-primary-button>

            @if (session('status') === 'profile-updated')
                <p
                    x-data="{ show: true }"
                    x-show="show"
                    x-transition
                    x-init="setTimeout(() => show = false, 2000)"
                    class="text-sm text-gray-600"
                >{{ __('Saved.') }}</p>
            @endif
        </div>
        <!-- [tl! collapse:end] -->
    </form>
</section>
Remember, this <x-trix-input /> Blade component was published by the package when we installed it. After all these steps, you should see something like this on your edit profile page:
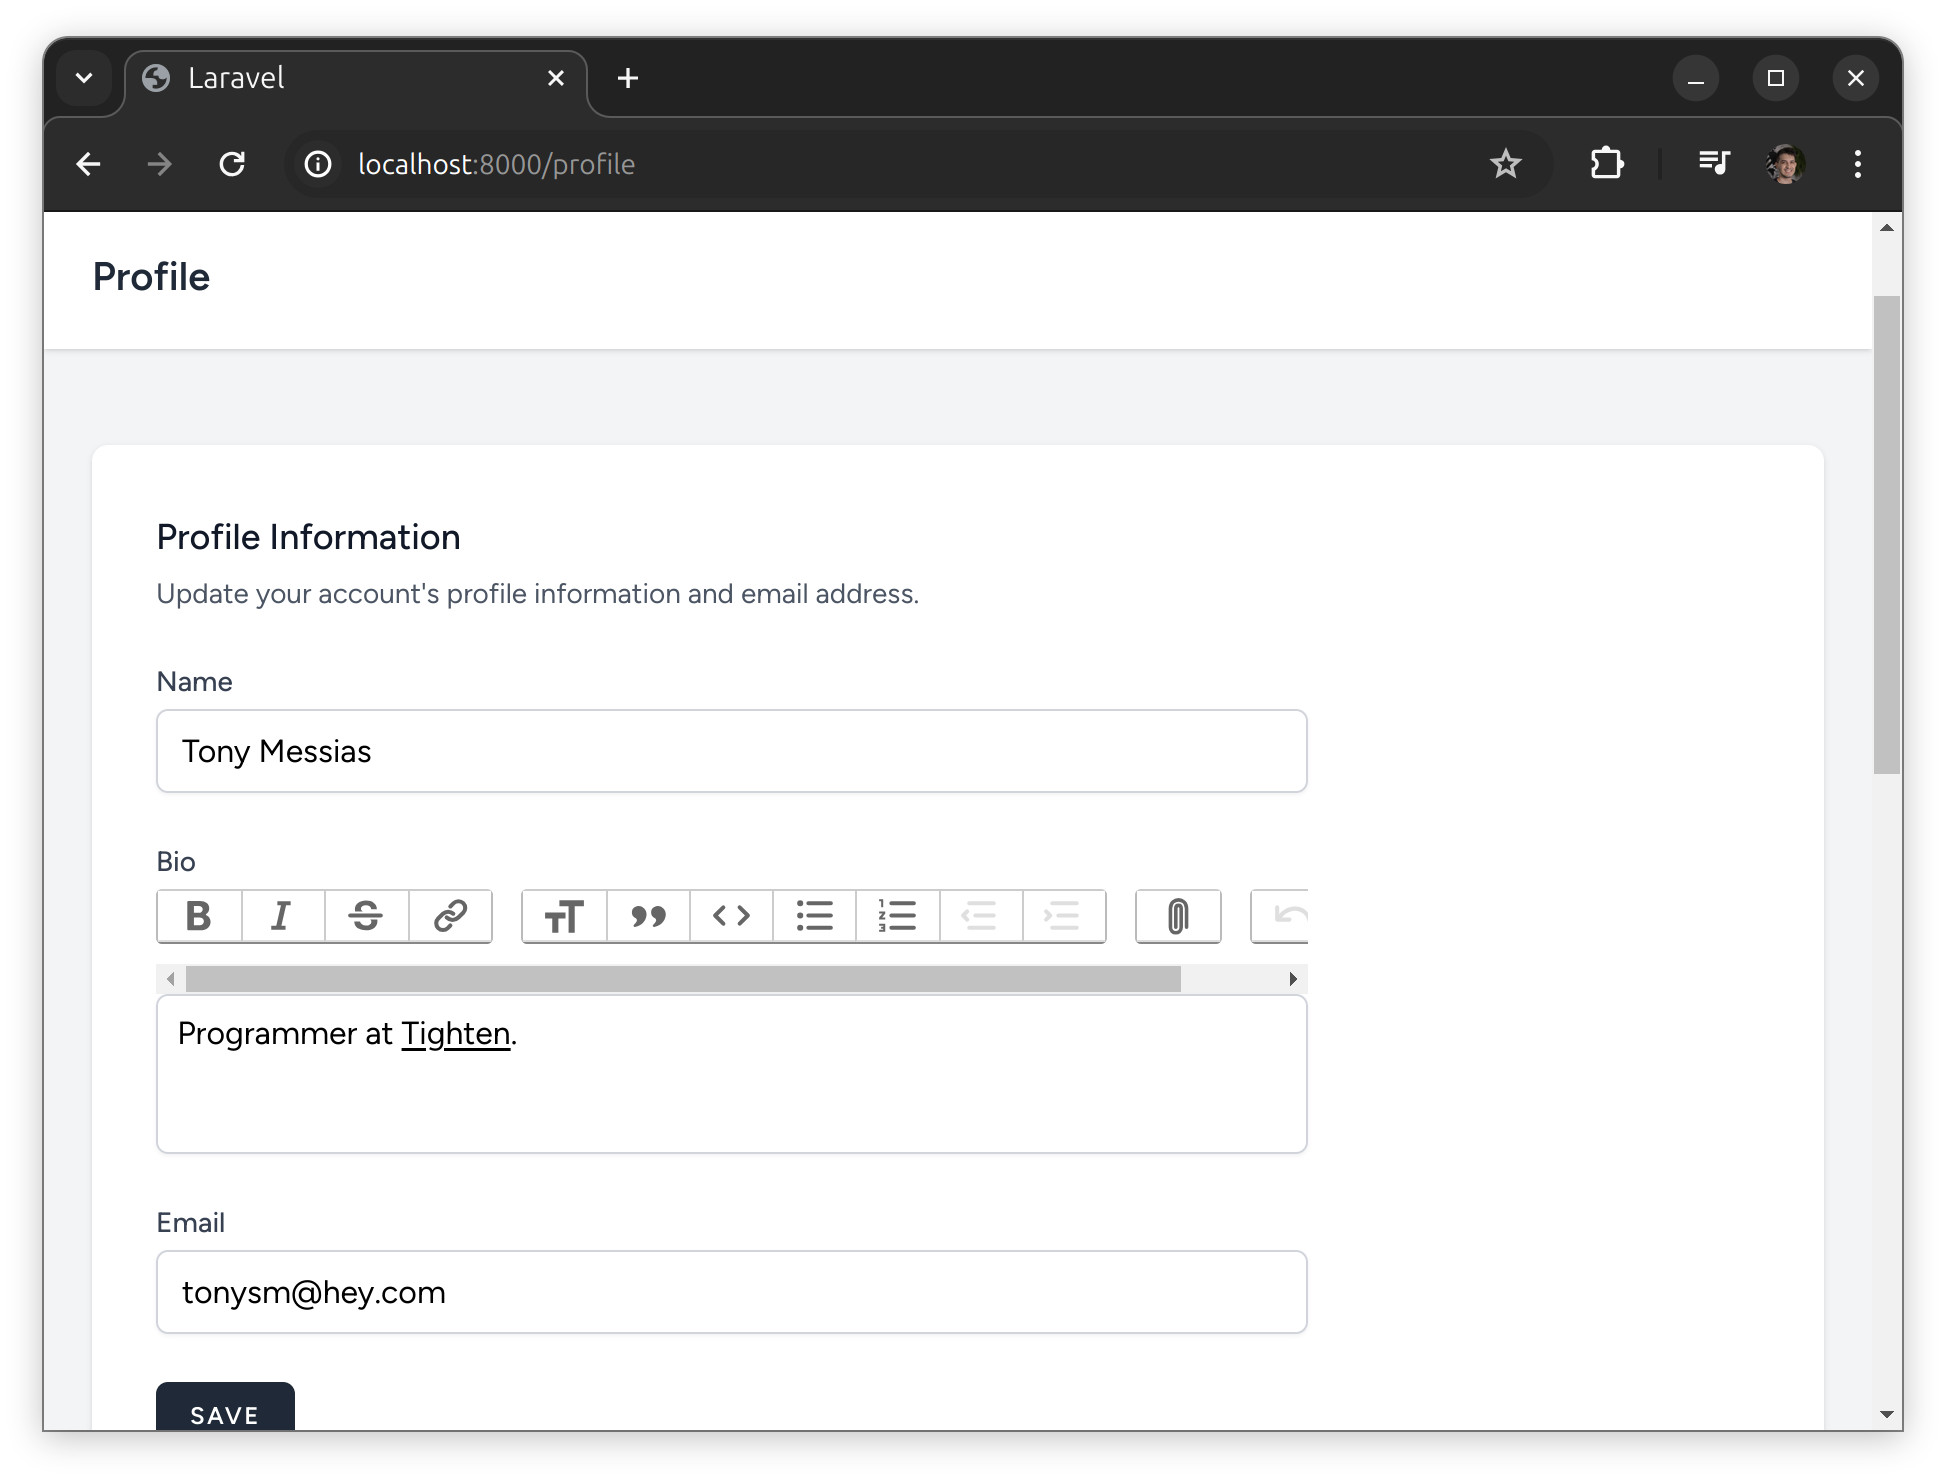
And that's all we need to add a new field. If you save the form now, it should Just Work™.
Interacting with Rich Text attributes
Notice that we didn't have to make any changes to the ProfileController for this to work. We only added a new field to the form input validation. That's because saving Rich Text attributes works like the regular attributes, at least for the most part. In our cause, the controller is resolving code that looks like this:
$user->update([
    'name' => 'Jon',
    'email' => 'jon@example.com',
    'bio' => '<div><b>Hello, World</b></div>',
]);
However, unlike regular model attributes, rich text attributes won't be stored in the users table; notice we didn't add a bio column to the users table migration. Instead, all Rich Text attributes are stored in a separate table called rich_texts using a polymorphic relationship to determine the model that owns the attribute and the name of the attribute (you may have more than one rich text attribute per model).
In most cases, we will treat our Rich Text attribute as a regular attribute. But when we need to, we can break this illusion. For example, we can call methods on the attribute; you may have noticed we use $user->bio?->toTrixHtml() to convert the content to Trix-friendly HTML before passing it into the <x-trix-input /> component.
If we need to convert our Rich Text attribute to plain text, we may use the toPlainText() method:
$user->bio->toPlainText()
This plain text conversion is not simply stripping out the HTML tags. It does more than that, like converting attachments to plain text. Attachments are a powerful feature of Trix; we'll talk more about them later.
Modifying the Trix toolbar
Before we're done with the bio attribute, let's disable some of Trix's features, since we don't need quite that many options for a bio attribute. We have two ways to do that:
- Create a new custom Blade component that has a minimal toolbar; or
- Modify the published Trix Blade component to make the toolbar configurable
Both options are valid. If the toolbars were too different, I'd probably create a new Blade component or a partial for this special Trix instance. For now, let's go with the second approach: we'll modify the published component to make it more configurable.
Let's add a toolbar prop, defaulting to null, and support mini as an option. When mini is passed, it will hide most toolbar buttons using CSS and use a bit of JavaScript to prevent Trix from accepting file attachments. We'll only support bold, italic, and links.
trix-paste event and clean up the undesirable HTML elements from there. You must also filter out the undesirable HTML elements when rendering the field. We'll talk more about that when discussing HTML Sanitization.Change the <x-trix-input /> component to this:
@props(['id', 'name', 'value' => ''])
@props(['id', 'name', 'value' => '', 'toolbar' => ''])
<!-- [tl! remove:-2,1 add:-1,1] -->
<input
    type="hidden"
    name="{{ $name }}"
    id="{{ $id }}_input"
    value="{{ $value }}"
/>
<!-- [tl! remove:2,1 add:3,4] -->
<trix-toolbar
    class="[&_.trix-button]:bg-white [&_.trix-button.trix-active]:bg-gray-300"
    @class([
        "[&_.trix-button]:bg-white [&_.trix-button.trix-active]:bg-gray-300",
        "[&_.trix-button-group:not(.trix-button-group--text-tools)]:hidden [&_.trix-button--icon-strike]:hidden" => $toolbar === 'mini',
    ])
    id="{{ $id }}_toolbar"
></trix-toolbar>
<!-- [tl! add:5,5] -->
<trix-editor
    id="{{ $id }}"
    toolbar="{{ $id }}_toolbar"
    input="{{ $id }}_input"
    @if ($toolbar === 'mini')
        x-data=""
        x-on:trix-file-accept.prevent
        x-on:trix-attachment-add="$event.attachment.file && $event.attachment.remove()"
    @endif
    {{ $attributes->merge(['class' => 'trix-content border-gray-300 focus:ring-1 focus:border-indigo-500 focus:ring-indigo-500 rounded-md shadow-sm']) }}
></trix-editor>
Now, we need to update the update-profile-information-form.blade.php Blade partial to set the toolbar=mini prop; I'll omit the rest of the template to keep it short:
<x-trix-input toolbar="mini" id="bio" ... />
Next, recompile the assets so the new Tailwind styles are picked up:
npm run build
With these changes, the bio input should look something like this:
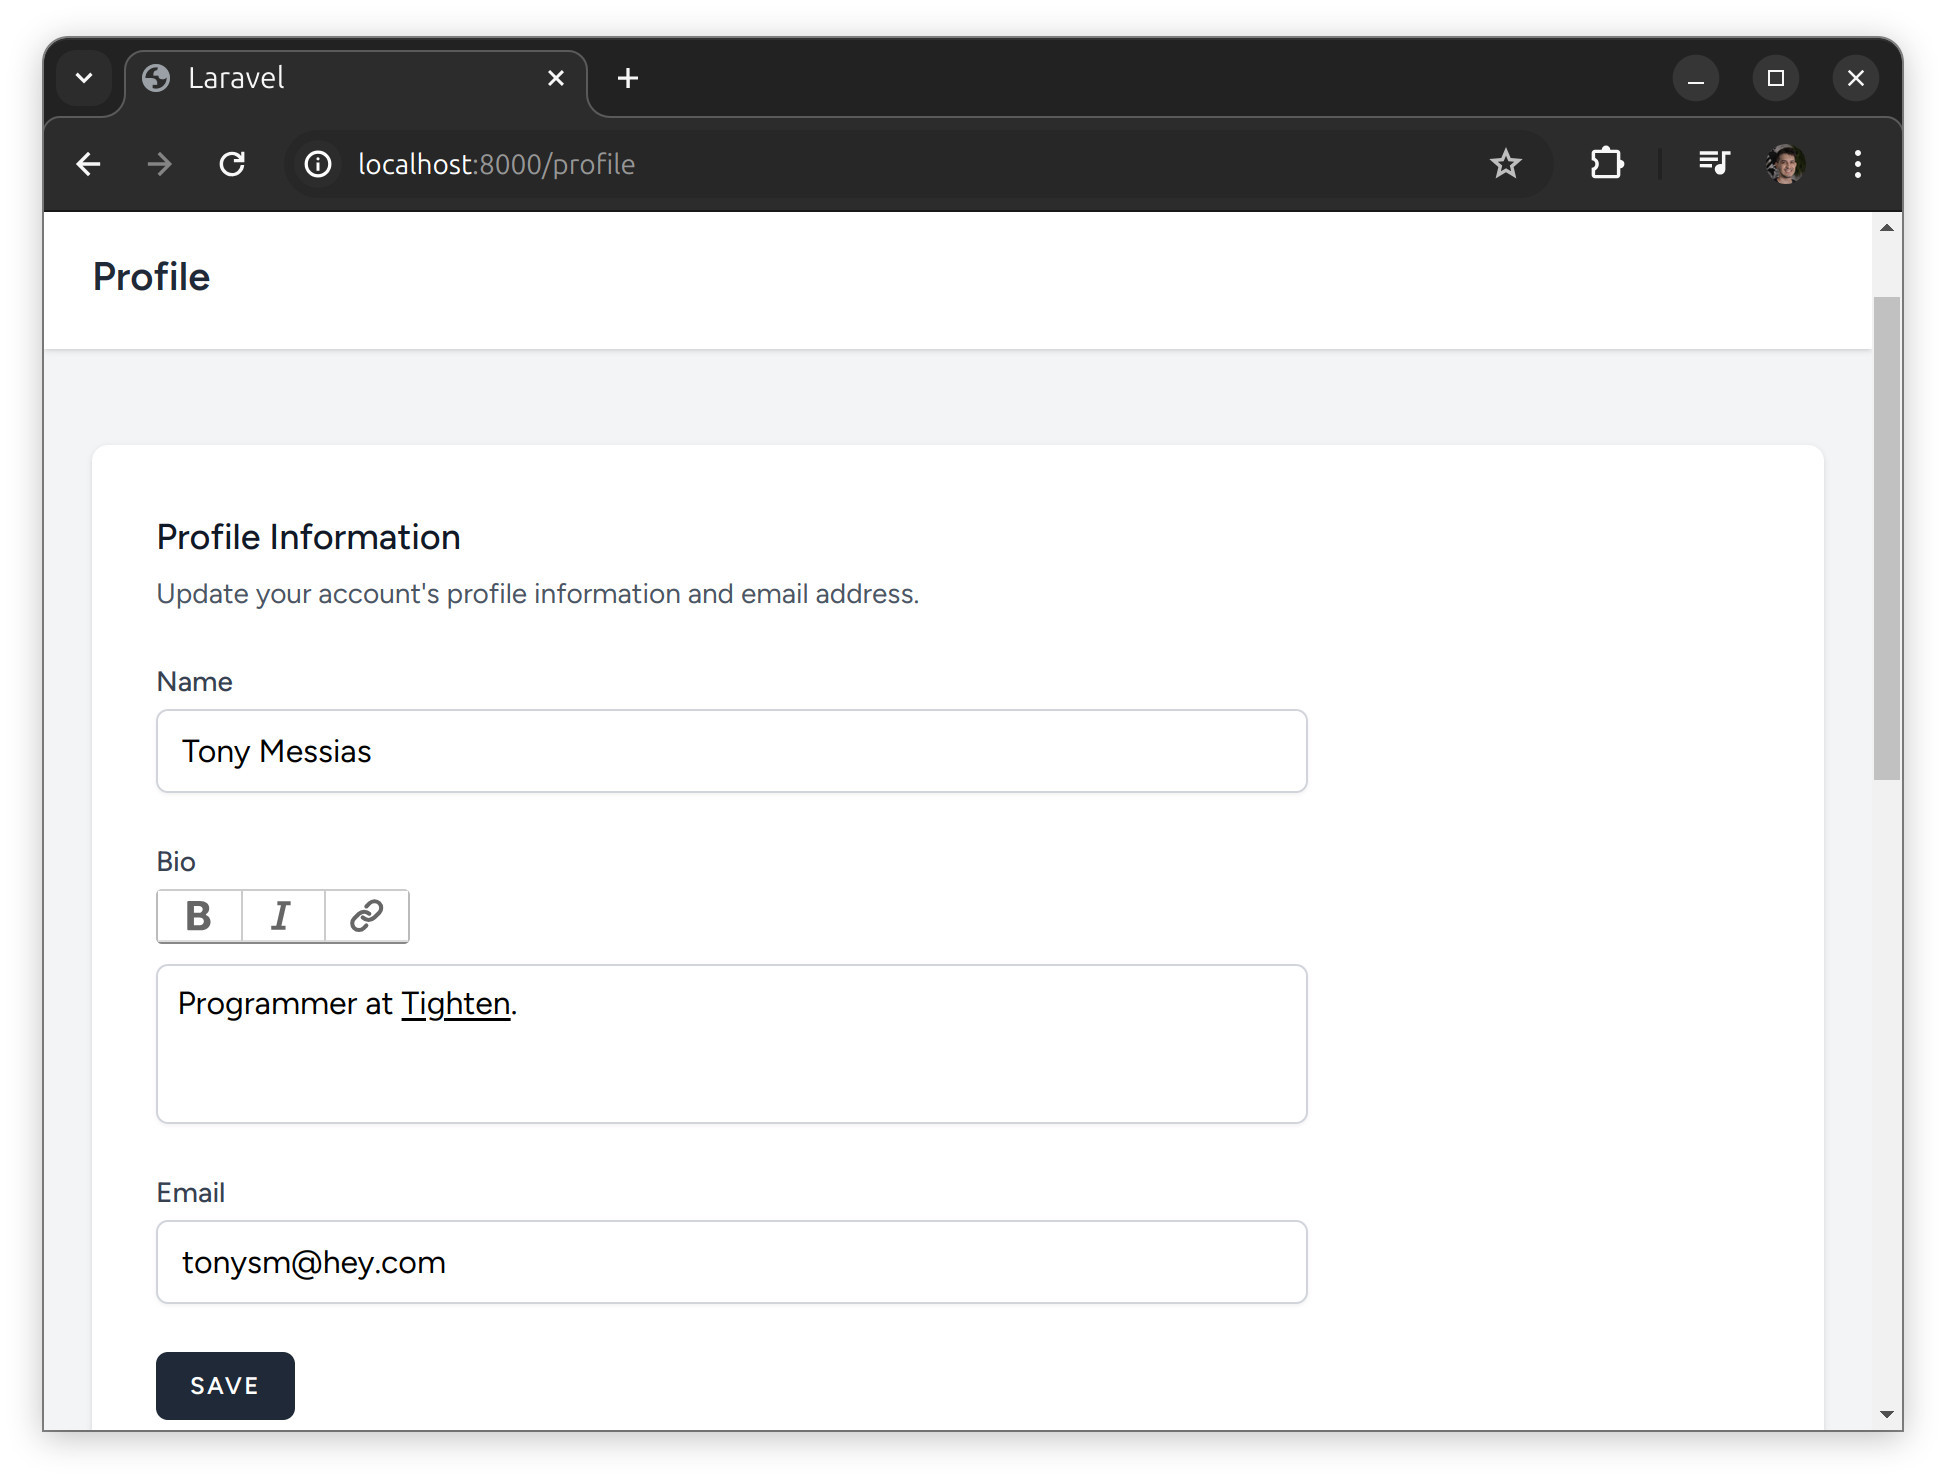
Great! We've accomplished our first task: adding a new field that uses Trix. We also understand a bit more about how the rich text attributes are being stored in a separate table.
Since we're getting more comfortable with Trix and the Rich Text Laravel package, let's update an existing element (the message on our Chirps forms) to also use Trix.
Using Trix in The Chirps Form
To start, let's add the HasRichText trait to the Chirp model; we'll add a new rich text attribute with a new name called content, since we still have to migrate the data in the previous message attribute:
<?php

namespace App\Models;

use Illuminate\Database\Eloquent\Factories\HasFactory;
use Illuminate\Database\Eloquent\Model;
use Illuminate\Database\Eloquent\Relations\BelongsTo;
use Tonysm\RichTextLaravel\Models\Traits\HasRichText; // [tl! add]

class Chirp extends Model
{
    use HasFactory;
    use HasRichText; // [tl! add]

    protected $fillable = [
        'message',
        'content', // [tl! remove:-1,1 add]
    ];

    protected $richTextAttributes = [ // [tl! add:0,3]
        'content',
    ];

    public function user(): BelongsTo
    {
        return $this->belongsTo(User::class);
    }
}
Implementing Trix for the content attribute of the Chirps model requires an extra step because, unlike the bio attribute of the User model, there might be records in the chirps table filled with with content already. In this scenario, we need to create a new migration to move over the existing data to the new structure:
php artisan make:migration migrate_chirps_messages_to_rich_text
Here's what that migration could look like:
<?php

use App\Models\Chirp;
use Illuminate\Database\Migrations\Migration;
use Illuminate\Support\Facades\Schema;

return new class extends Migration
{
    public function up(): void
    {
        Chirp::withoutTouching(function () {
            Chirp::withoutTimestamps(function () {
                Chirp::query()->withoutGlobalScopes()->eachById(function (Chirp $chirp) {
                    $chirp->update([
                        'content' => $chirp->message,
                    ]);
                });
            });
        });


        Schema::dropColumns('chirps', 'message');
    }
};
I'm not a big fan of using models in migrations because models often change as time passes, while migrations are supposed to be "frozen in time," but I'll make an exception here since we're relying on the attribute-to-relationship forwarding capabilities that the package provides.
The next step is to run this migration:
php artisan migrate
Now, let's update the ChirpController, because it's currently referencing a message attribute that we removed:
<?php

namespace App\Http\Controllers;
// [tl! collapse:start]
use App\Models\Chirp;
use Illuminate\Http\Request;
use Illuminate\Support\Facades\Gate;
// [tl! collapse:end]
class ChirpController extends Controller
{
    // [tl! collapse:start]
    /**
     * Display a listing of the resource.
     */
    public function index()
    {
        return view('chirps.index', [
            'chirps' => Chirp::with('user')->latest()->get(),
        ]);
    }

    /**
     * Show the form for creating a new resource.
     */
    public function create()
    {
        //
    }
    // [tl! collapse:end]
    /**
     * Store a newly created resource in storage.
     */
    public function store(Request $request)
    {
        $request->user()->chirps()->create($request->validate([
            'message' => ['required', 'string', 'max:255'],
            'content' => ['required', 'string'], // [tl! add remove:-1,1]
        ]));

        return to_route('chirps.index');
    }
    // [tl! collapse:start]
    /**
     * Display the specified resource.
     */
    public function show(Chirp $chirp)
    {
        //
    }

    /**
     * Show the form for editing the specified resource.
     */
    public function edit(Chirp $chirp)
    {
        Gate::authorize('update', $chirp);

        return view('chirps.edit', [
            'chirp' => $chirp,
        ]);
    }
    // [tl! collapse:end]
    /**
     * Update the specified resource in storage.
     */
    public function update(Request $request, Chirp $chirp)
    {
        Gate::authorize('update', $chirp);

        $chirp->update($request->validate([
            'message' => ['required', 'string', 'max:255'],
            'content' => ['required', 'string'], // [tl! add remove:-1,1]
        ]));

        return to_route('chirps.index');
    }
    // [tl! collapse:start]
    /**
     * Remove the specified resource from storage.
     */
    public function destroy(Chirp $chirp)
    {
        Gate::authorize('delete', $chirp);

        $chirp->delete();

        return to_route('chirps.index');
    }
    // [tl! collapse:end]
}
Next, we'll update the chirps/index.blade.php view to make two changes:
- Replace the
<textarea>with the<x-trix-input />Blade component - Replace the
$chirp->messagewith$chirp->contentwhen displaying chirps
Here's the diff:
<x-app-layout>
<div class="max-w-2xl mx-auto p-4 sm:p-6 lg:p-8">
<form method="POST" action="{{ route('chirps.store') }}">
@csrf
<textarea
name="message"
placeholder="{{ __('What\'s on your mind?') }}"
class="block w-full border-gray-300 focus:border-indigo-300 focus:ring focus:ring-indigo-200 focus:ring-opacity-50 rounded-md shadow-sm"
>{{ old('message') }}</textarea>
<x-input-error :messages="$errors->get('message')" class="mt-2" /> <!-- [tl! remove:-5,6] -->
<x-trix-input
id="content"
name="content"
placeholder="{{ __('What\'s on your mind?') }}"
class="block w-full bg-white border-gray-300 focus:border-indigo-300 focus:ring focus:ring-indigo-200 focus:ring-opacity-50 rounded-md shadow-sm"
:value="old('content')"
/>
<x-input-error :messages="$errors->get('content')" class="mt-2" /> <!-- [tl! add:-7,8] -->
<x-primary-button class="mt-4">{{ __('Chirp') }}</x-primary-button>
</form>
<div class="mt-6 bg-white shadow-sm rounded-lg divide-y">
@foreach ($chirps as $chirp)
<div class="p-6 flex space-x-2">
<svg xmlns="http://www.w3.org/2000/svg" class="h-6 w-6 text-gray-600 -scale-x-100" fill="none" viewBox="0 0 24 24" stroke="currentColor" stroke-width="2"> <!-- [tl! collapse:start] -->
<path stroke-linecap="round" stroke-linejoin="round" d="M8 12h.01M12 12h.01M16 12h.01M21 12c0 4.418-4.03 8-9 8a9.863 9.863 0 01-4.255-.949L3 20l1.395-3.72C3.512 15.042 3 13.574 3 12c0-4.418 4.03-8 9-8s9 3.582 9 8z" />
</svg> <!-- [tl! collapse:end] -->
<div class="flex-1">
<div class="flex justify-between items-center"> <!-- [tl! collapse:start] -->
<div>
<span class="text-gray-800">{{ $chirp->user->name }}</span>
<small class="ml-2 text-sm text-gray-600">{{ $chirp->created_at->format('j M Y, g:i a') }}</small>
@unless ($chirp->created_at->eq($chirp->updated_at))
<small class="text-sm text-gray-600"> · {{ __('edited') }}</small>
@endunless
</div>
@if ($chirp->user->is(auth()->user()))
<x-dropdown>
<x-slot name="trigger">
<button>
<svg xmlns="http://www.w3.org/2000/svg" class="h-4 w-4 text-gray-400" viewBox="0 0 20 20" fill="currentColor">
<path d="M6 10a2 2 0 11-4 0 2 2 0 014 0zM12 10a2 2 0 11-4 0 2 2 0 014 0zM16 12a2 2 0 100-4 2 2 0 000 4z" />
</svg>
</button>
</x-slot>
<x-slot name="content">
<x-dropdown-link :href="route('chirps.edit', $chirp)">
{{ __('Edit') }}
</x-dropdown-link>
<form method="POST" action="{{ route('chirps.destroy', $chirp) }}">
@csrf
@method('delete')
<x-dropdown-link :href="route('chirps.destroy', $chirp)" onclick="event.preventDefault(); this.closest('form').submit();">
{{ __('Delete') }}
</x-dropdown-link>
</form>
</x-slot>
</x-dropdown>
@endif
</div> <!-- [tl! collapse:end] -->
<p class="mt-4 text-lg text-gray-900 dark:text-gray-200">{{ $chirp->message }}</p>
<div class="mt-4 text-lg text-gray-900 dark:text-gray-200">{!! $chirp->content !!}</div> <!-- [tl! remove:-1,1 add] -->
</div>
</div>
@endforeach
</div>
</div>
</x-app-layout>
Notice that we switched from {{ }} to {!! !!} when displaying the Chirp content. This is unsafe, because it enables Cross-site Scripting (XSS) attacks. But don't worry, we'll fix that in the next section.
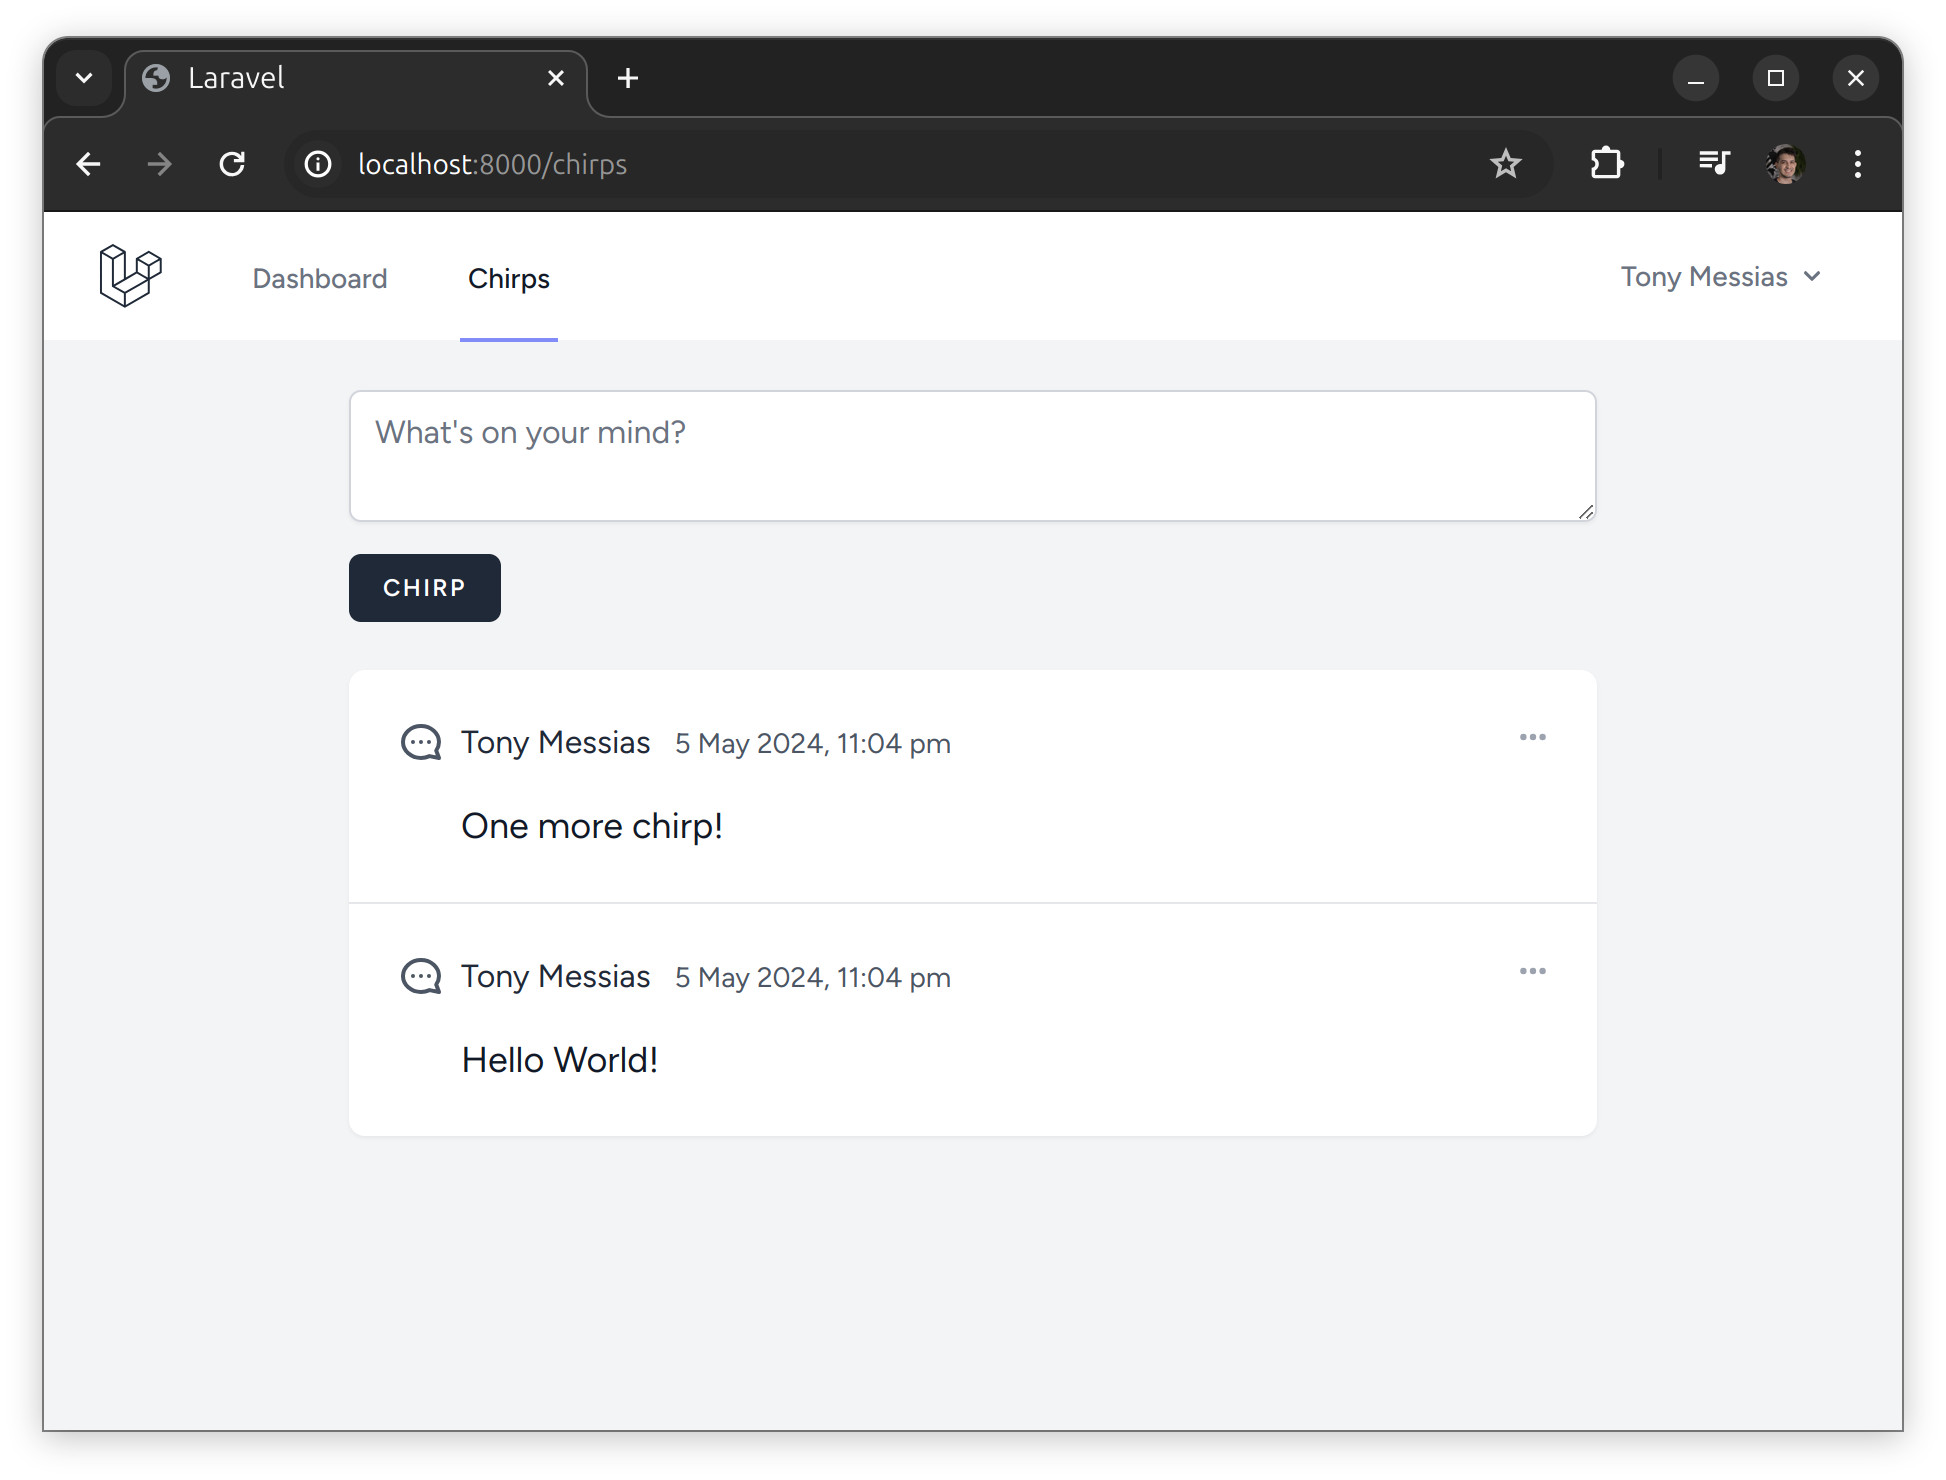
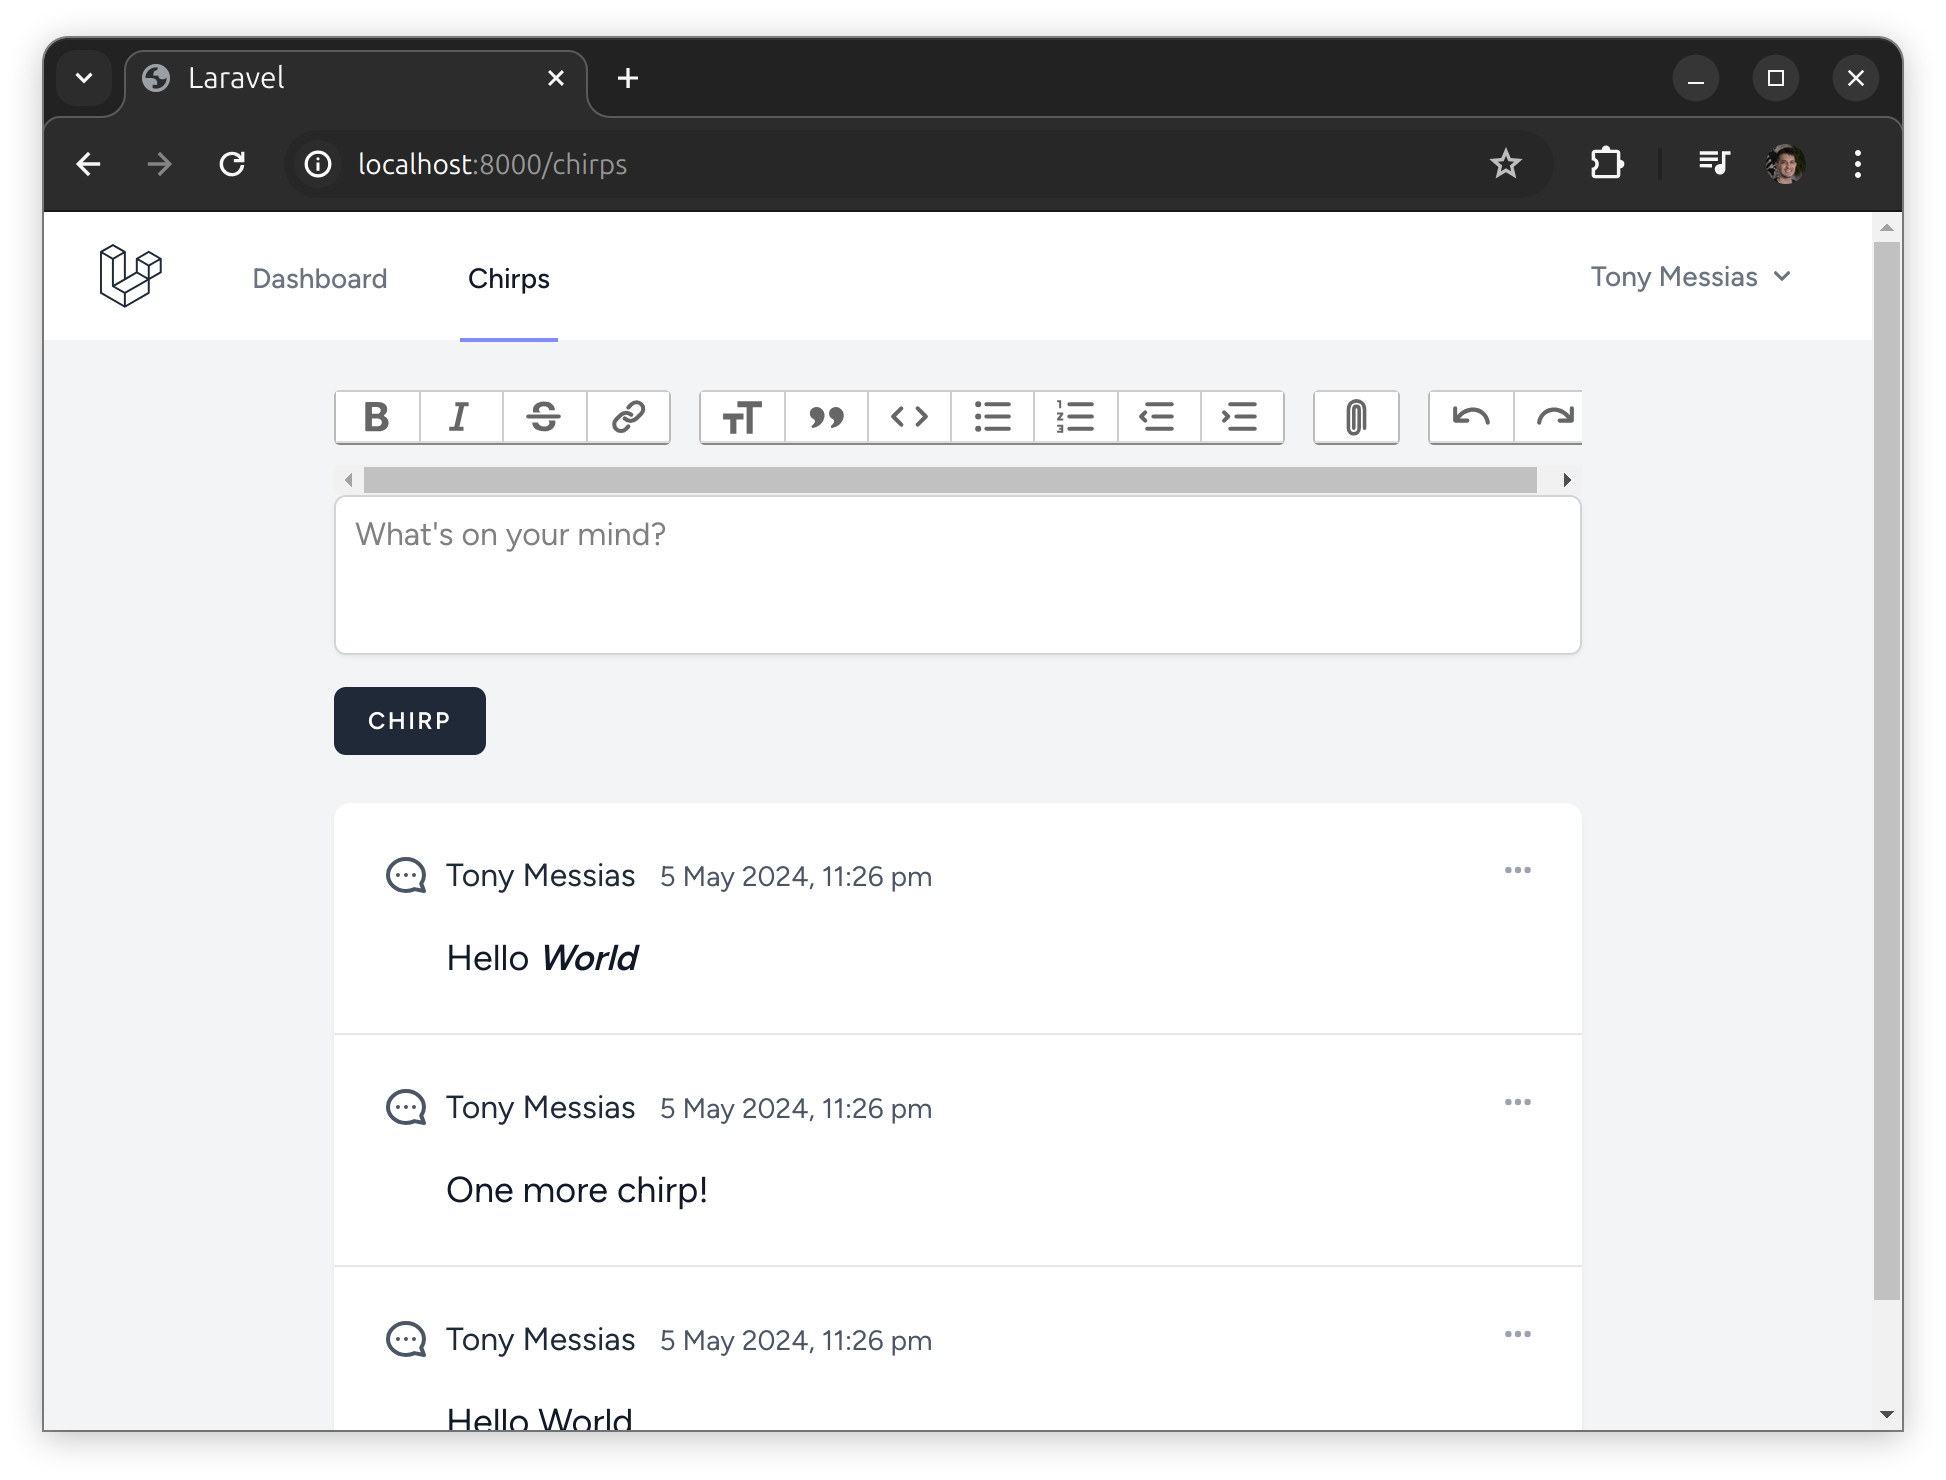
For now, let's try our changes:
HTML Sanitization
To address the XSS issue we introduced, let's add Symfony's HTML Sanitizer component:
composer require symfony/html-sanitizer
We're going to build a custom class to wrap this sanitizer, and then a helper function, h(), to make it easier to use in templates.
Let's actually start with the new h(string $html): HtmlString helper function - h stands for HTML (it's inspired by Laravel's e() function for escaping). As the variable name suggests, we will have it receive an HTML string and return an instance of Laravel's HtmlString class, which tells Blade it's okay to render it without escaping.
Create the file at app/helpers.php with the h() function definition:
<{{'?php'}}

use App\View\Html\Sanitizer;
use Illuminate\Support\HtmlString;

if (! function_exists('h')) {
    function h(string $html, string $element = 'body'): HtmlString {
        $sanitizer = resolve(Sanitizer::class);

        return new HtmlString($sanitizer->sanitizeFor($element, $html));
    }
}
Next, update the composer.json file to include the app/helpers.php file in the autoload config:
{
    "name": "laravel/laravel", // [tl! collapse:start]
    "type": "project",
    "description": "The skeleton application for the Laravel framework.",
    "keywords": ["laravel", "framework"],
    "license": "MIT",
    "require": {
        "php": "^8.2",
        "laravel/framework": "^11.0",
        "laravel/tinker": "^2.9",
        "tonysm/rich-text-laravel": "^3.1"
    },
    "require-dev": {
        "fakerphp/faker": "^1.23",
        "laravel/breeze": "^2.0",
        "laravel/pint": "^1.13",
        "laravel/sail": "^1.26",
        "mockery/mockery": "^1.6",
        "nunomaduro/collision": "^8.0",
        "phpunit/phpunit": "^11.0.1",
        "spatie/laravel-ignition": "^2.4"
    }, // [tl! collapse:end]
    "autoload": {
        "psr-4": {
            "App\\": "app/",
            "Database\\Factories\\": "database/factories/",
            "Database\\Seeders\\": "database/seeders/"
        }
        },
        "files": ["app/helpers.php"] // [tl! add:-1,2 remove:-2,1]
    },
    "autoload-dev": { // [tl! collapse:start]
        "psr-4": {
            "Tests\\": "tests/"
        }
    },
    "scripts": {
        "post-autoload-dump": [
            "Illuminate\\Foundation\\ComposerScripts::postAutoloadDump",
            "@php artisan package:discover --ansi"
        ],
        "post-update-cmd": [
            "@php artisan vendor:publish --tag=laravel-assets --ansi --force"
        ],
        "post-root-package-install": [
            "@php -r \"file_exists('.env') || copy('.env.example', '.env');\""
        ],
        "post-create-project-cmd": [
            "@php artisan key:generate --ansi",
            "@php -r \"file_exists('database/database.sqlite') || touch('database/database.sqlite');\"",
            "@php artisan migrate --graceful --ansi"
        ]
    },
    "extra": {
        "laravel": {
            "dont-discover": []
        }
    },
    "config": {
        "optimize-autoloader": true,
        "preferred-install": "dist",
        "sort-packages": true,
        "allow-plugins": {
            "pestphp/pest-plugin": true,
            "php-http/discovery": true
        }
    },
    "minimum-stability": "stable",
    "prefer-stable": true // [tl! collapse:end]
}
Then, recreate the autoload:
composer dump
The h() function we just created uses a new class we'll build that's a thin abstraction on top of Symfony's HTML Sanitizer. Let's create that class at app/View/Html/Sanitizer.php:
<?php

namespace App\View\Html;

use Symfony\Component\HtmlSanitizer\HtmlSanitizer;

class Sanitizer
{
    public function __construct(private HtmlSanitizer $sanitizer) {}

    public function sanitizeFor(string $element, string $input): string
    {
        return $this->sanitizer->sanitizeFor($element, $input);
    }
}
We need to register it in our app/Providers/AppServiceProvider.php:
<?php

namespace App\Providers;

use App\View\Html\Sanitizer; // [tl! add]
use Illuminate\Support\ServiceProvider;
use Symfony\Component\HtmlSanitizer\HtmlSanitizer; // [tl! add:0,2]
use Symfony\Component\HtmlSanitizer\HtmlSanitizerConfig;

class AppServiceProvider extends ServiceProvider
{
    /**
     * Register any application services.
     */
    public function register(): void
    {
        //
        $this->app->scoped(Sanitizer::class, function () {
            return new Sanitizer(new HtmlSanitizer(
                (new HtmlSanitizerConfig)
                    ->allowSafeElements()
                    ->allowAttribute('class', '*')
            ));
        }); // [tl! remove:-7,1 add:-6,7]
    }
    // [tl! collapse:start]
    /**
     * Bootstrap any application services.
     */
    public function boot(): void
    {
        //
    }
    // [tl! collapse:end]
}
Let's update the display of chirps in the resources/views/chirps/index.blade.php file to use the newly created h() function:
<div class="mt-4 text-lg text-gray-900 dark:text-gray-200">@{!! $chirp->content !!}</div>
<div class="mt-4 text-lg text-gray-900 dark:text-gray-200">{{ h($chirp->content) }}</div> <!-- [tl! remove:-1,1 add] -->
Now, if you try it, you should see the same thing. To test it out, let's try to inject some malicious HTML via Tinker:
php artisan tinker
Next, execute the following code (in Tinker or any other interactive shell):
App\Models\Chirp::latest()->first()->update(['content' => '<div>Testing <strong>Scripts</strong><script>alert("pwned")</script></div>']);
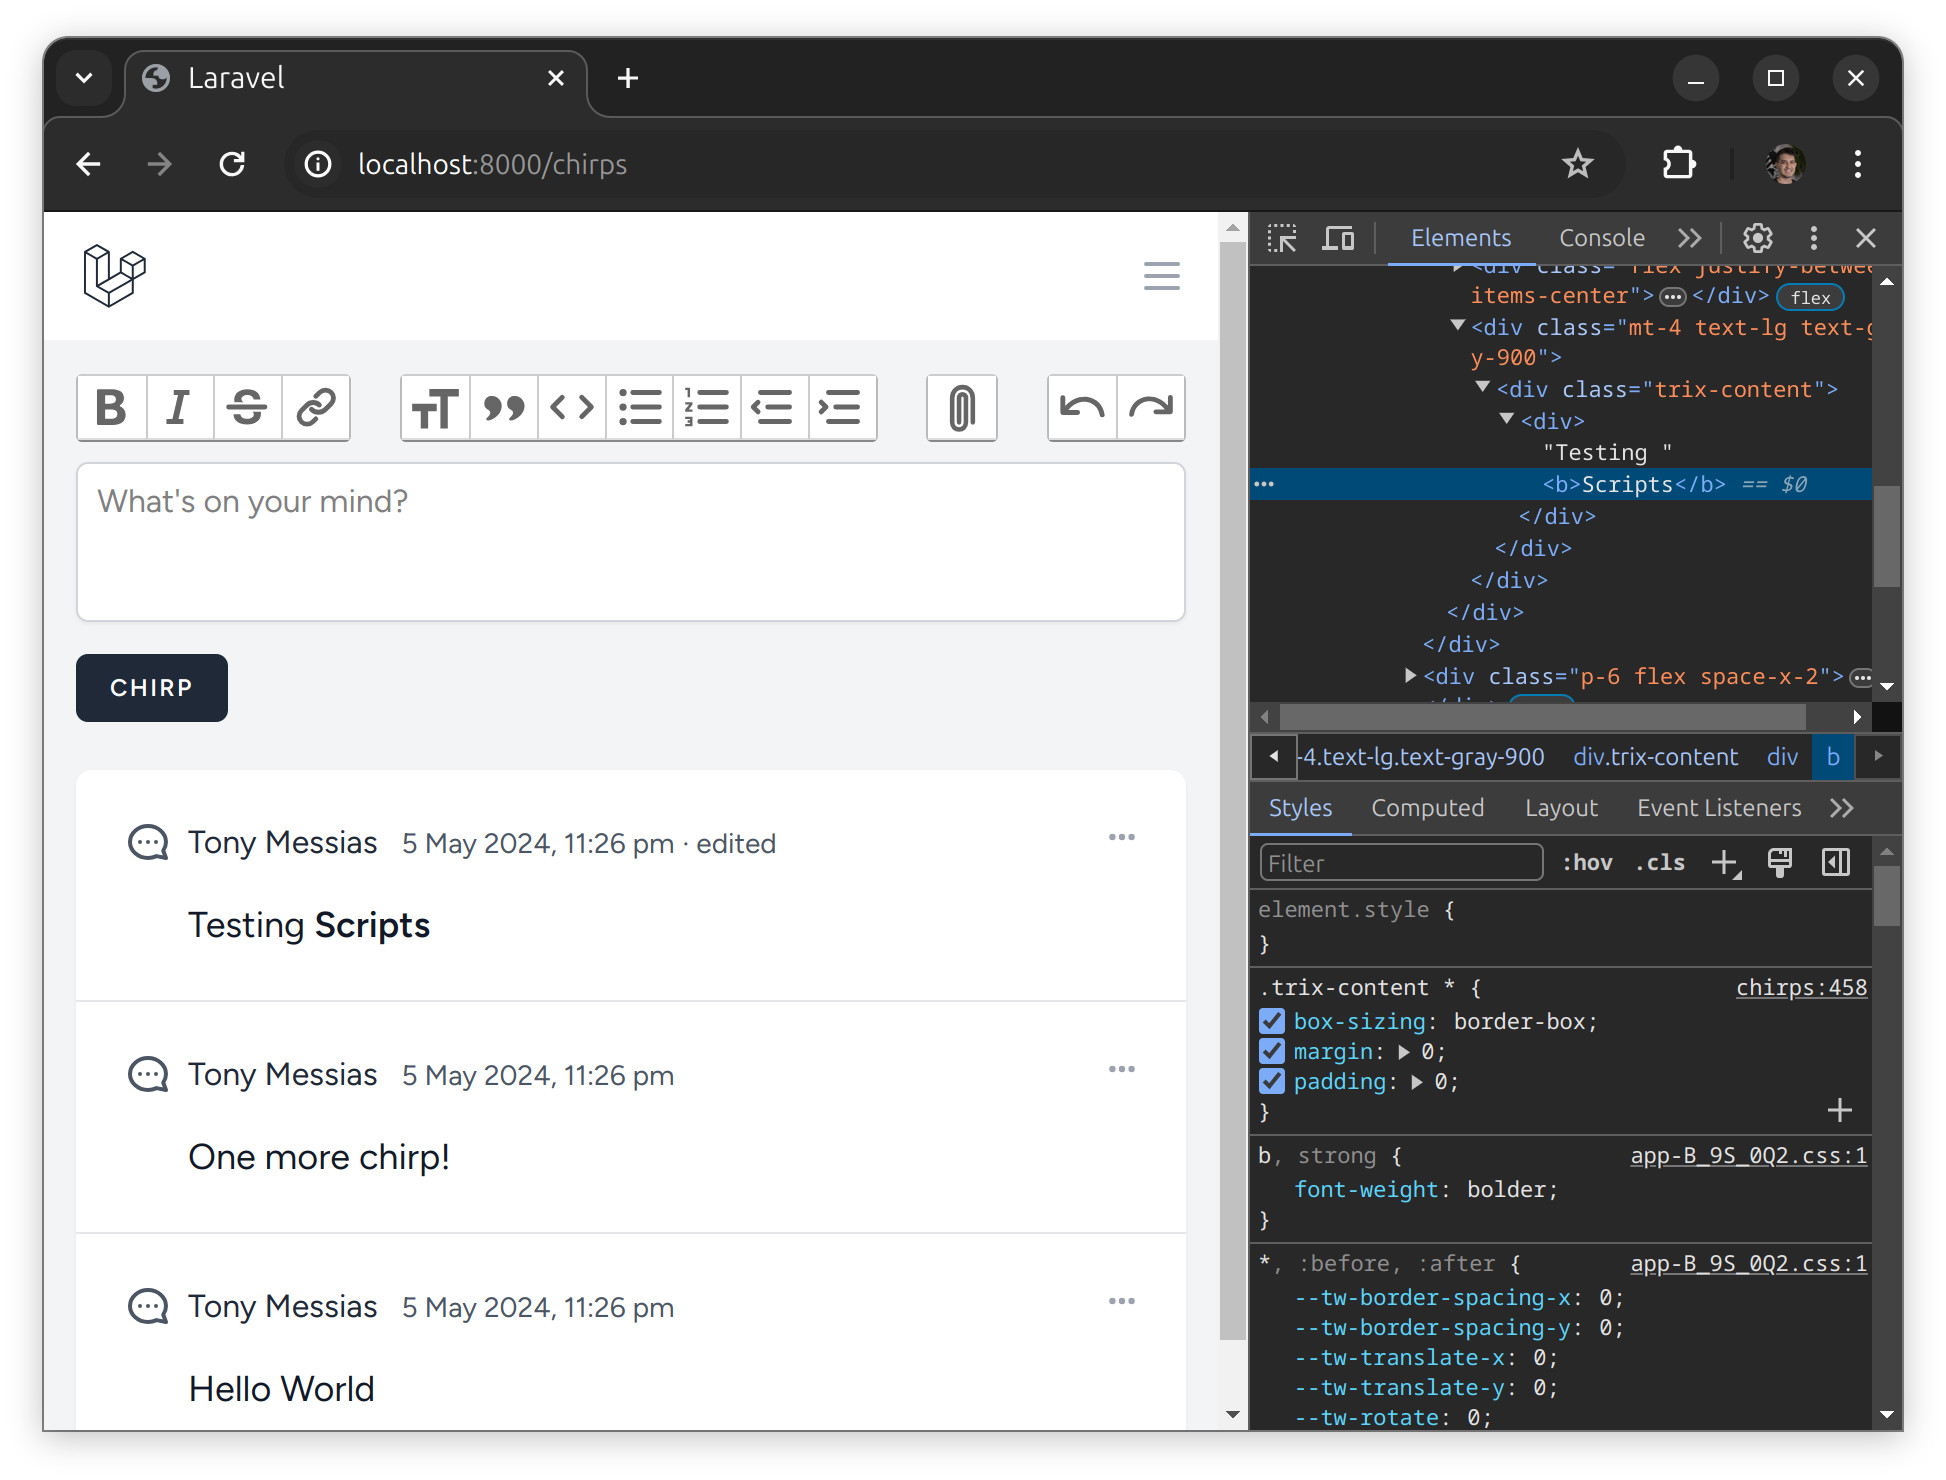
If you refresh the page, you should see that no alerts have been executed! If you inspect the DOM, you will see the script tag is not being rendered, even though it's stored in the database.
We updated the form for creating Chirps, but the form for editing still renders as a <textarea> input. While we could extract the form to a Blade partial and reuse it in both places, for now, let's update the chirps/edit.blade.php view instead:
<x-app-layout>
    <div class="max-w-2xl mx-auto p-4 sm:p-6 lg:p-8">
        <form method="POST" action="{{ route('chirps.update', $chirp) }}">
            @csrf
            @method('patch')
            <textarea
                name="message"
                class="block w-full border-gray-300 focus:border-indigo-300 focus:ring focus:ring-indigo-200 focus:ring-opacity-50 rounded-md shadow-sm"
            >{{ old('message', $chirp->message) }}</textarea>
            <x-input-error :messages="$errors->get('message')" class="mt-2" /> <!-- [tl! remove:-4,5] -->
            <x-trix-input
                id="content"
                name="content"
                class="block w-full bg-white dark:bg-gray-900 border-gray-300 dark:border-gray-700 focus:border-indigo-300 focus:ring focus:ring-indigo-200 focus:ring-opacity-50 rounded-md shadow-sm"
                :value="old('content', $chirp->content?->toTrixHtml())"
            />
            <x-input-error :messages="$errors->get('content')" class="mt-2" /> <!-- [tl! add:-6,7] -->
            <div class="mt-4 space-x-2">
                <x-primary-button>{{ __('Save') }}</x-primary-button>
                <a href="{{ route('chirps.index') }}">{{ __('Cancel') }}</a>
            </div>
        </form>
    </div>
</x-app-layout>
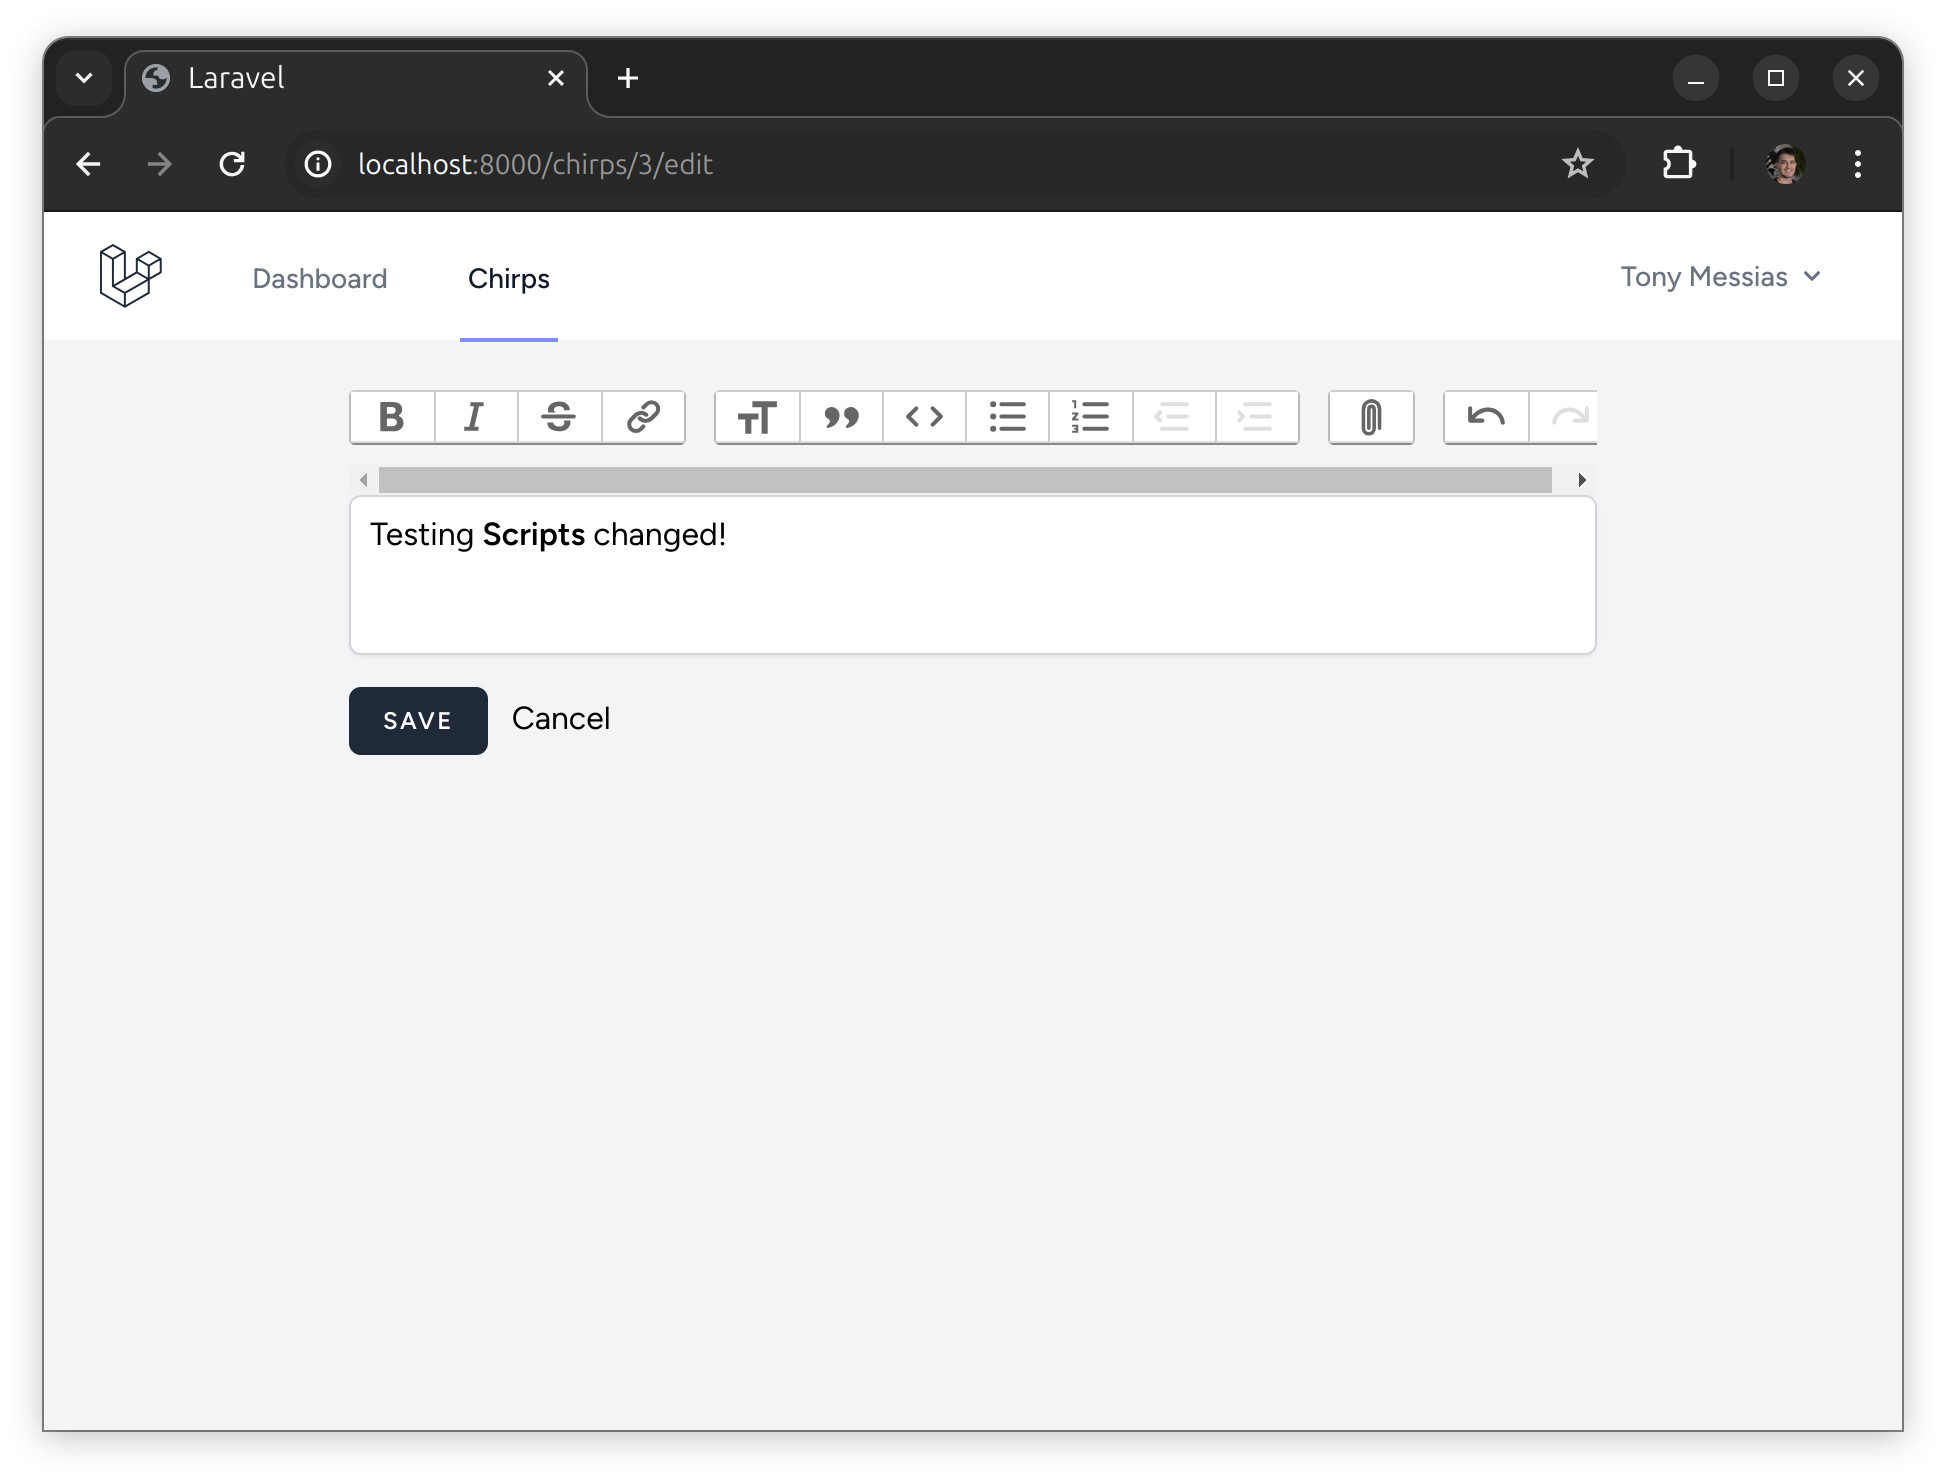
Now we can also edit Chirps using Trix:
Uploading Attachments
We've made great progress! And we can go one step further with the power of Trix Attachments.
Let's start by implementing a new route to upload attachments. This endpoint will receive each upload and return the full public URL for the image. Let's keep things simple for now by storing our images publicly. If you need to store them privately, you'll need to implement a custom Content Attachment (more about that later).
Since we'll use the full URLs, make sure you have the APP_URL environment variable set to the correct value. In my case, my app is running at http://localhost:8000, so that should be my value.
Additionally, files will be stored using the public disk that comes with Laravel. Those files are not publicly available to the browser by default, since they're stored in the storage/ folder, so we'll need to create the symlinks using the storage:link command:
php artisan storage:link
Great. Let's get started by generating a new controller for an attachments endpoint:
php artisan make:controller AttachmentsController
Now, let's define the route in routes/web.php:
<?php

use App\Http\Controllers\AttachmentsController; // [tl! add]
use App\Http\Controllers\ChirpController;
use App\Http\Controllers\ProfileController;
use Illuminate\Support\Facades\Route;
// [tl! collapse:start]
Route::get('/', function () {
    return view('welcome');
});

Route::get('/dashboard', function () {
    return view('dashboard');
})->middleware(['auth', 'verified'])->name('dashboard');

Route::middleware('auth')->group(function () {
    Route::get('/profile', [ProfileController::class, 'edit'])->name('profile.edit');
    Route::patch('/profile', [ProfileController::class, 'update'])->name('profile.update');
    Route::delete('/profile', [ProfileController::class, 'destroy'])->name('profile.destroy');
});

Route::resource('chirps', ChirpController::class)
    ->only(['index', 'store', 'edit', 'update', 'destroy'])
    ->middleware(['auth', 'verified']);
// [tl! collapse:end]
Route::post('attachments', AttachmentsController::class)
    ->name('attachments.store')
    ->middleware(['auth', 'verified']); // [tl! add:-2,3]

require __DIR__.'/auth.php';
Update the controller to add the __invoke method:
<?php

namespace App\Http\Controllers;

use Illuminate\Http\Request;
use Illuminate\Support\Facades\Storage;

class AttachmentsController extends Controller
{
    public function __invoke(Request $request)
    {
        $request->validate(['attachment' => ['required', 'file']]);

        $path = $request->file('attachment')->store('attachments', [
            'disk' => 'public',
        ]);

        return [
            'attachment_url' => Storage::disk('public')->url($path),
        ];
    }
}
Now, let's update our <x-trix-input /> Blade component, so we can also configure when the input should accept file uploads. Instead of coupling that to the mini toolbar, replace the previous component with this one:
@props(['id', 'name', 'value' => '', 'toolbar' => null, 'acceptFiles' => false])

<input
    type="hidden"
    name="{{ $name }}"
    id="{{ $id }}_input"
    value="{{ $value }}"
/>

<trix-toolbar
    @class([
        "[&_.trix-button]:bg-white [&_.trix-button.trix-active]:bg-gray-300",
        "[&>.trix-button-row>.trix-button-group:not(.trix-button-group--text-tools)]:hidden [&_.trix-button--icon-strike]:hidden" => $toolbar === 'mini',
    ])
    id="{{ $id }}_toolbar"
></trix-toolbar>

<trix-editor
    id="{{ $id }}"
    toolbar="{{ $id }}_toolbar"
    input="{{ $id }}_input"
    x-data="{
        uploadAttachment(event) {
            if (! event.attachment?.file) return

            const form = new FormData()
            form.append('attachment', event.attachment.file)

            fetch('/attachments', {
                method: 'POST',
                body: form,
                headers: {
                    'Accept': 'application/json',
                    'X-CSRF-TOKEN': document.head.querySelector('meta[name=csrf-token]').content,
                }
            }).then(resp => resp.json()).then((data) => {
                event.attachment.setAttributes({
                    url: data.attachment_url,
                    href: data.attachment_url,
                })
            }).catch(() => event.attachment.remove())
        }
    }"
    @if ($acceptFiles)
    x-on:trix-attachment-add="uploadAttachment"
    @else
    x-on:trix-file-accept.prevent
    x-on:trix-attachment-add="$event.attachment.file && $event.attachment.remove()"
    @endif
    {{ $attributes->merge(['class' => 'trix-content border-gray-300 dark:bg-gray-900 dark:border-gray-700 dark:!text-white focus:ring-1 focus:border-indigo-500 focus:ring-indigo-500 rounded-md shadow-sm']) }}
></trix-editor>
Next, update both the create and edit Chirps forms to pass the :accept-files="true" prop:
<x-trix-input
    id="content"
    name="content"
    placeholder="{{ __('What\'s on your mind?') }}"
    class="block w-full bg-white border-gray-300 focus:border-indigo-300 focus:ring focus:ring-indigo-200 focus:ring-opacity-50 rounded-md shadow-sm"
    :value="old('content')"
    toolbar="mini"
    :accept-files="true"
/><!-- [tl! remove:-2,1 add:-1,1] -->
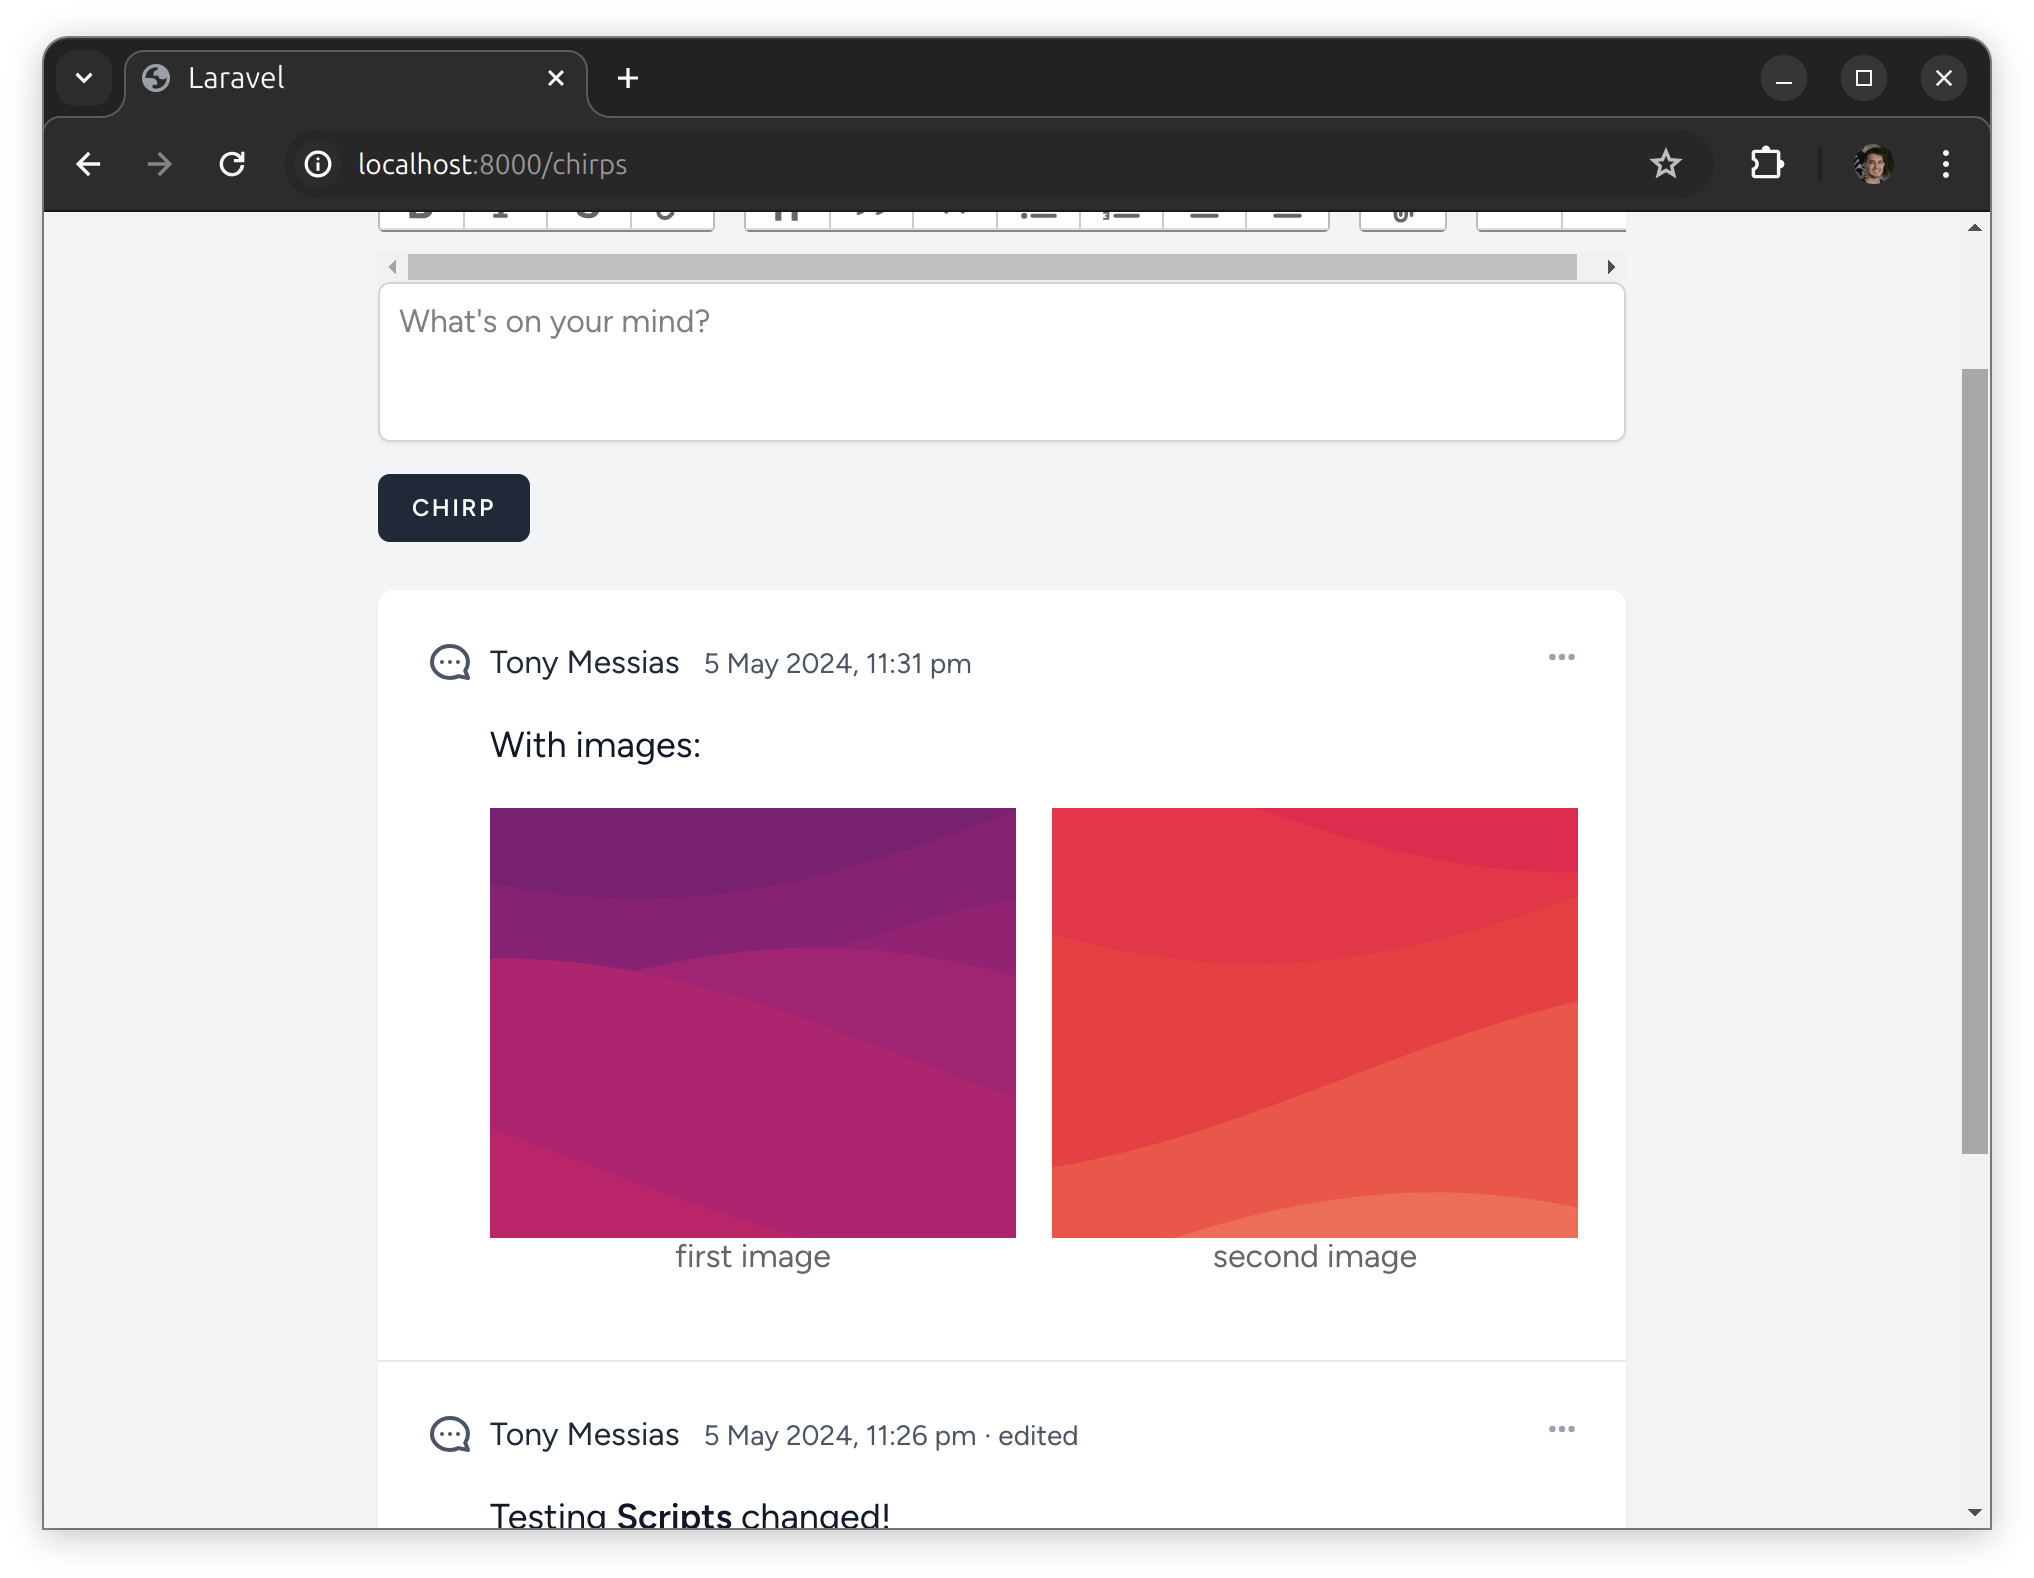
If you reload the page and try to upload files to Trix, it should work!
We can quickly extract the attachments out of any rich text attribute using the attachments() method. Let's try that on Tinker:
php artisan tinker
Then, run the following code:
App\Models\Chirp::latest()->first()->content->attachments()
In my case, I got back a collection with two items:
= Illuminate\Support\Collection {#6077
    all: [
      Tonysm\RichTextLaravel\Attachment {#6078
        +node: DOMElement {#6124
          ...
        },
        +attachable: Tonysm\RichTextLaravel\Attachables\RemoteImage {#6090
          +url: "http://localhost:8000/storage/attachments/MFrkiL2ZfX7NxfMWDHM1kSzz95SSkW1Yn8iPkIG8.png",
          +contentType: "image/png",
          +width: "789",
          +height: "644",
          +filename: "image-1.png",
          +filesize: "33042",
          +caption: "first image",
        },
      },
      Tonysm\RichTextLaravel\Attachment {#6115
        +node: DOMElement {#6126
          ...
        },
        +attachable: Tonysm\RichTextLaravel\Attachables\RemoteImage {#6116
          +url: "http://localhost:8000/storage/attachments/OlsayrFO62FP5gzIVFqjkwpMl5zStcgzbgnKAhJN.png",
          +contentType: "image/png",
          +width: "789",
          +height: "644",
          +filename: "image-2.png",
          +filesize: "34217",
          +caption: "second image",
        },
      },
    ],
  }
This works for any attachables. It just happens that we're only supporting RemoteImage attachments since that's the only kind of attachment we have so far. If you're only interested in the attachables (not in the attachments - which includes the DOMElement instances), you may use the attachables() method instead:
App\Models\Chirp::latest()->first()->content->attachables()
This would result in the following output:
= Illuminate\Support\Collection {#6235
    all: [
      Tonysm\RichTextLaravel\Attachables\RemoteImage {#6071
        +url: "http://localhost:8000/storage/attachments/MFrkiL2ZfX7NxfMWDHM1kSzz95SSkW1Yn8iPkIG8.png",
        +contentType: "image/png",
        +width: "789",
        +height: "644",
        +filename: "image-1.png",
        +filesize: "33042",
        +caption: "first image",
      },
      Tonysm\RichTextLaravel\Attachables\RemoteImage {#6068
        +url: "http://localhost:8000/storage/attachments/OlsayrFO62FP5gzIVFqjkwpMl5zStcgzbgnKAhJN.png",
        +contentType: "image/png",
        +width: "789",
        +height: "644",
        +filename: "image-2.png",
        +filesize: "34217",
        +caption: "second image",
      },
    ],
  }
Now you can extract the images for post-processing or whatever your use case requires.
Conclusion
I hope this article sparked your interest in Trix. It's a simple yet powerful editor that may not get as much credit as it deserves.
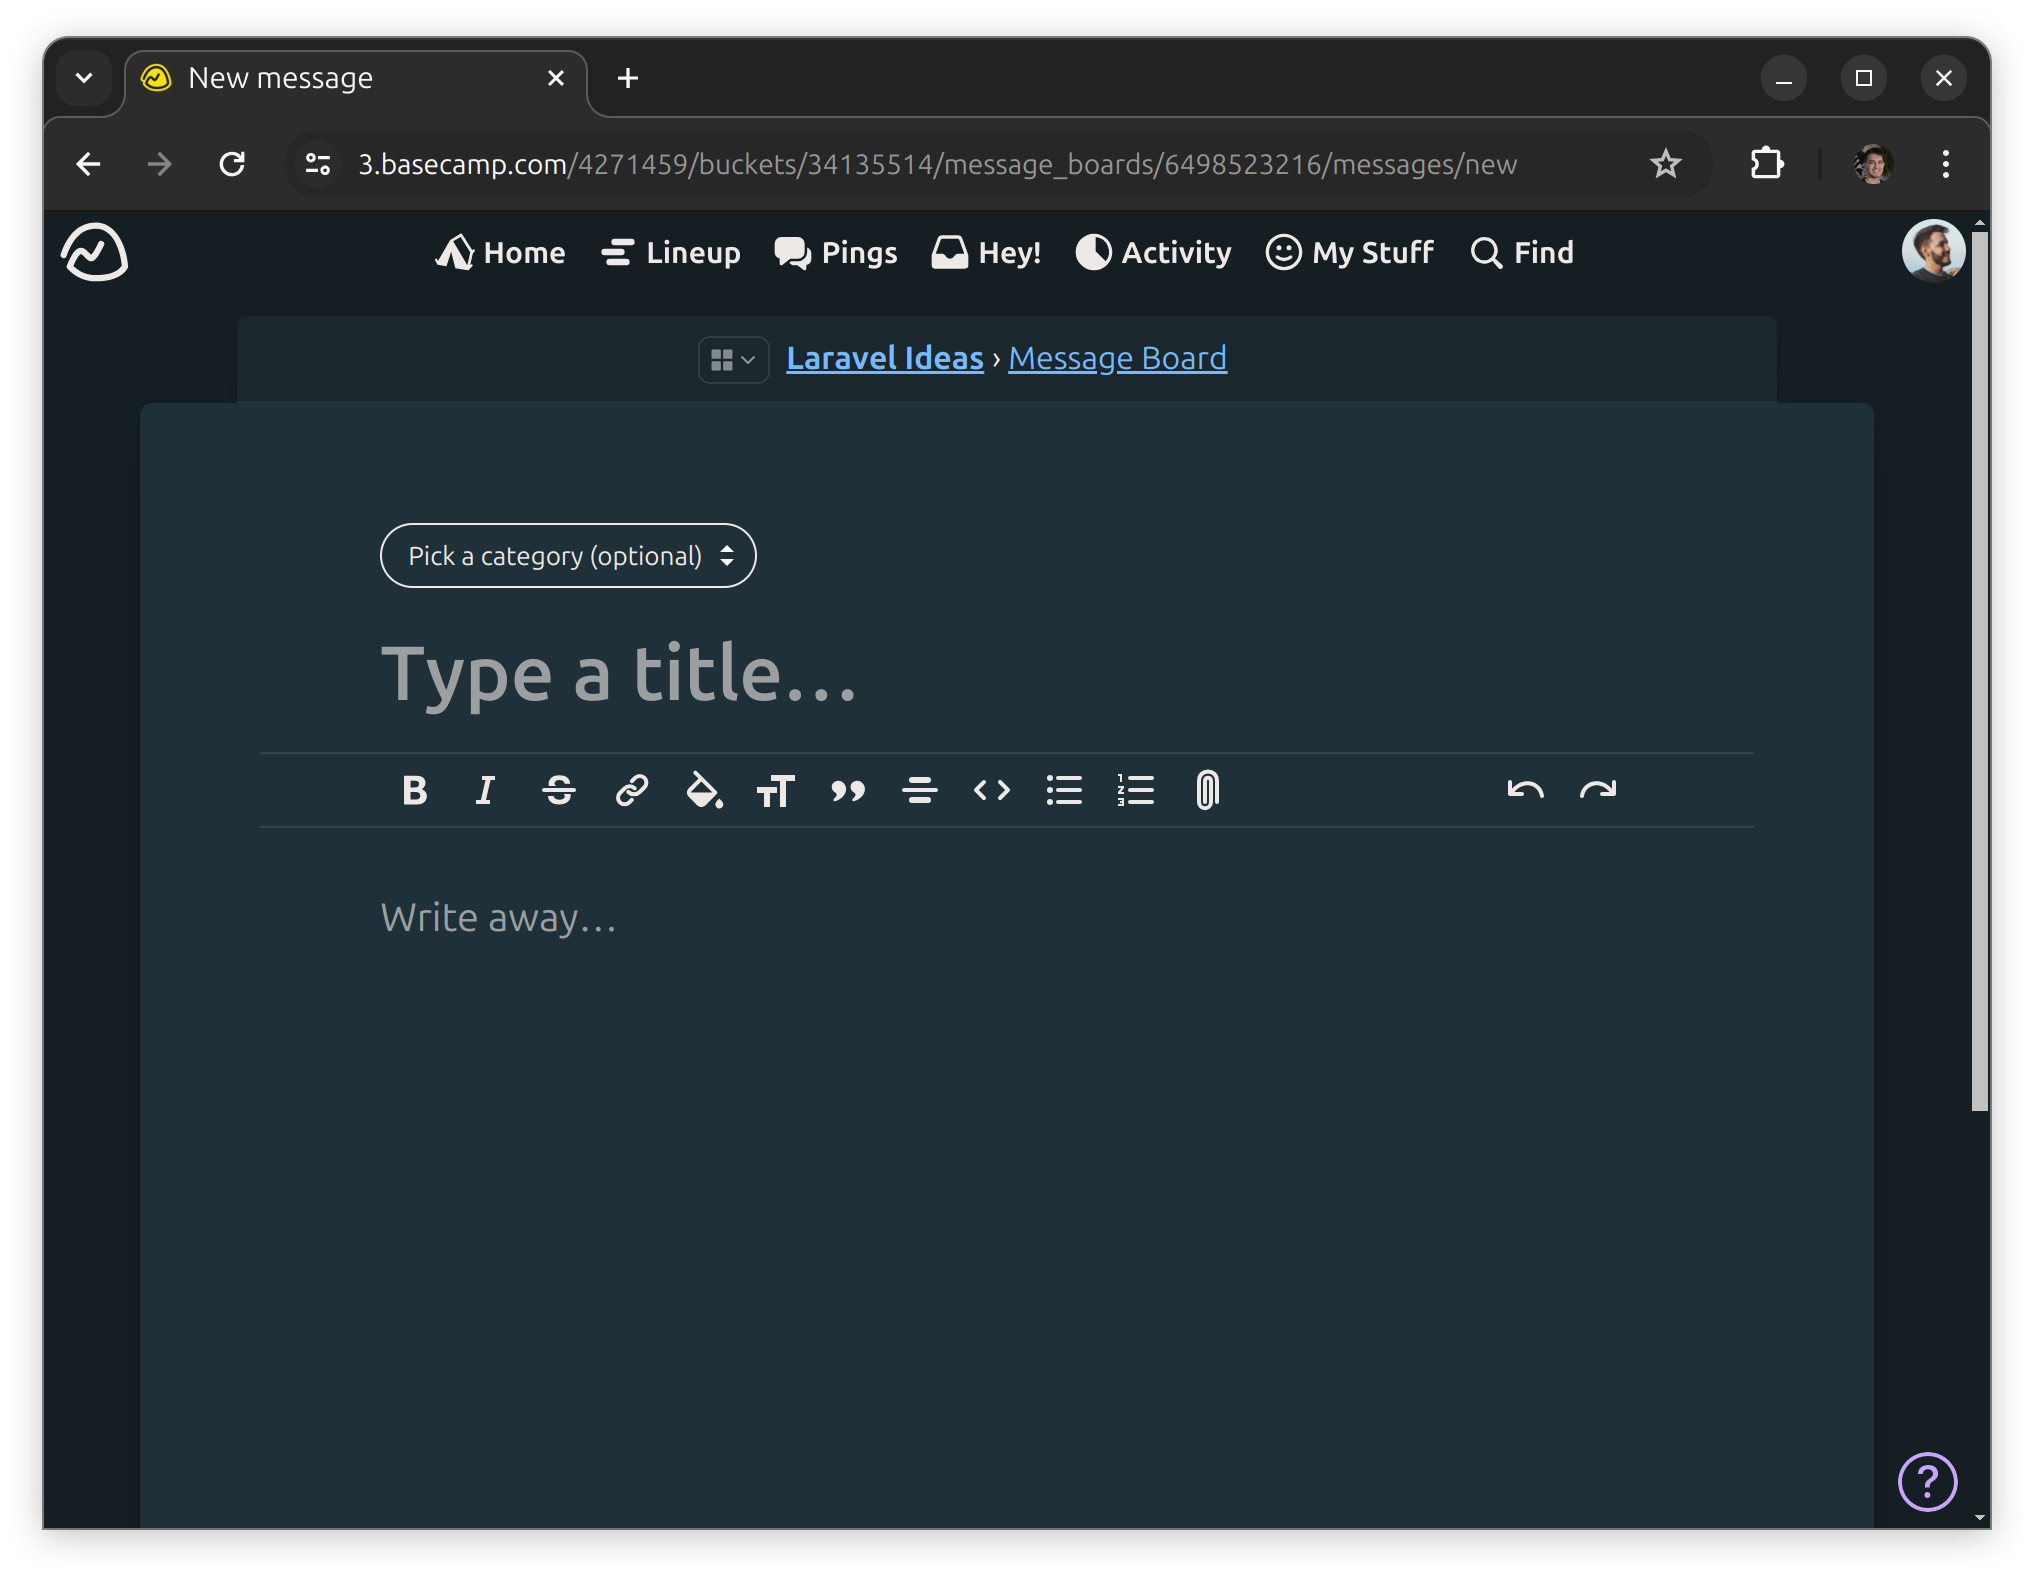
The 37signals folks use it everywhere on their apps. Sometimes, with the full toolbar:
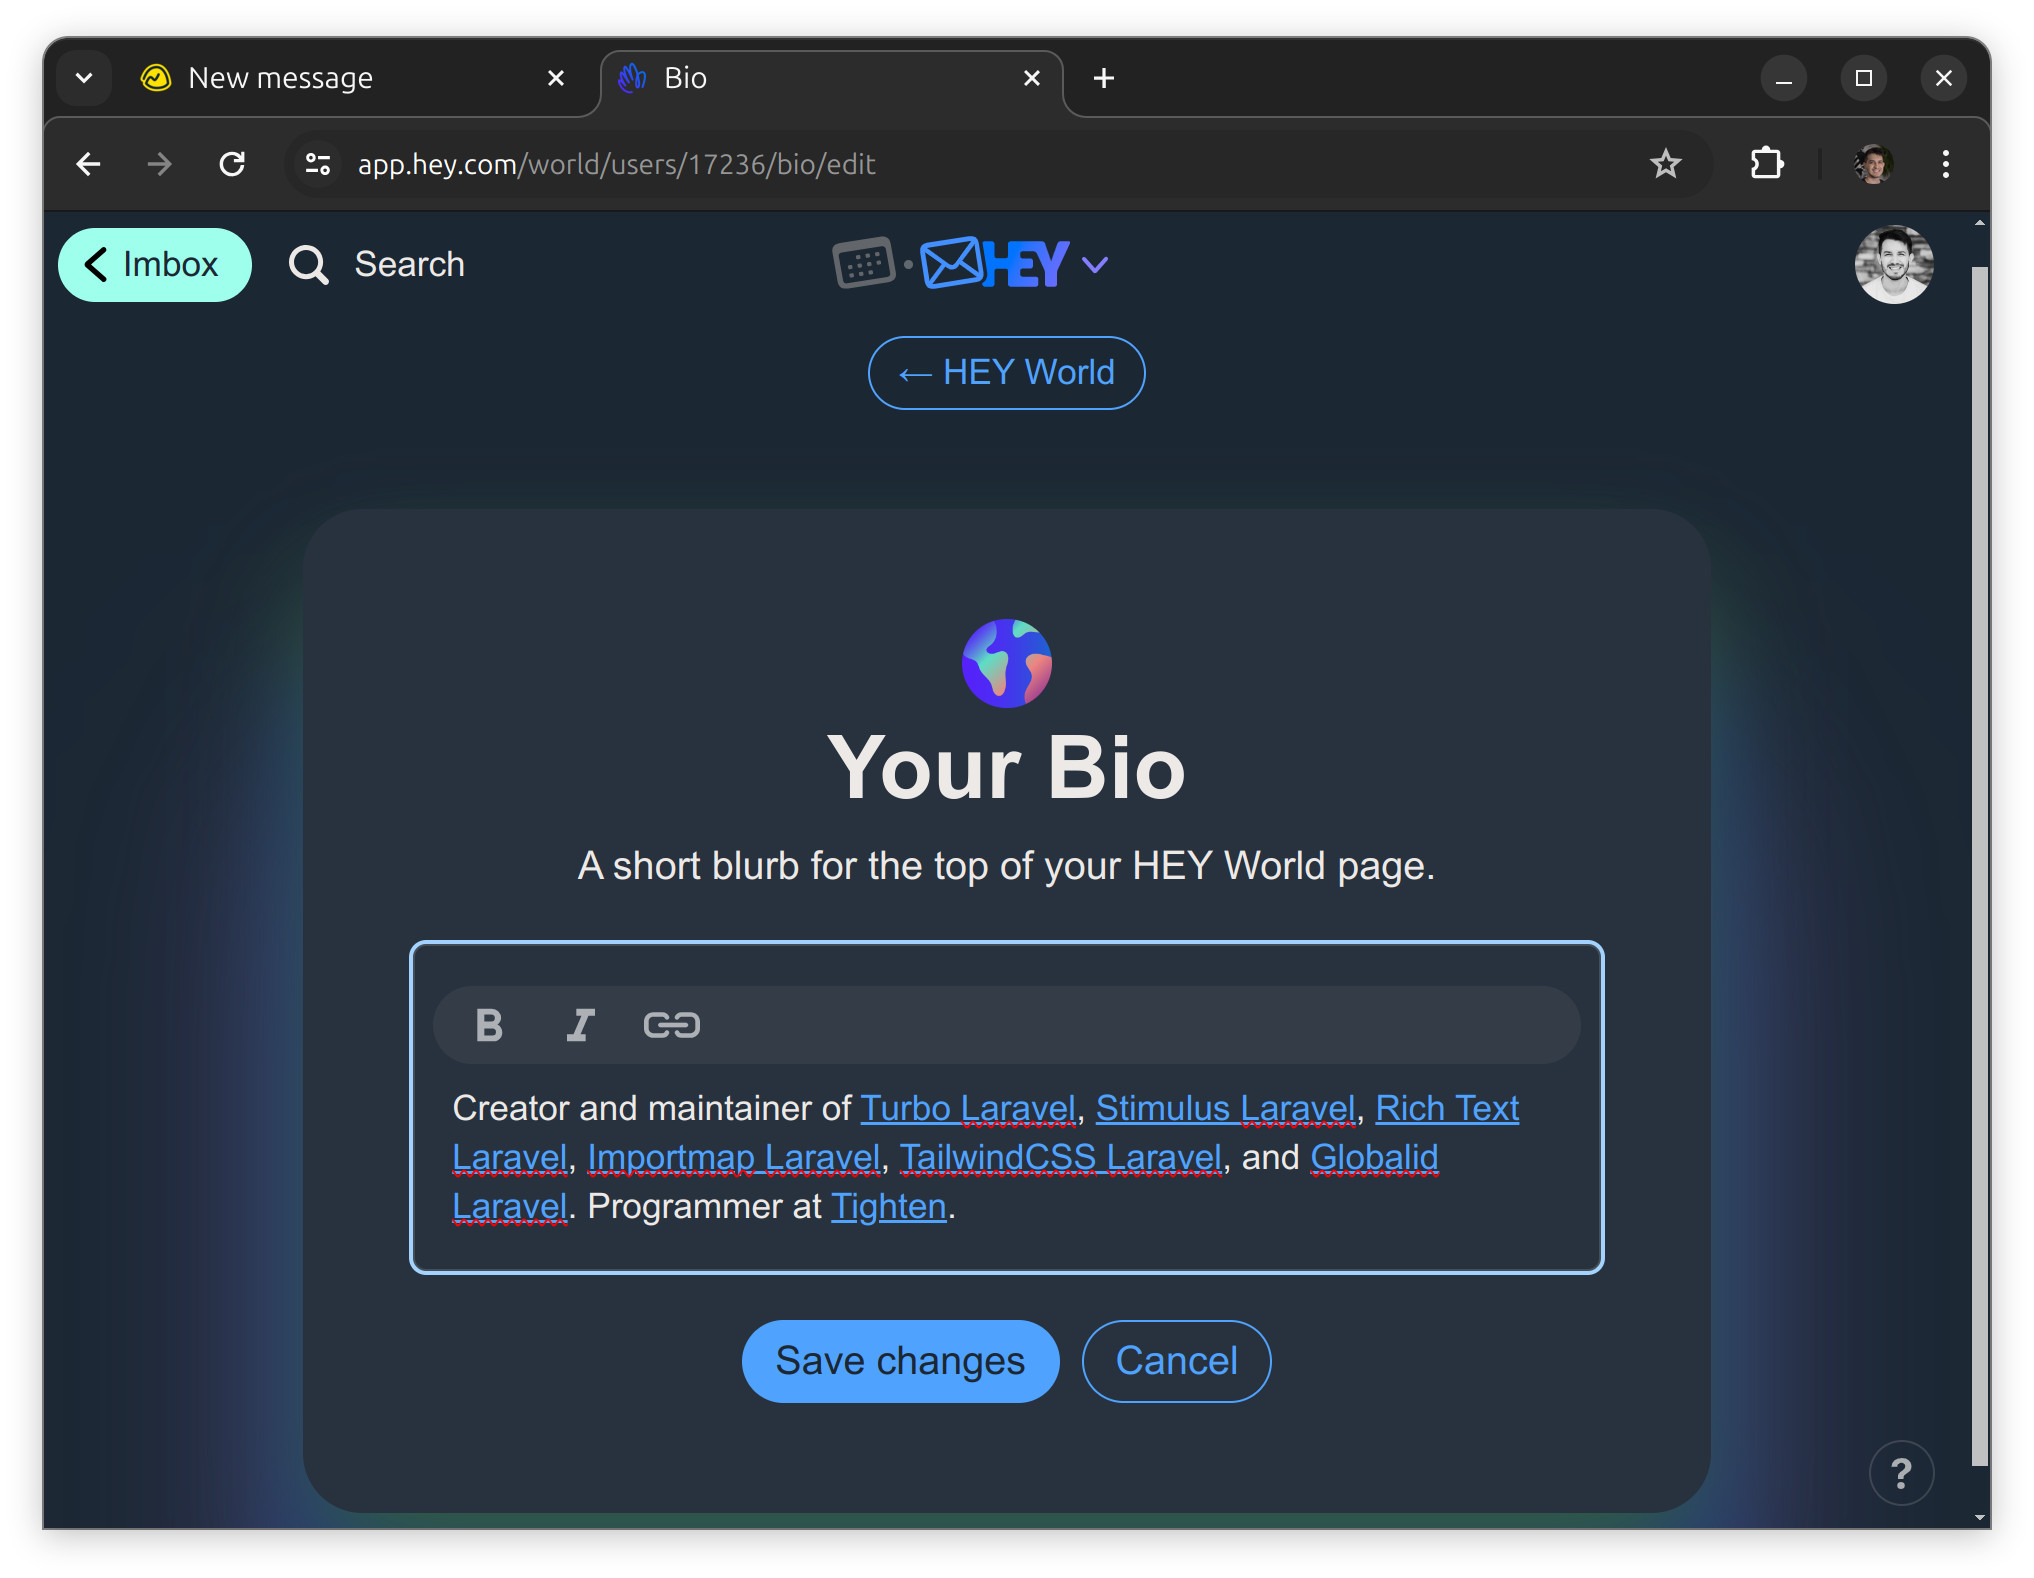
... and sometimes with a minimal one:
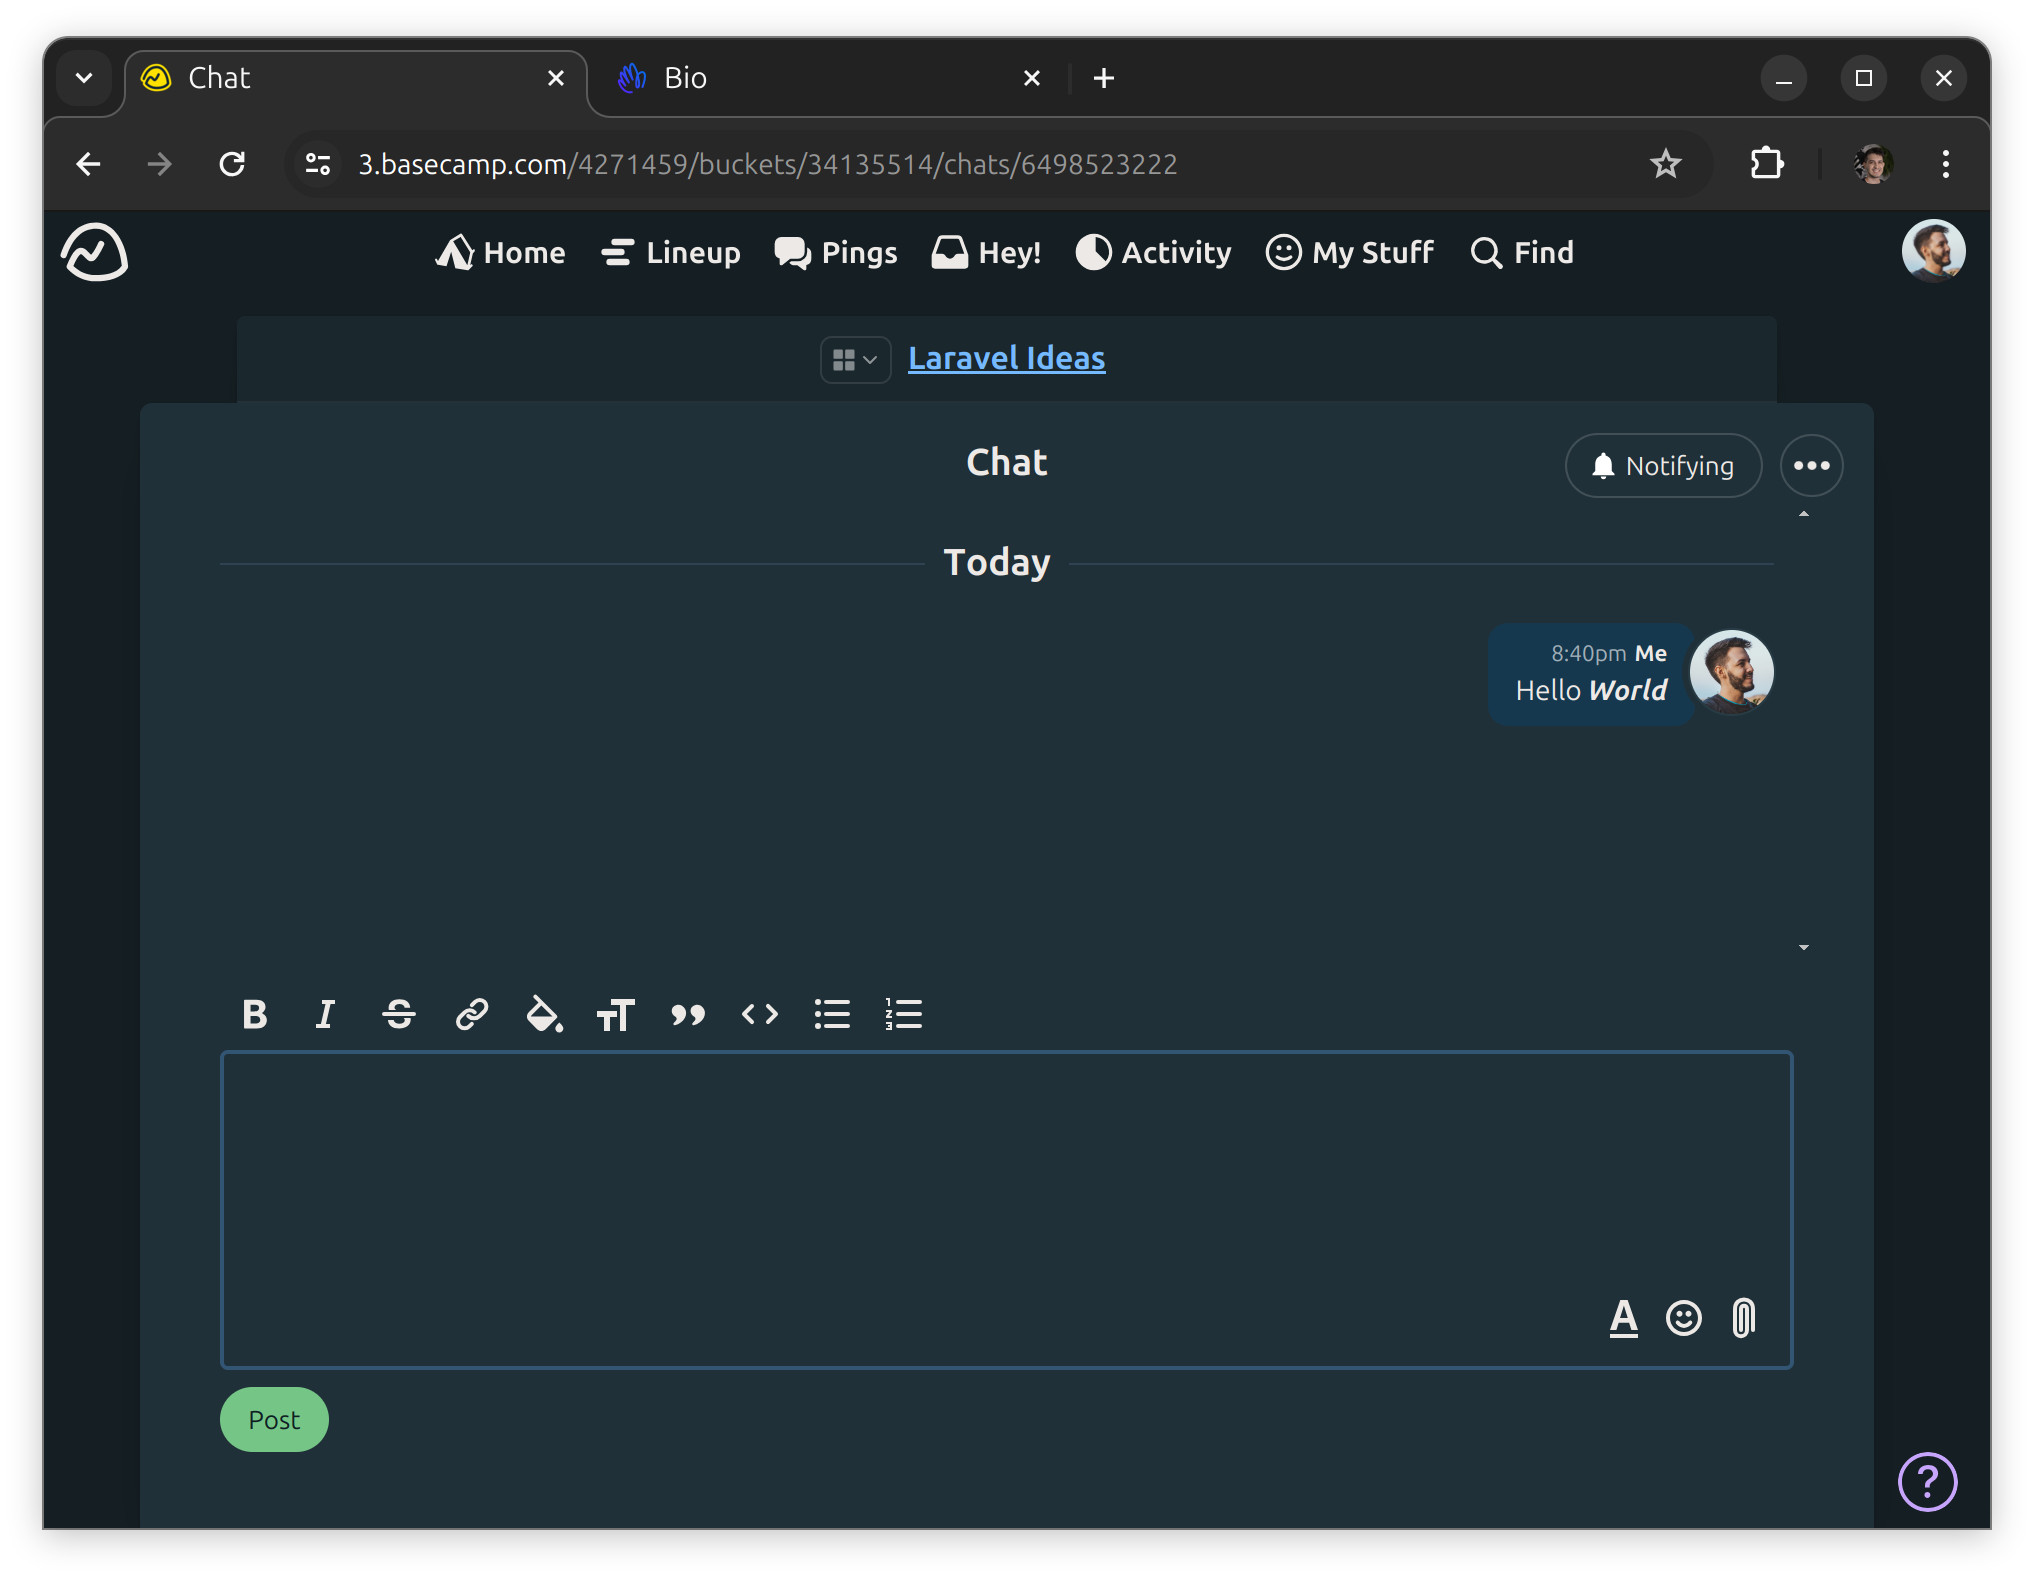
... sometimes behind a toggle button to hide/show the toolbar, like on Basecamp's Chat tool (and also in Campfire):
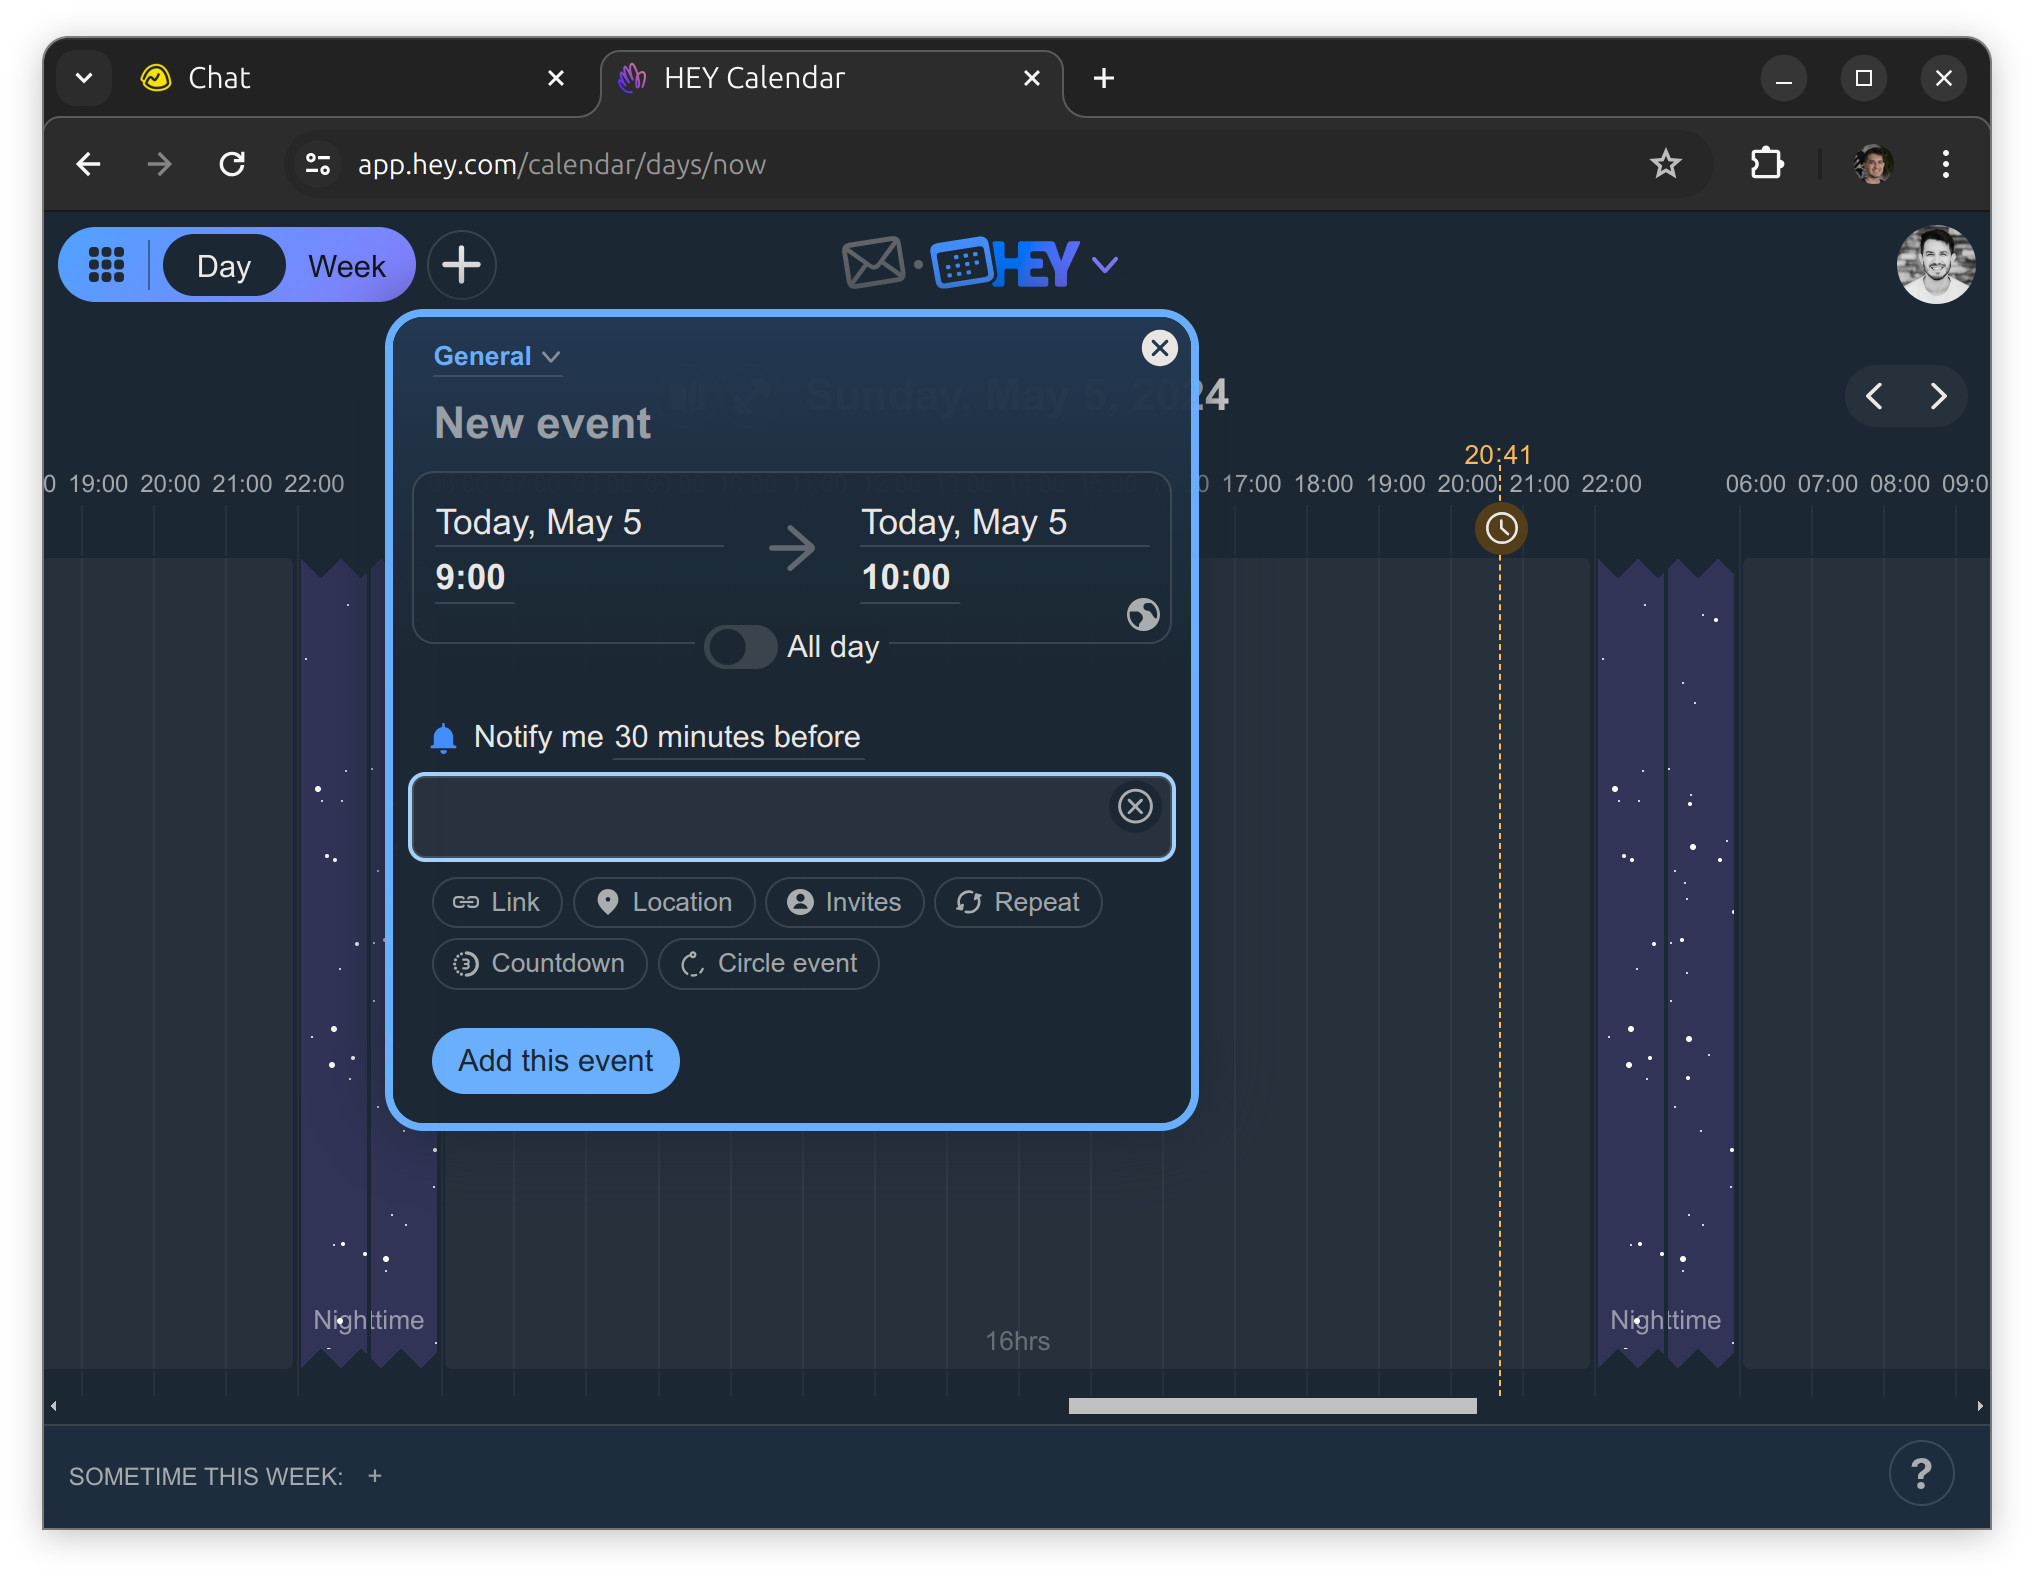
... other times with no toolbar at all, just with the rich text capabilities:
There's so much more to the Rich Text Laravel package, such as content attachments (which allows us to attach any model to our Trix documents), encrypted attributes, content attachments without an SGID for items not tied to a database record. By the way, I'm already planning a follow-up post on these topics 😉
Try out the Rich Text Laravel package and let me know what you think. See you next time!
in your inbox:
let’s talk.
Thank you!
We appreciate your interest.
We will get right back to you.