Making the Move from WordPress to Jigsaw
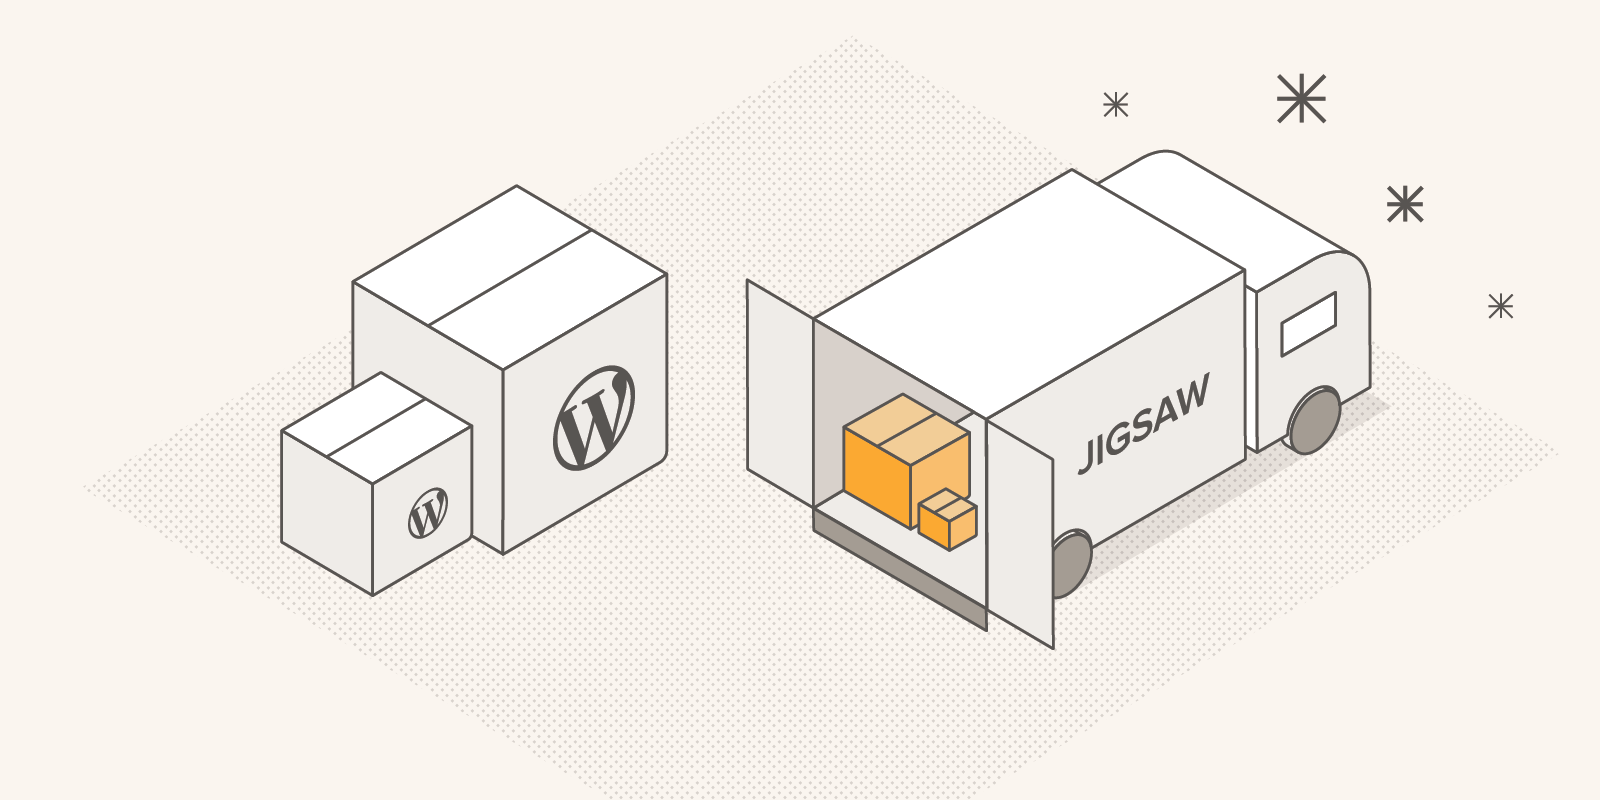

Moving can often be painful—but fortunately, if you’re moving your site from WordPress to Jigsaw, it doesn't have to be. With just a few steps, you can export your existing WordPress data and drop it into a new Jigsaw project.
In this post, I'll walk you through how easy it can be to switch to Jigsaw, using only a single WordPress plugin and one of Tighten's newly released Jigsaw starter templates.
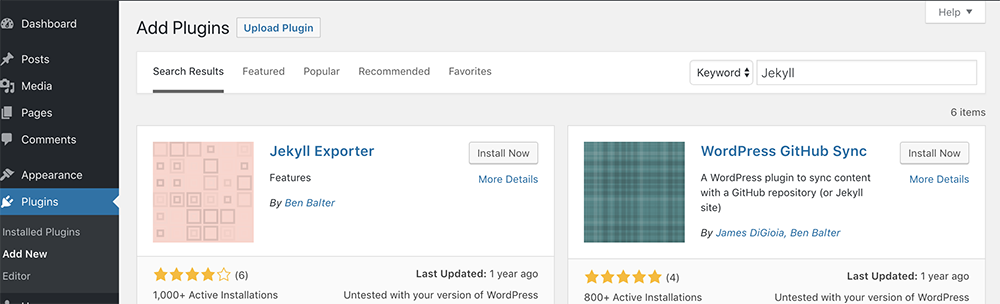
1. Install Jekyll Exporter
Jekyll Exporter is a WordPress plugin that will export your existing WordPress blog posts to Markdown. It will also export your categories and assets into organized directories, which you can then easily drop into your new Jigsaw site. You can install the plugin either by using the WordPress dashboard plugin browser or by uploading a .zip file. Below is a screenshot of how you can search for Jekyll from the dashboard.
Like Jigsaw, Jekyll is a static site generator that supports content written in Markdown. This plugin was built to create Markdown files that already include page configuration variables like those used by Jigsaw, such as
CategoriesandDate.
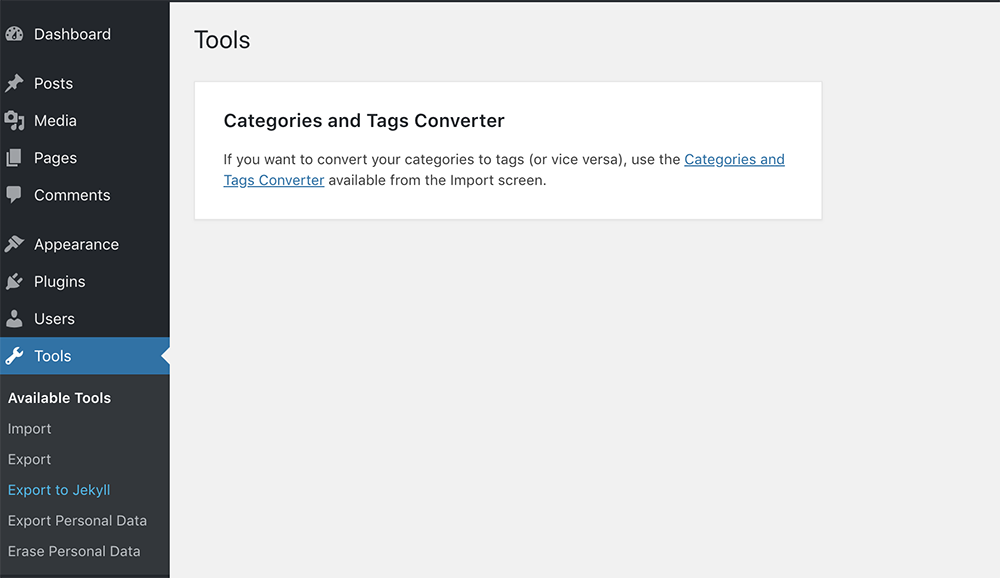
2. Export your data
After installing the plugin, click Export to Jekyll within the Tools section of your WordPress navigation sidebar. This automatically downloads a .zip file to your local machine named jekyll-export, which will contain your blog posts converted to Markdown, as well as any assets (e.g. post images and uploads).
3. Create a new Jigsaw project
Now that you have a copy of your data exported, let's spin up a fresh Jigsaw project on your local machine.
cd ~/Sites
mkdir jigsaw-blog
cd jigsaw-blog
composer require tightenco/jigsaw
Don't have Composer installed globally? Or not familiar with the terminal? Check out this post from Matt Stauffer teaching the basics of Composer-on-the-command-line.
To get a jump start on the design, you can use Jigsaw's new blog template. To initialize a new Jigsaw site using this template, run the following command:
./vendor/bin/jigsaw init blog
The starter templates generate instructional copy in the templates. You are free to remove or keep them as drafts for reference. If you're looking for more instructions on how to install and configure Jigsaw and these templates, you can reference the Jigsaw documentation.
4. Move exported WordPress directories to Jigsaw
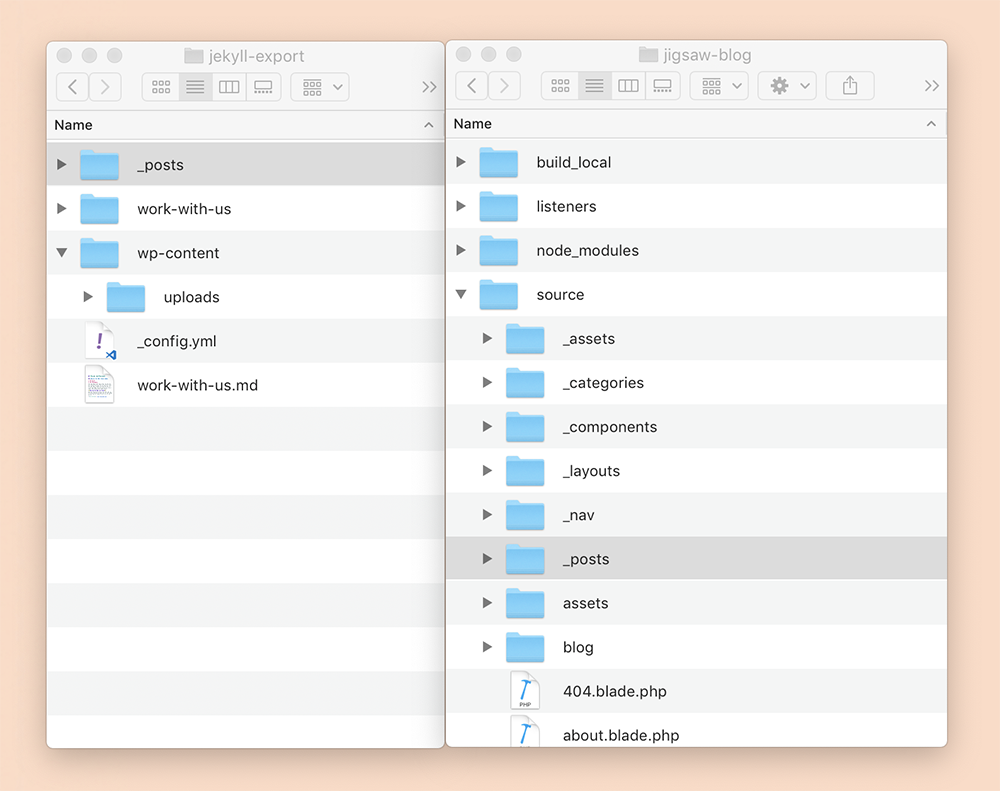
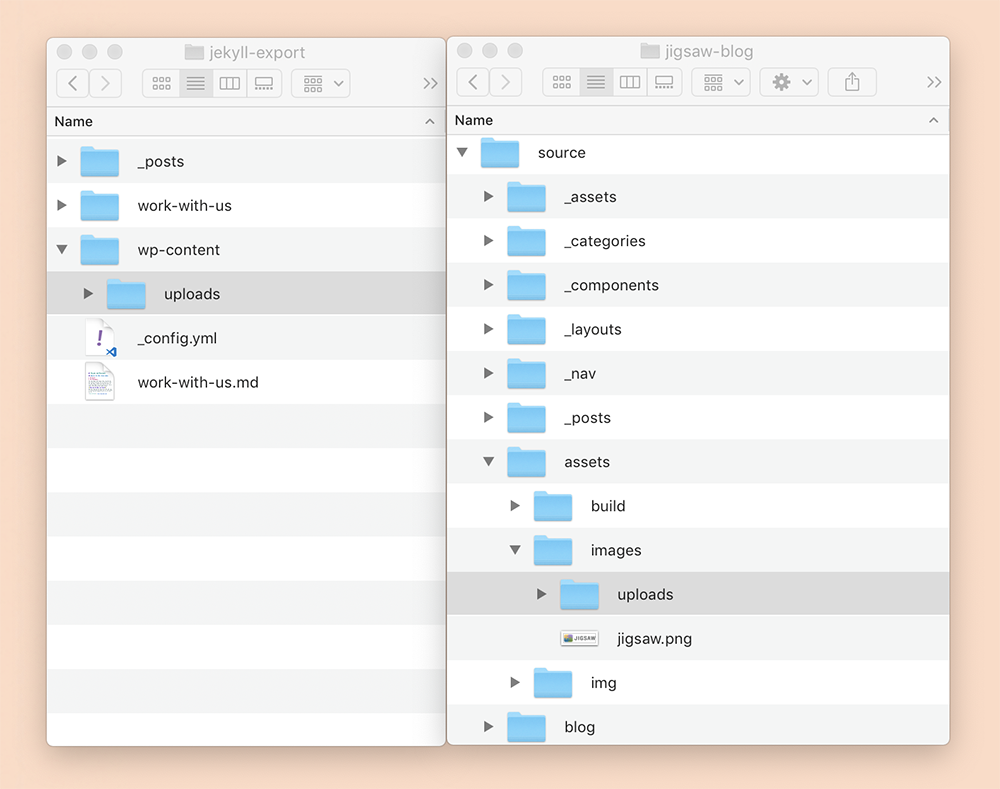
To move your posts over, simply drag the _posts directory from jekyll-export into the source directory of your new Jigsaw project. If prompted to replace the existing directory, go ahead. Next, you can move the entire uploads directory into source/assets/img/. As shown in the screenshot below, the final uploads path should be source/assets/img/uploads/.
The Jekyll Exporter plugin gets you most of the way to a functioning Jigsaw site, but you still need to make sure the correct Blade layout is being rendered.
- In your IDE, find all instances of the string layout:post in your entire project, and replace them with extends: _layouts.post. Alternatively, you can do this in the terminal from within your site directory, using the following command:
perl -i -pe's/layout: post/extends: layouts.post/g' ./source/_posts/*.md
- Perform a regex search for ^permalink.*, and remove every instance that is found. Or, if you prefer, run this command from your terminal instead:
perl -i -ne'print unless /^permalink.*/;' ./source/_posts/*.md
5. Build your new Jigsaw blog
Now it's time to see what you've created! Build your new site by running the following commands, then visit http://localhost:8000 in your browser.
./vendor/bin/jigsaw build
./vendor/bin/jigsaw serve
At this point, you should have a functional Jigsaw-powered blog! Congratulations; you've made it!
From here you can dive into source/_layouts to change the markup, or update the styles found in source/_assets/sass. You can also take a look at the Markdown posts in source/_posts to see how to structure any posts you write in the future.
Once you are ready to deploy, you can check out the Jigsaw deploy documentation and launch your new blog. Welcome to Jigsaw!
For some examples of other projects built using Jigsaw, take a look at Tighten's Built With Jigsaw site. If you've created a starter template that you'd like to share, tell us on Twitter at @tightenco or open an issue in the Jigsaw docs repo.
in your inbox:
let’s talk.
Thank you!
We appreciate your interest.
We will get right back to you.