Build an AI-Powered Drawing Guessing Game with Laravel, Prism, and HTML Canvas

AI is everywhere. It can create songs, build entire apps, and even drive our cars. But... can it play Pictionary? We're about to find out.
Today, we're building an AI-powered drawing guessing game. In this little app, users will draw anything they like, and the AI will try to guess what it is. Here's what we'll need:
- Laravel
- Prism, a Laravel package for talking to AI providers like OpenAI
- HTML Canvas, so users can draw right on the screen
We'll walk through setting up Prism, using the canvas element to draw by tracking mouse events, turning the drawing into an image file, and sending it to the AI.
Ready? Let's get started!
Setup
Install Laravel
Ah! The joy of spinning up a fresh Laravel app:
laravel new demo-pictionary
We won't be using any starter kits or a database for this demo, but feel free to choose what works best for you. For JavaScript, we'll keep it simple with a vanilla <script> tag. No frameworks required, so you can skip the NPM steps.
Install Prism
Prism is a Laravel package that makes it easy to communicate with different AI providers using a fluent, unified, and practical set of commands. Install it by running:
composer require prism-php/prism
php artisan vendor:publish --tag=prism-config
That last command publishes the config file to config/prism.php. If you open it, you'll see the configuration options for the supported providers.
'providers' => [
    'openai' => [
        'url' => env('OPENAI_URL', 'https://api.openai.com/v1'),
        'api_key' => env('OPENAI_API_KEY', ''),
        'organization' => env('OPENAI_ORGANIZATION', null),
        'project' => env('OPENAI_PROJECT', null),
    ],
    'anthropic' => [...],
    'ollama' => [...],
Today, we'll be using OpenAI, but the code will work with any other provider that supports images. Prism makes it simple to switch between providers, so feel free to choose your favorite.
As you might have noticed, the provider config relies on environment variables. For OpenAI, we need to add the following variables to our .env file:
OPENAI_API_KEY=
OPENAI_PROJECT=
OPENAI_ORGANIZATION=
Check the following section to learn where to find these values.
Getting your OpenAI API key
You'll need an OpenAI account with some credits (don't worry, running this demo won't consume more than a few cents).
First, copy your organization ID and add it to your .env file:
OPENAI_ORGANIZATION=org-XXXX
Then, create a project, copy its ID, and add it as well:
OPENAI_PROJECT=proj-XXXX
Finally, generate an API key in your project's API keys section. Remember to keep it safe. It's the last piece we need for our .env file:
OPENAI_API_KEY=sk-XXXX
Done! You're now ready to use the OpenAI API with Prism.
Backend: Working With AI
To get familiar with Prism and confirm our setup is working, let's create a simple command. Open your routes/console.php file and add:
<?php

use Prism\Prism\Prism;
use Prism\Prism\Enums\Provider;
use Illuminate\Support\Facades\Artisan;

Artisan::command('ai', function () {
    $response = Prism::text()
        ->using(Provider::OpenAI, 'gpt-4o')
        ->withPrompt('Explain the plot of The Matrix in 20 words or less.')
        ->asText();

    $this->info('Response: ' . $response->text);
});
Let's break this down:
- We import the
Prismclass and theProviderenum. - We use the OpenAI provider and send the prompt: “Explain the plot of The Matrix in 20 words or less.”
- We call
asTextto get the response. Prism also supportsasStream, but today we'll stick to text responses.
Open your terminal and run php artisan ai. You should see a response like:
Response: A hacker discovers reality is a simulation and joins rebels to fight oppressive machines controlling humanity.
Let's go! It worked. Great movie, by the way.
Sending Images
We need to send the user's drawing to the AI, so it can guess what it is. That means adding an image file to the OpenAI API request. Thankfully, Prism makes this easy.
Before building the actual controller, let's add a new command to test image uploads. In routes/console.php, import:
use Prism\Prism\ValueObjects\Messages\UserMessage;
use Prism\Prism\ValueObjects\Messages\Support\Image;
Then, add this command:
Artisan::command('ai2', function () {
    $message = new UserMessage(
        "What's in this image?",
        [Image::fromLocalPath(path: base_path('image.png'))]
    );

    $response = Prism::text()
        ->using(Provider::OpenAI, 'gpt-4o')
        ->withMessages([$message])
        ->asText();

    $this->info('Response: ' . $response->text);
});
Here, we're not using withPrompt. Instead, we're sending an array of messages via withMessages. In this case, the array has a single element:
- A user message: "What's in this image?"
- An image loaded from a local path
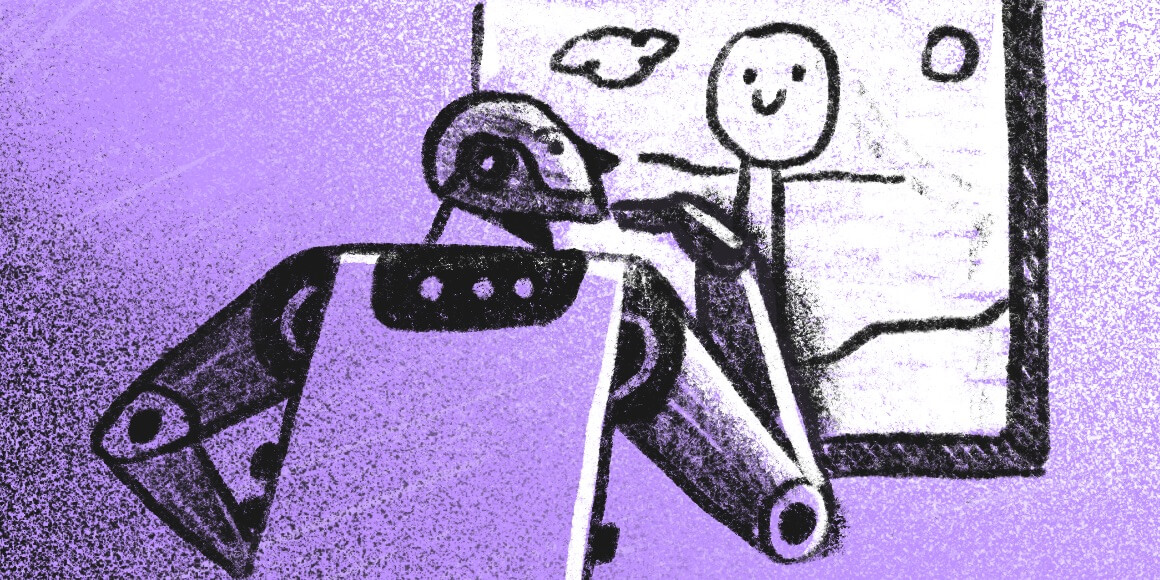
To make this work, place an image.png file in the root of your project. Here's one you can use.
Aside from that, the flow is the same: Prism builds the request, sends it to the OpenAI API, and parses the response for us.
Time to test it! Head back to your terminal and run php artisan ai2. You should see something like:
Response: The image is a black-and-white line drawing of an apple with two leaves attached to its stem.
Nice! It works. The LLM correctly described the image we sent. If you used a different one, the description should reflect that.
Did it work for you? If not, double-check that the model you're using supports images. You'll find details in Prism's provider support table.
Creating the Endpoint
Alright, time to build the endpoint. It should:
- Accept and store an image file
- Use AI to guess the contents of the image
- Return a text description
An invokable controller is perfect for this case. If you're not familiar, an invokable controller is a controller that only handles on action, and it's called using that controller's __invoke() method:
php artisan make:controller GuessImageController --invokable
Wire it up in routes/web.php:
use App\Http\Controllers\GuessImageController;

Route::get('/guess', GuessImageController::class);
Now open the controller and import the required classes:
use Illuminate\Http\Request;
use Prism\Prism\Prism;
use Prism\Prism\Enums\Provider;
use Prism\Prism\ValueObjects\Messages\UserMessage;
use Prism\Prism\ValueObjects\Messages\Support\Image;
Then, update the __invoke method to handle the file upload. Laravel makes this easy: call store on the uploaded file instance to save it with a unique name and get its relative path.
public function __invoke(Request $request)
{
    $relativePath = $request->file('image')->store('images');
    $path = storage_path('app/private/' . $relativePath);
    return $path;
}
For now, we're just returning the path as plain text. To test this, let's create a quick form. Open the default Laravel welcome view and replace the <body> with:
<form id="form" action="/guess" method="POST" enctype="multipart/form-data">
    @csrf
    <input type="file" name="image" accept="image/*">
    <button>Submit</button>
</form>
Start your dev server with php artisan serve and visit the homepage. You should see the form. Select an image and hit "Submit."
If you're redirected to /guess and see a file path, it works! The image was uploaded and saved. You can confirm this by checking your storage directory.
Now, instead of returning the path, we'll send the image to the AI for analysis, just like we did in the test command earlier.
public function __invoke(Request $request)
{
    $relativePath = $request->file('image')->store('images');
    $path = storage_path('app/private/' . $relativePath);

    $message = new UserMessage(
        "What's in this image?",
        [Image::fromLocalPath(path: $path)]
    );

    $response = Prism::text()
        ->using(Provider::OpenAI, 'gpt-4o')
        ->withMessages([$message])
        ->asText();

    return $response->text;
}
It's time to test!
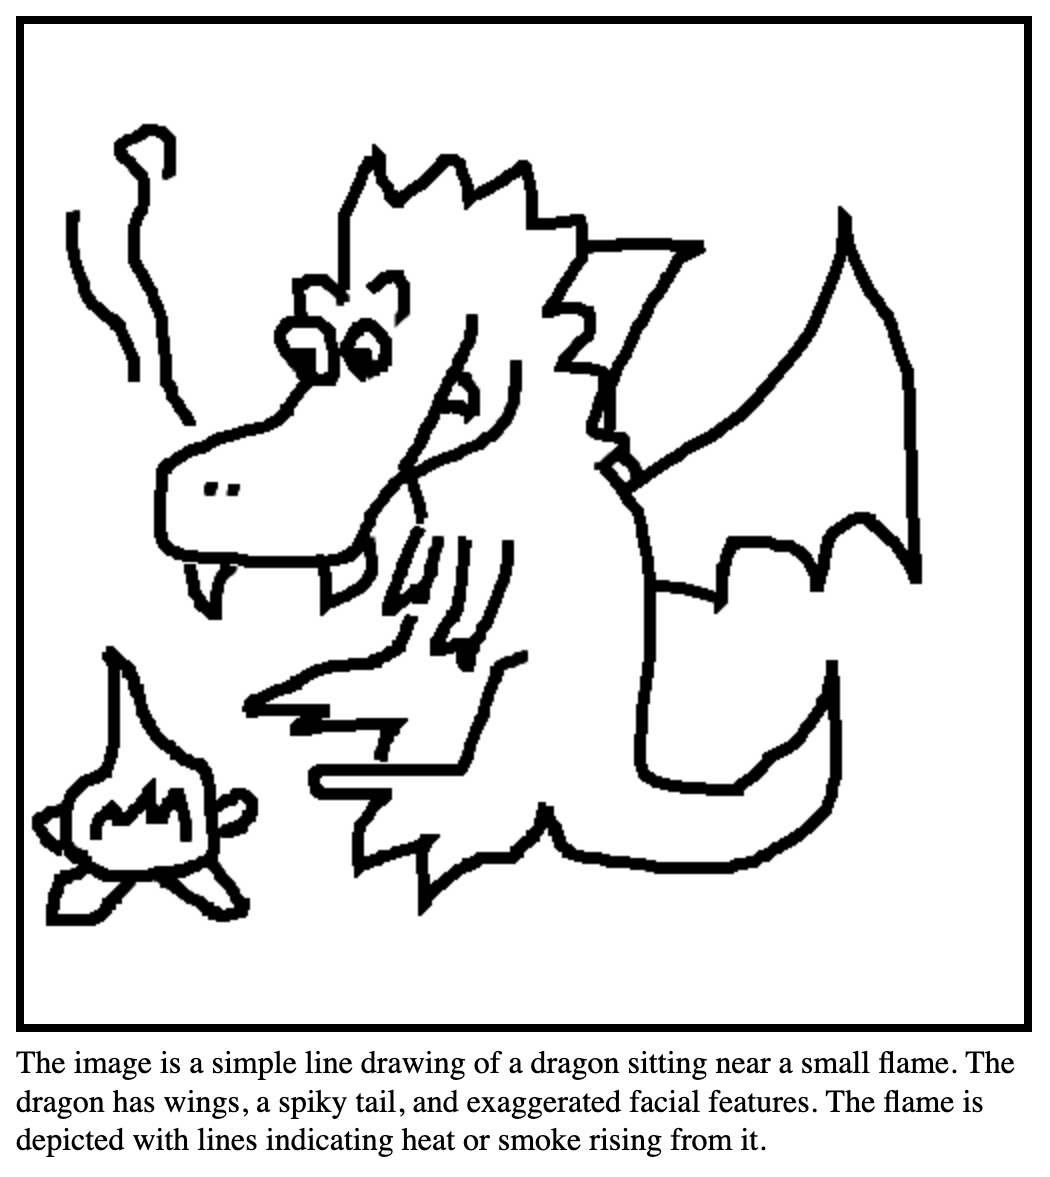
Open your browser, select an image, and submit the form. I picked this one of Goku from Dragon Ball, but feel free to use any image you like. After submitting, you should see the AI-generated description.
For example:
This image features an animated character from the "Dragon Ball" series, known as Goku. He is depicted in his Super Saiyan form, with spiky yellow hair and wearing his signature orange and blue outfit.
Awesome! The endpoint is working. Next, let's build the frontend so users can draw directly on the screen and send their drawings to the AI for guessing.
Frontend: Drawing App With HTML Canvas
We want users to sketch directly on the screen using their mouse or trackpad, and HTML Canvas is perfect for this. It lets us track pointer movement, draw lines, and convert the finished sketch into an image blob to send within a form.
Add this snippet to your welcome view, just below the <form>.
<canvas
    id="sketchpad"
    width="500" height="500"
    style="border: 1px solid #000"></canvas>

<script>
const canvas = document.getElementById('sketchpad');
const ctx = canvas.getContext('2d');
ctx.fillStyle = '#fff';
ctx.fillRect(0, 0, canvas.width, canvas.height);
ctx.lineWidth = 5;
</script>
What is the script doing? For now, it just fills the canvas with a white background.
We call getContext('2d') to get the 2D rendering context of the <canvas> element. This is what you use to draw on the canvas: lines, shapes, colors, and more. It's like getting a paintbrush; all drawing commands (like fillRect, stroke, beginPath, etc.) are called on this ctx object.
For example, the methods we used are:
fillStyle, to set the fill colorfillRect, to draw a rectangle over the whole area (our white background)lineWidth, to set the pen stroke width in pixels
Tracking Mouse Events to Draw
Now it's time to add the drawing logic:
- When the user clicks, we start a new path and move the "pen" to that spot.
- As they drag the mouse with the button held down, we draw lines following their movement.
- When they release the click or leave the canvas, we stop drawing.
The following snippet handles all that. You could polish it up or wrap it in a class, but for now, it's everything we need.
let drawing = false;

canvas.addEventListener('mousedown', (e) => {
    drawing = true;
    ctx.beginPath();
    ctx.moveTo(e.offsetX, e.offsetY);
});

canvas.addEventListener('mousemove', (e) => {
    if (!drawing) return;
    ctx.lineTo(e.offsetX, e.offsetY);
    ctx.stroke();
});

canvas.addEventListener('mouseup', () => {
    drawing = false;
});

canvas.addEventListener('mouseleave', () => {
    drawing = false;
});
Let's draw! Open the page in your browser and test the drawing functionality. Here's my first masterpiece:
Drawing: check. Now, how do we send the drawing to our endpoint?
Sending the Drawing to the Endpoint
We can convert a <canvas> element to an image blob using the toBlob method. What's a blob? It's the raw binary representation of a file. When you add a blob to a FormData object, it behaves just like adding a file from your disk.
So, we can go ahead and remove the file input from our form:
<form id="form" action="/guess" method="POST" enctype="multipart/form-data">
    @csrf
    <button>Submit</button>
</form>
... because we don't need to manually select a file anymore. Instead, when the form is submitted, we'll convert the canvas into an image, add it to the form data, and send it asynchronously to our endpoint using fetch.
const form = document.getElementById('form');

// When the form is submitted
form.addEventListener('submit', async (e) => {

    // Prevent the page from reloading
    e.preventDefault();

    // Get the form data (the only field is the CSRF token)
    const formData = new FormData(form);

    // Convert the canvas to a blob
    canvas.toBlob(async function(blob) {

        // Add the blob to the form data
        formData.append('image', blob, 'drawing.png');

        // Send the form data to the form action URL
        const guess = await fetch(form.action, {
            method: 'POST',
            body: formData
        });

        // Display the AI's response
        form.innerHTML = await guess.text();
    }, 'image/png');
});
Add that code to your script tag, right below the drawing functions. Reload the page and try it out: draw something cool and click "Submit." The server will respond with the AI's guess, which should appear on the page.
Like this!
Finishing Touches
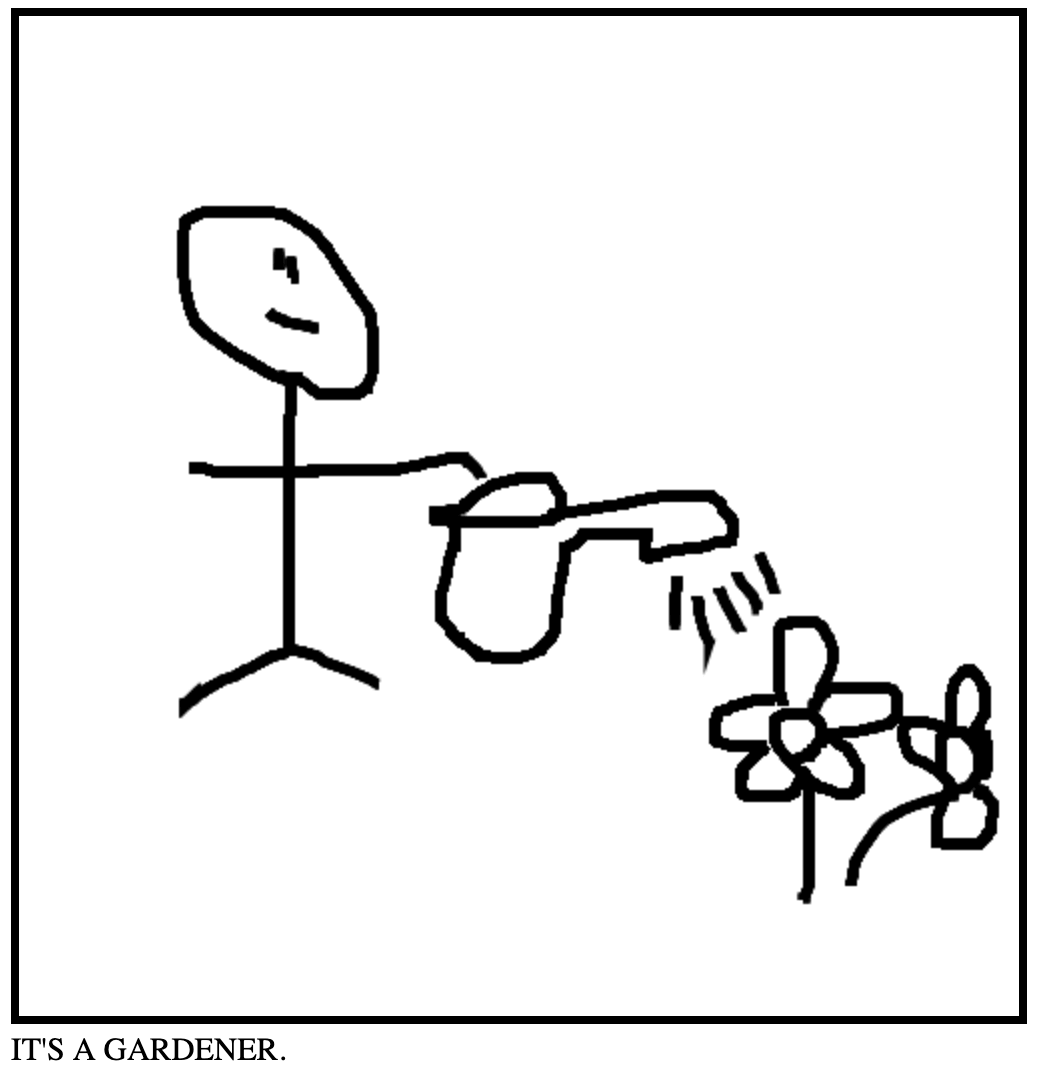
That's it! Our AI guessing game is up and running. Now, you can tweak it to fit your ideas. For example, I updated the prompt to make it feel more like Pictionary, with quick guesses instead of lengthy descriptions:
What is this? Respond with one clear sentence, like "IT'S A BUNNY" or "IT'S A DOG," as if you're playing a guessing game. Don't say "I think" or "I guess," just say what it is. Please do not mention that it's a drawing. If you see a person with an object (e.g., a man with a computer), guess the likely job or role (e.g., "IT'S A PROGRAMMER").
This creates more hilarious results:
Another cool upgrade would be to track touch events in addition to mouse events, so people using phones or tablets can also draw.
Last but not least, it'd be great to give our little app some styling. You can check out the final version of the view in this public Gist. Here's a sneak peek of what it looks like:
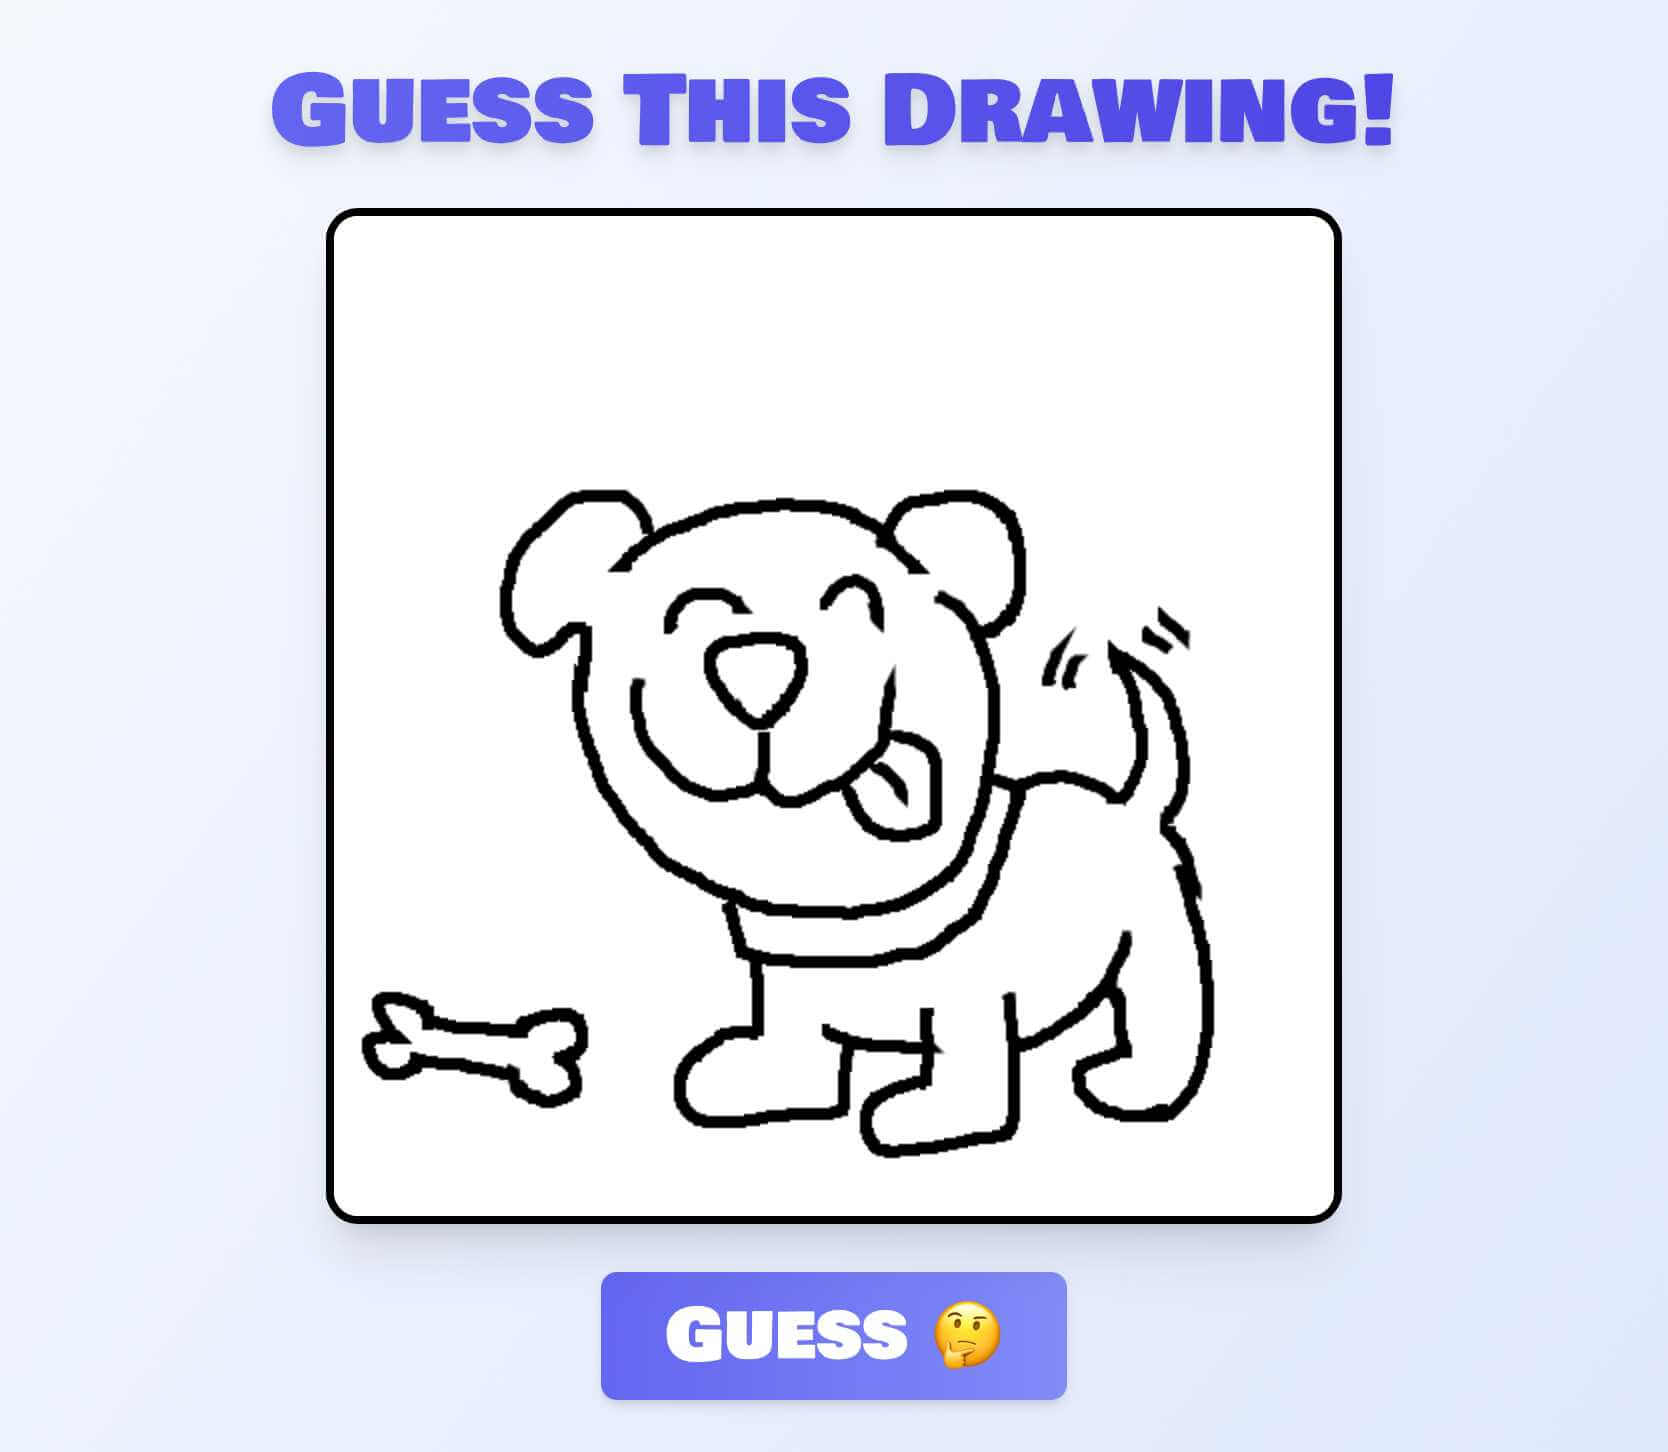
Pretty neat, right? Oh, and by the way... IT'S A DOG!
Conclusion
Adding AI features to your apps is easier than you might think. With Laravel and Prism, connecting to powerful language models and even analyzing documents or images, just like we did today, is straightforward and practical.
Now, there are plenty of models that can handle image recognition. Some are even small enough to work right in your browser! Instead of sending a request to OpenAI and waiting for them to process and return an answer, you can process the image using a small model on the client side. But that’s a topic for an upcoming article! Soon, we’ll learn how to run models in the browser thanks to Transformers.js.
I hope you found this article helpful and learned something new. If you'd like to see more content about AI in action, feel free to let us know.
Thanks for reading, and see you next time!
in your inbox:
let’s talk.
Thank you!
We appreciate your interest.
We will get right back to you.