Filament Crash-Course: Create a Customizable Admin Panel in Minutes

In most applications, administrators need a way to manage data. Whether it's a blog's articles and comments, a store's products and orders, or a theater's events and tickets, admins need a place to list, create, edit, and remove records.
And you can't simply hand them the database credentials and ask them to learn SQL!
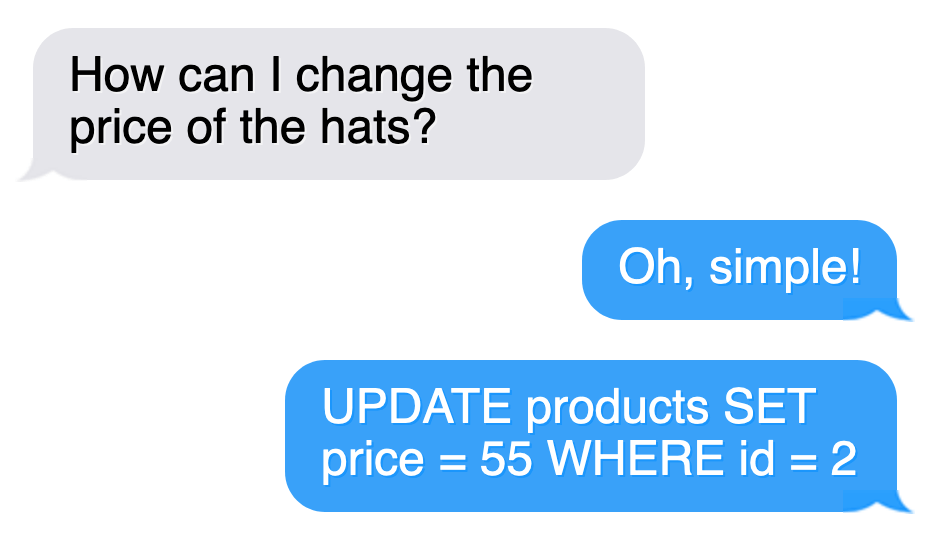
It's much better to provide an admin panel where users can make necessary edits without developer intervention.
Creating an admin panel from scratch can be daunting, but fortunately, the Laravel ecosystem offers many excellent tools that simplify the process: Backpack, Voyager and even Laravel Nova, built and maintaned by the Laravel team.
The star of today's article is Filament, a free and open-source alternative. By the end of this article, you’ll have a fully functional Filament admin panel to search and manage records, upload images, perform bulk actions, and more. Let’s get started!
What is Filament?
Filament is a toolkit for rapidly building powerful admin panels. It's built using the TALL stack: Tailwind, Alpine.js, Livewire, and Laravel. It streamlines the creation of essential admin panel components like forms, tables, and notifications. With a focus on user-friendly interfaces and a comprehensive feature set, Filament will help you have an admin panel up and running in minutes and extend it to suit your needs.
Installation and Setup
We'll start from a clean slate, but don't worry—everything you learn today will apply to any existing projects (and your many side projects!).
First things first, let's install Laravel:
composer create-project laravel/laravel demo-filament
cd demo-filament
php artisan storage:link
Let's build an online store. It's a classic example, and for good reason: the store's staff need a place to manage products, stock, orders, and more.
Let's keep it simple and focus on four models: Product, Category, Feature, and Review. Here's what our models will look like, including field types and relationships:
models:
  Product:
    name: string
    description: text
    price: integer
    tags: json nullable
    image: string nullable
    relationships:
      belongsTo: Category
      belongsToMany: Feature
      hasMany: Review
  Category:
    name: string
    description: text
    relationships:
      hasMany: Product
  Feature:
    name: string
    description: text
    relationships:
      belongsToMany: Product
  Review:
    title: string
    content: text
    rating: integer
    approved: boolean default:false
    relationships:
      belongsTo: Product
Instead of manually creating all the necessary files, let's use Laravel Blueprint. This handy package can generate models, factories, migrations, and more from a YAML definition like the one above.
Create a draft.yaml file in the root of your project and paste in the lines from the snippet above. Then, install Blueprint:
composer require -W --dev laravel-shift/blueprint
... and run it like this:
php artisan blueprint:build
Boom! Blueprint created models, factories, and migrations for us in the blink of an eye. It can also generate controllers and seeders, but we won't need them in this tutorial.
What we do need is to migrate the changes to our database and seed the default user which comes with the Laravel installation, test@example.com.
php artisan migrate --seed
Perfect! Our database now has all the necessary tables, and we have a user who will act as the admin.
Install Filament
It's Filament time! Install the Filament Panel Builder by running the following commands:
composer require filament/filament:"^3.2" -W
php artisan filament:install --panels
You'll be prompted in the terminal with a question: “What is the ID?”
This question can be confusing, but it's asking what the unique identifier of the Filament instance you are setting up should be. This ID is used to identify your Filament installation, which is useful when dealing with multiple installations or in a multi-tenant environment.
Since ours is a single, non-multi-tenant instance, we can use the default value admin. This means the Filament dashboard will reside at our site's /admin URL.
 ┌ What is the ID? ─────────────────────────────────────────────┐
 │ admin                                                        │
 └──────────────────────────────────────────────────────────────┘
And we're done! The installation is complete, and we're ready to start using Filament.
Login to Filament
To access Filament, open your browser and visit its URL.
- If you run it via
php artisan serve, the URL will behttp://127.0.0.1:8000/admin - If you use Valet or Herd, it will be something like
http://demo-filament.test/admin
You'll see a login form there. Great! This means Filament is running as expected. To log in, use the seeded credentials: the email address test@example.com and the password password.
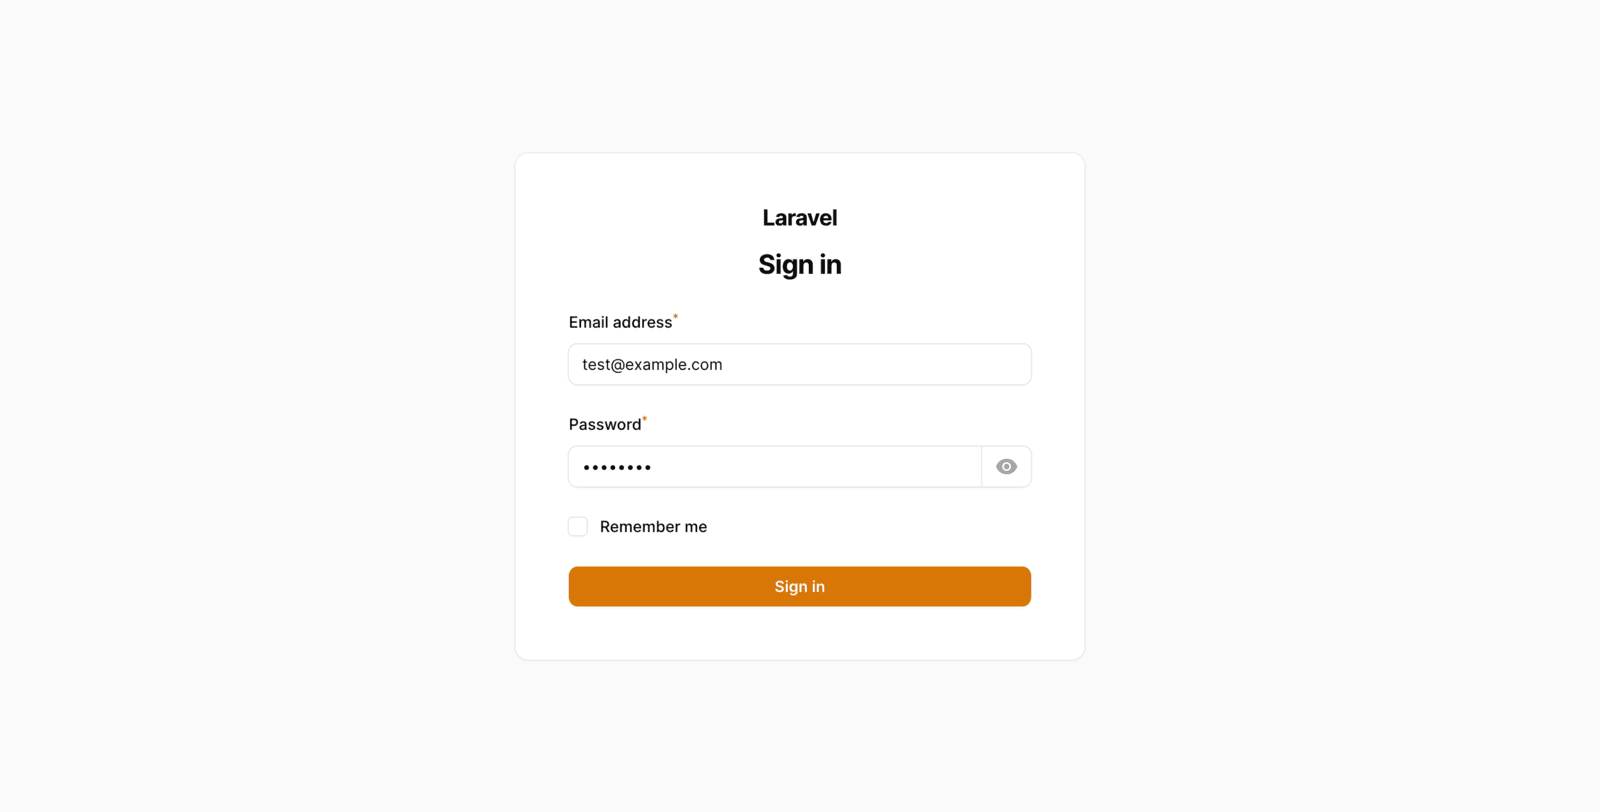
No worries, Filament allows all users to access it locally, but for production, you can define who has access using a simple canAccessPanel function. Read more about authorization here.
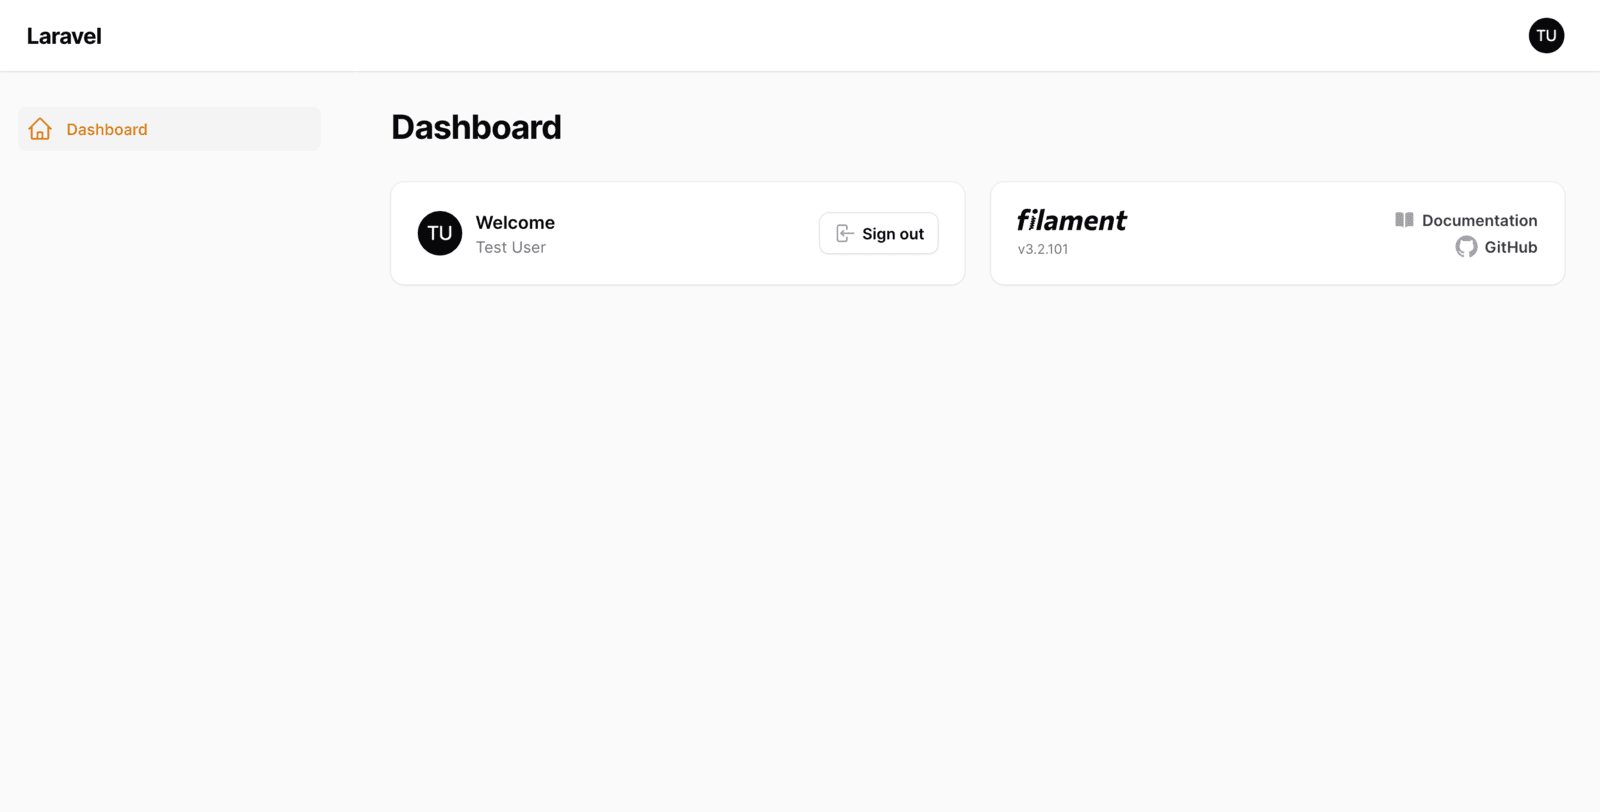
Now, you're in! Yes, it looks pretty empty right now. Let's learn how to quickly create resources to manage each of our models.
How to Generate Resources
In the context of Filament, a resource is a class that defines the table and form for a model. It lists all the fields (the table columns and form inputs) needed to perform CRUD operations in the admin panel.
You can write resources by hand, but if you'd like to save time, Filament can automatically generate them for you based on your model's database columns using an artisan command.
Let's start with a simple model: Category. Later on, we'll do the same for Product, Feature, and Review. To generate the resource, run the following command:
php artisan make:filament-resource Category --generate
This creates the following files:
app/Filament/Resources/CategoryResource.php
app/Filament/Resources/CategoryResource/Pages/CreateCategory.php
app/Filament/Resources/CategoryResource/Pages/EditCategory.php
app/Filament/Resources/CategoryResource/Pages/ListCategories.php
Later on, we'll see how to customize the code Filament created for us, but for now, let's explore the features this scaffold offers out of the box. Reload your browser, and you'll see a new link in the sidebar: Category. Click it, and you should see something like this:
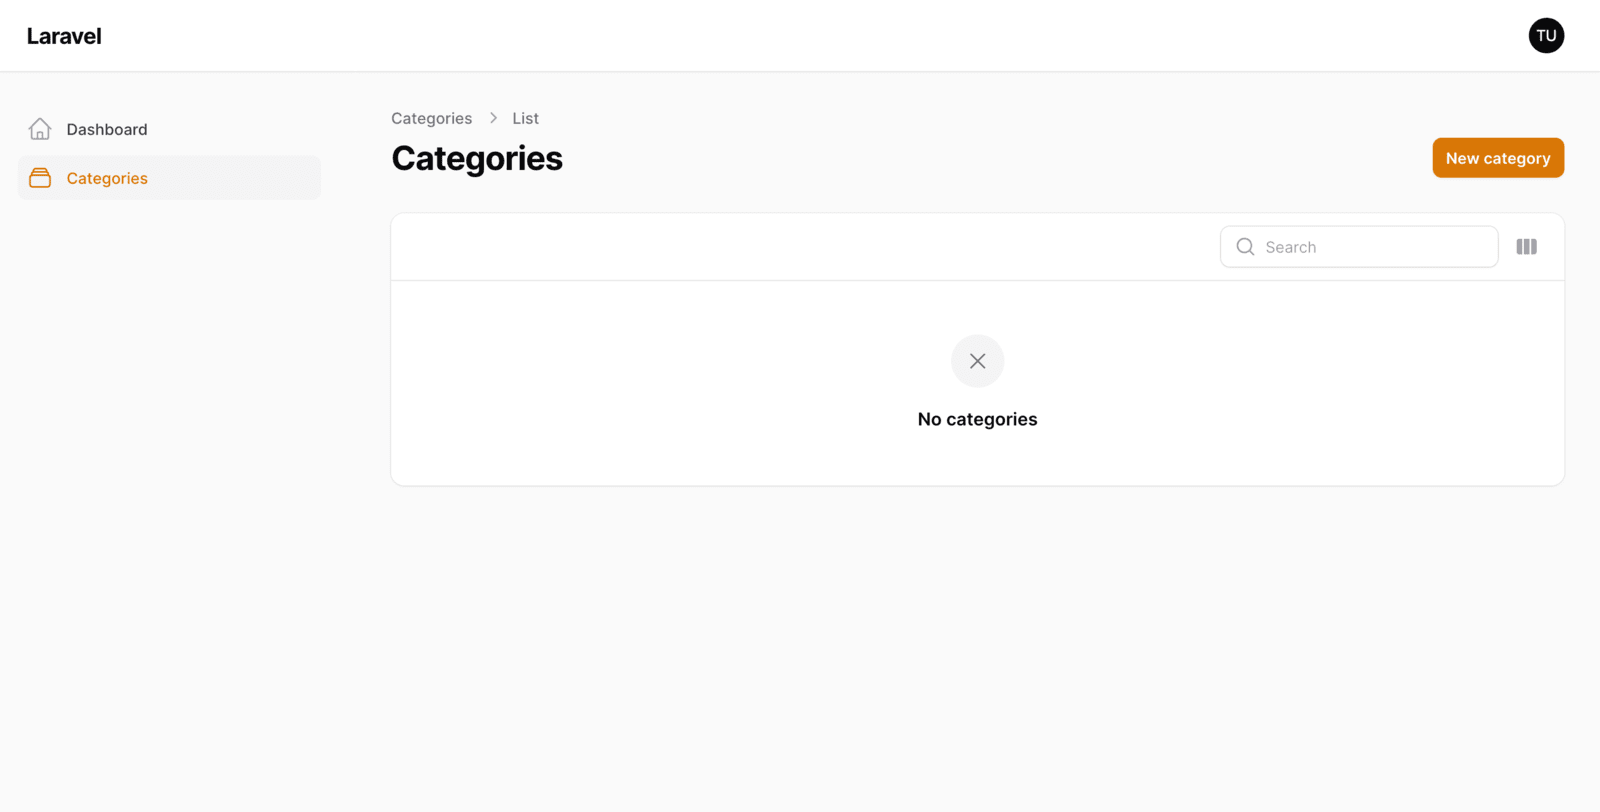
Cool! Now click "New category." You'll see a form to create a category. Filament created the code necessary to display this form based on the columns of the categories table. It determines the type of input based on the column type and, in this case, marks the fields as required because the columns are not nullable. Pretty easy, right?
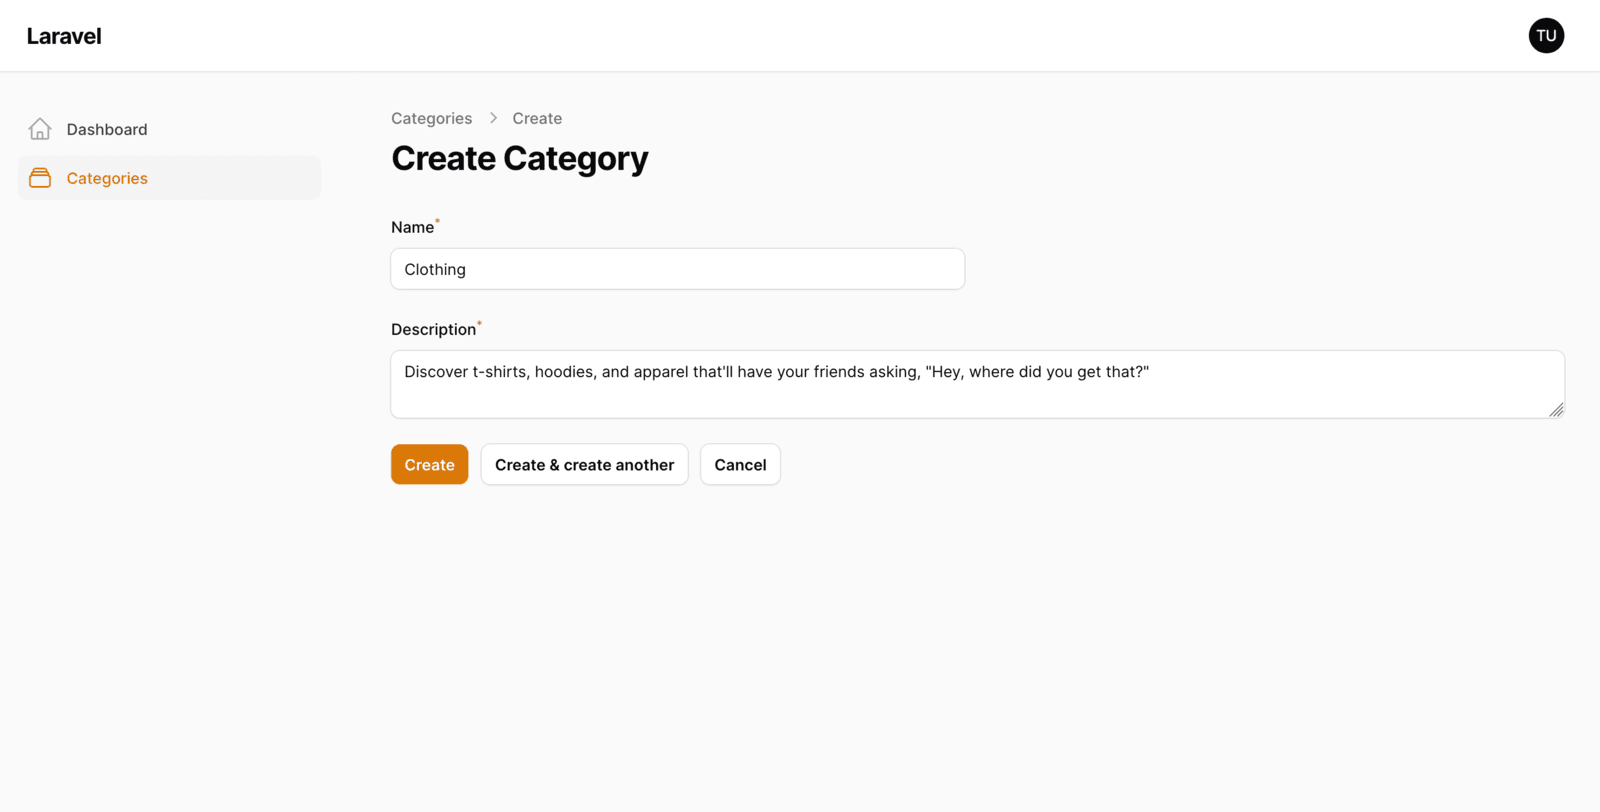
Fill in the form and click "Create" or "Create & create another" to continue entering categories. Once we create some categories, the index page will look like this:
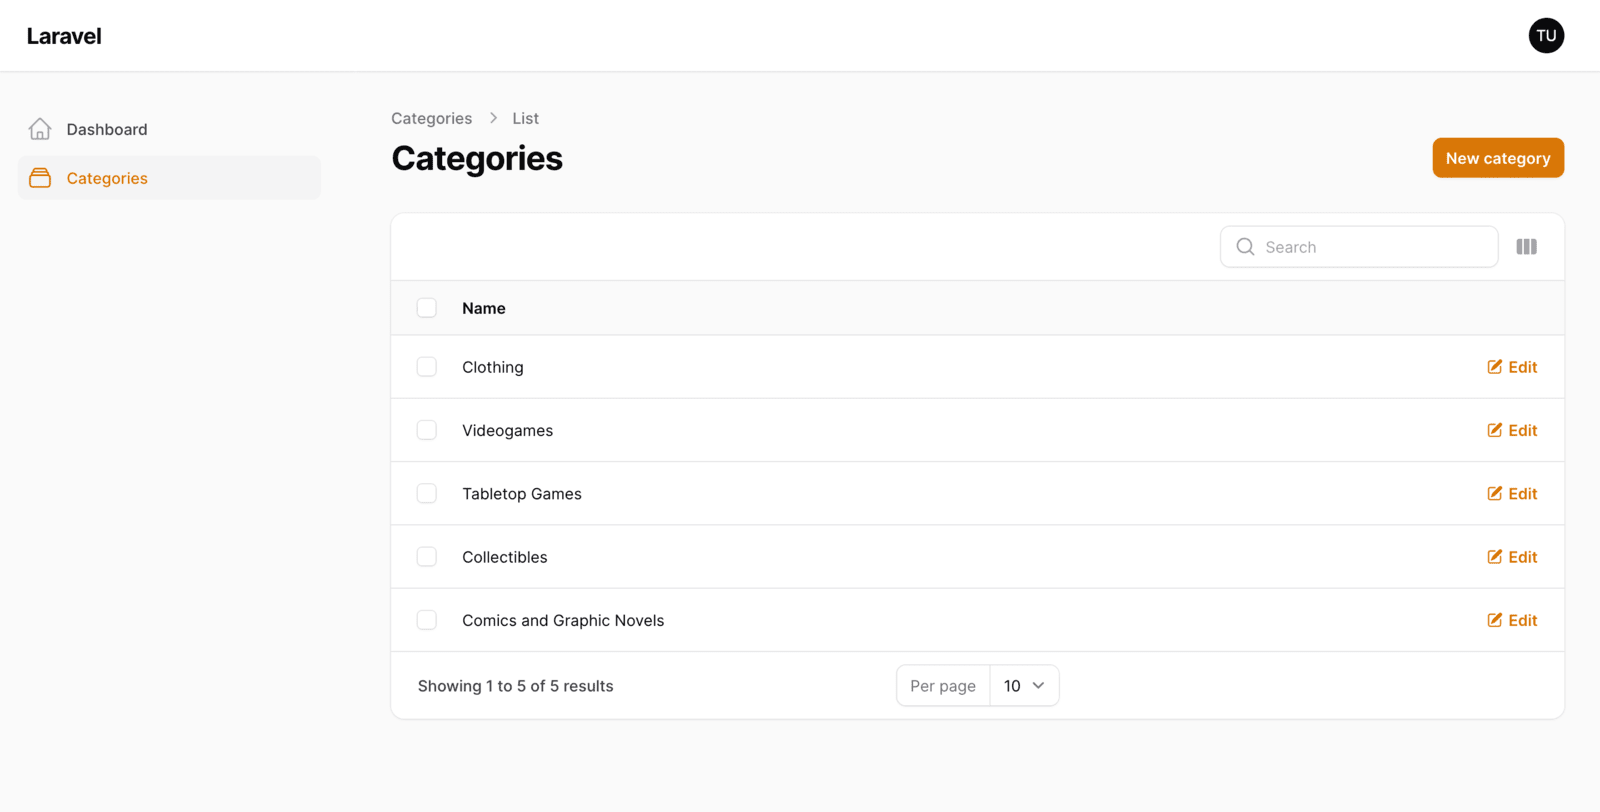
At a glance, you can see some of the Filament tools. It offers search, pagination (with options to select how many records you want per page), column configuration (allowing you to show or hide columns), and row actions.
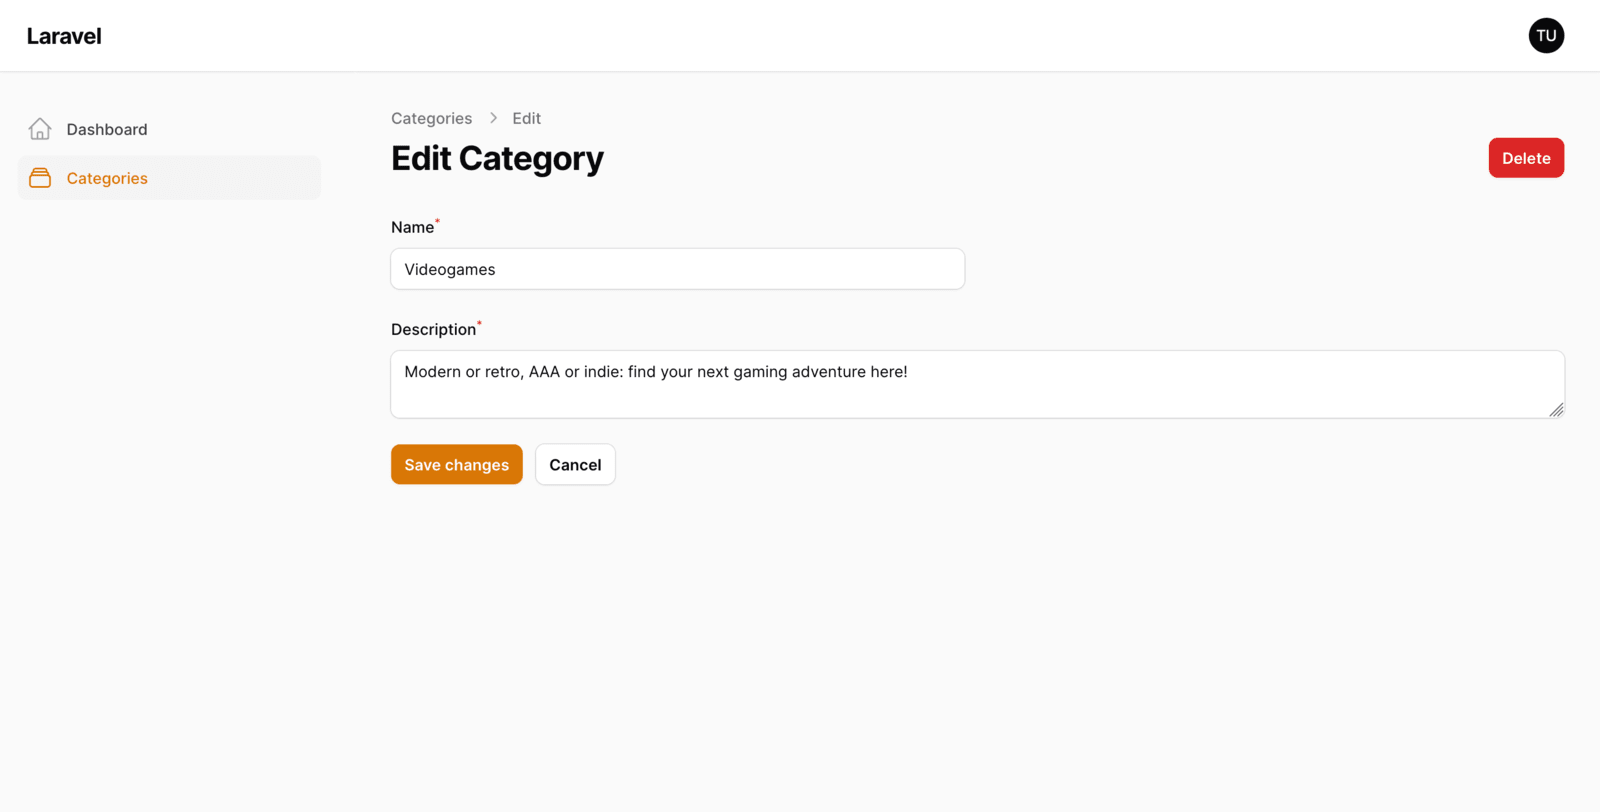
The only row action we see on the screen is "Edit." Once you click that button, you'll be redirected to the category edit page. From there, you can also delete the record.
Filament also offers bulk actions: when you select multiple rows, a "Bulk actions" button appears at the top of the table. If you click it, you'll see a dropdown with all the bulk actions available for the resource. By default, there's a single but valuable action: "Delete selected," which allows you to delete records in bulk.
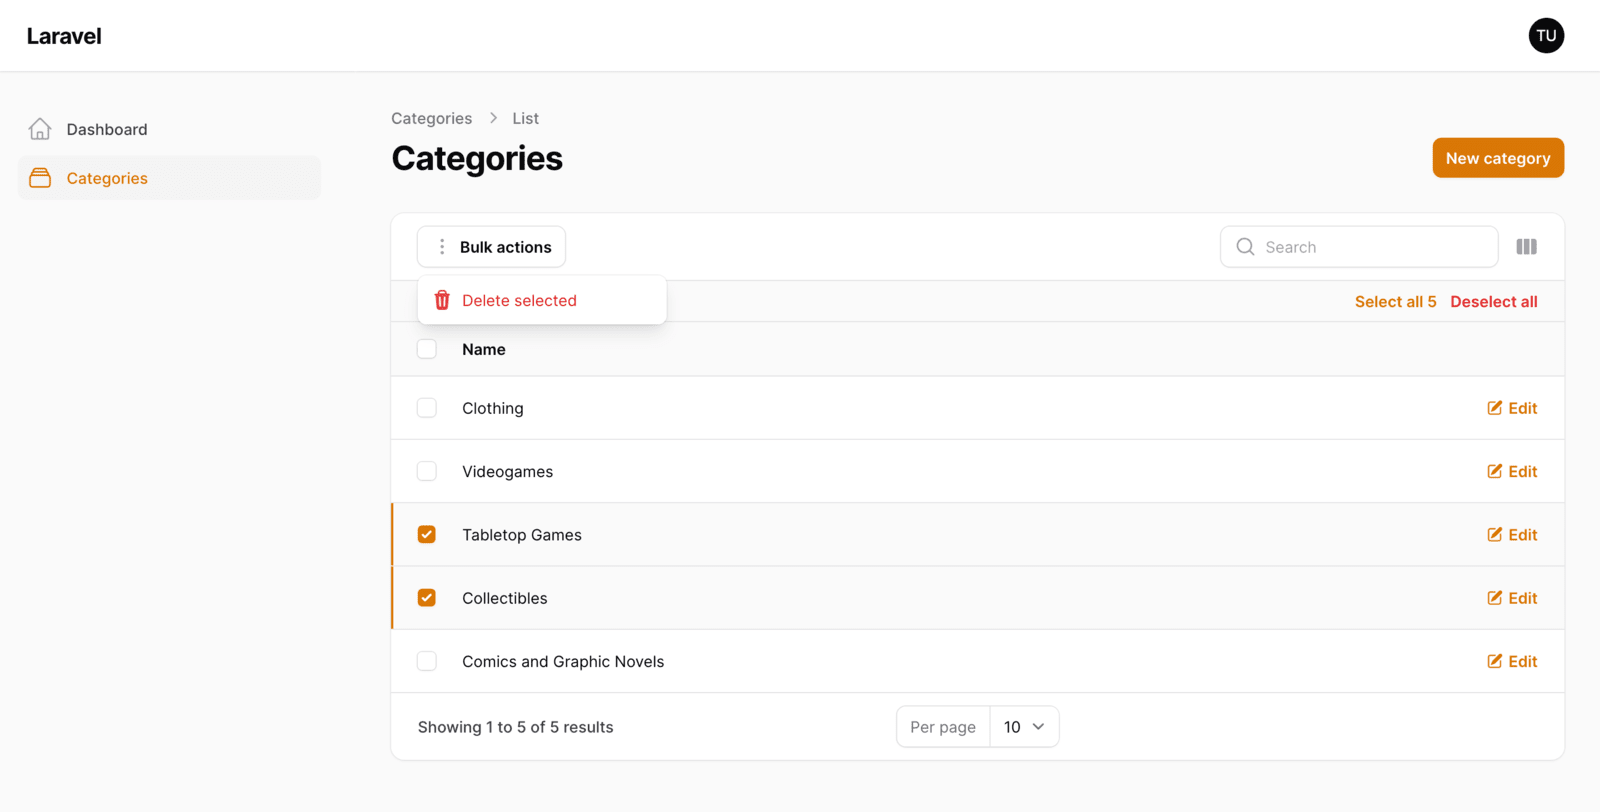
Great! Now that we know how to perform all the CRUD operations for a resource, we can go ahead and generate the rest of them:
php artisan make:filament-resource Product --generate
php artisan make:filament-resource Feature --generate
php artisan make:filament-resource Review --generate
If you refresh your browser, you'll see links to these resources in the sidebar.
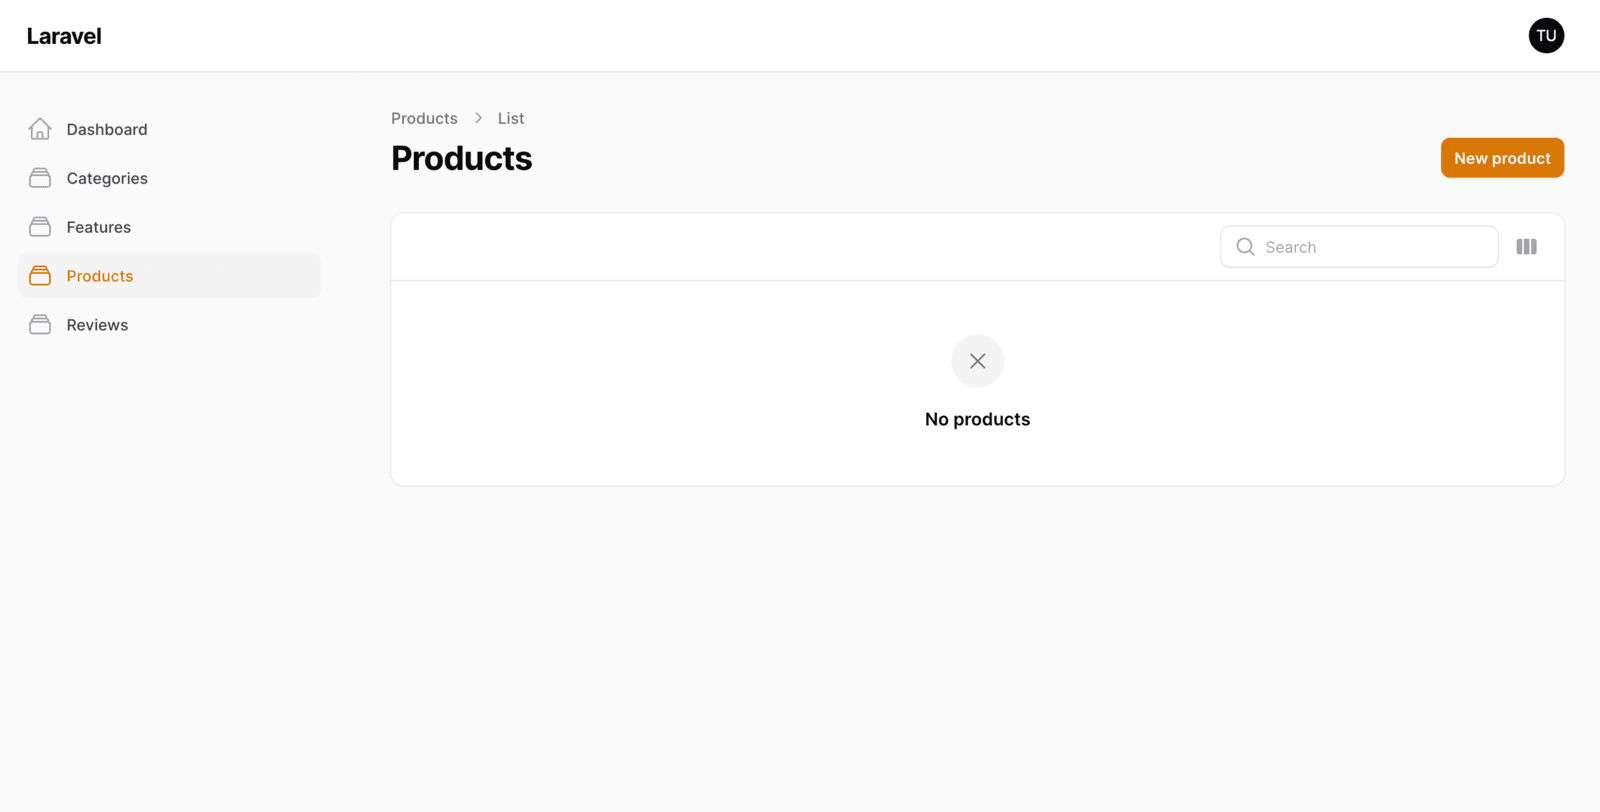
The tables and forms Filament generates are great, but we'll likely need to tweak them to add or remove fields, adjust the input types, or make similar adjustments. You can view them as a strong starting point that allows you to get an admin dashboard up and running quickly. But, in true Laravel fashion, Filament allows you to tailor every table and form to your needs.
How to Customize the Forms
Let's create a product, shall we?
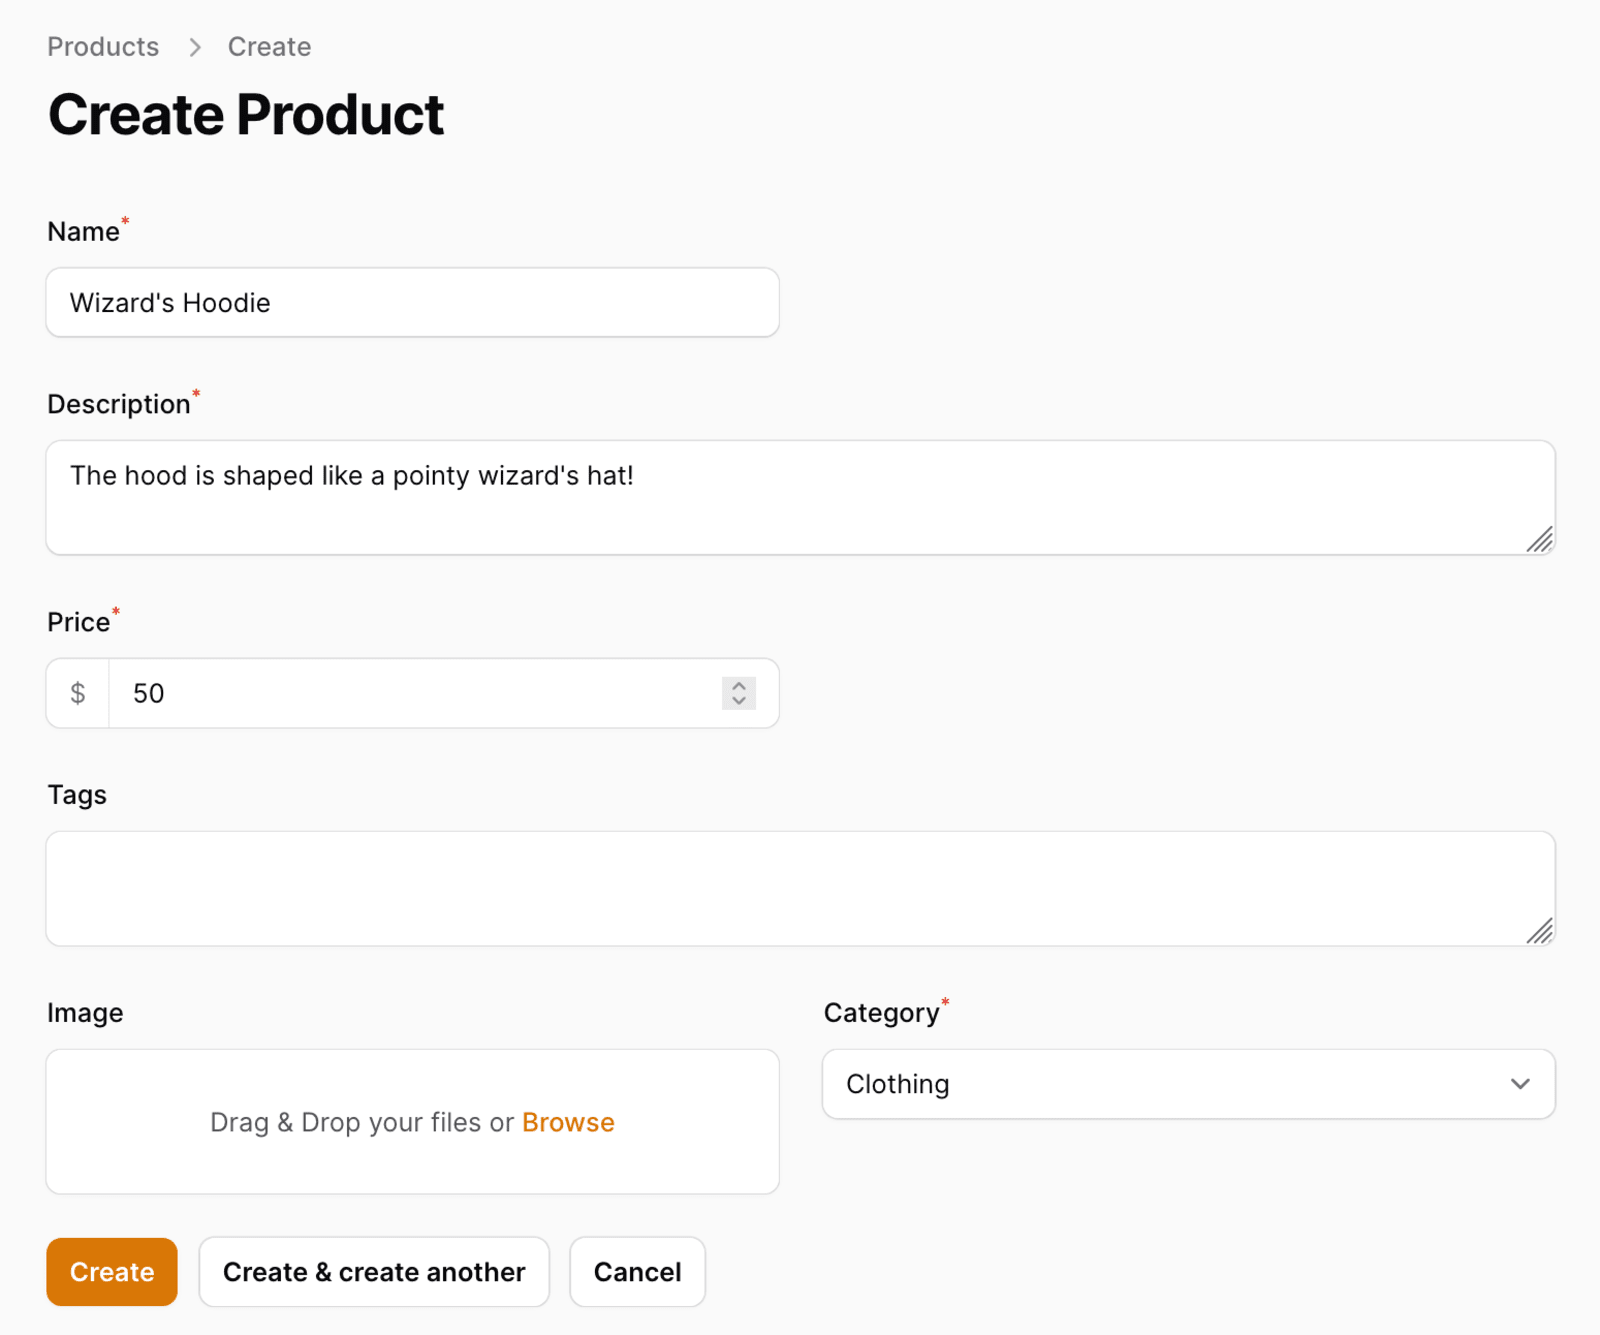
Filament automatically chooses the form component based on the name and type of each column. For example:
- A
stringcolumn gets a text input. - A
textcolumn gets a textarea. - A
belongsTorelationship field gets a select dropdown. - And so on!
If you're curious, you can dive into the form generator's source code. There you'll see how columns named cost or price (like ours) generate numeric inputs with a dollar sign prefix, and how columns containing the string image on their name (like ours) generate image uploaders.
Now, let's dive into the code Filament generated for our product resource, located in:
- app/Filament/Resources/ProductResource.php
Open that file in your code editor. This class has four main methods: form, table, getRelations, and getPages.
As you might have guessed, the form method is responsible for returning a schema of the form, defining the component that should be used for each editable field.
public static function form(Form $form): Form
{
    return $form
        ->schema([
            Forms\Components\TextInput::make('name')
                ->required(),
            Forms\Components\Textarea::make('description')
                ->required()
                ->columnSpanFull(),
            Forms\Components\TextInput::make('price')
                ->required()
                ->numeric()
                ->prefix('$'),
            Forms\Components\Textarea::make('tags')
                ->columnSpanFull(),
            Forms\Components\FileUpload::make('image')
                ->image(),
            Forms\Components\Select::make('category_id')
                ->relationship('category', 'name')
                ->required(),
        ]);
}
Let's break this down:
The
namefield (a string) is a standard text input with therequiredattribute:TextInput::make('name')->required()The
descriptionfield (a text) is a textarea, alsorequired, and spans the full width of the form:Textarea::make('description')->required()->columnSpanFull()The
pricefield (an integer) is a numeric input,required, with a "$" prefix:TextInput::make('price')->required()->numeric()->prefix('$')The
tagsfield (a JSON field) is a textarea for now (we'll replace this with an advanced tag selector later):Textarea::make('tags')->columnSpanFull()The
imagefield (a string) is a file uploader that only accepts image files:FileUpload::make('image')->image()The
category_idfield (an integer) is a select dropdown. Filament automatically uses thecategoriesrelationship to determine the options:Select::make('category_id')->relationship('category', 'name')->required()
Filament is pretty smart, right? But now, let's see how we can take this form to the next level.
Add a Rich Text Editor
Let's upgrade the simple textarea to a rich text editor. Filament has one built-in, so there's no need to install anything extra. Just update the following line:
-Forms\Components\Textarea::make('description')
+Forms\Components\RichEditor::make('description')
Done! Reload the form, and you'll now see the rich text editor.
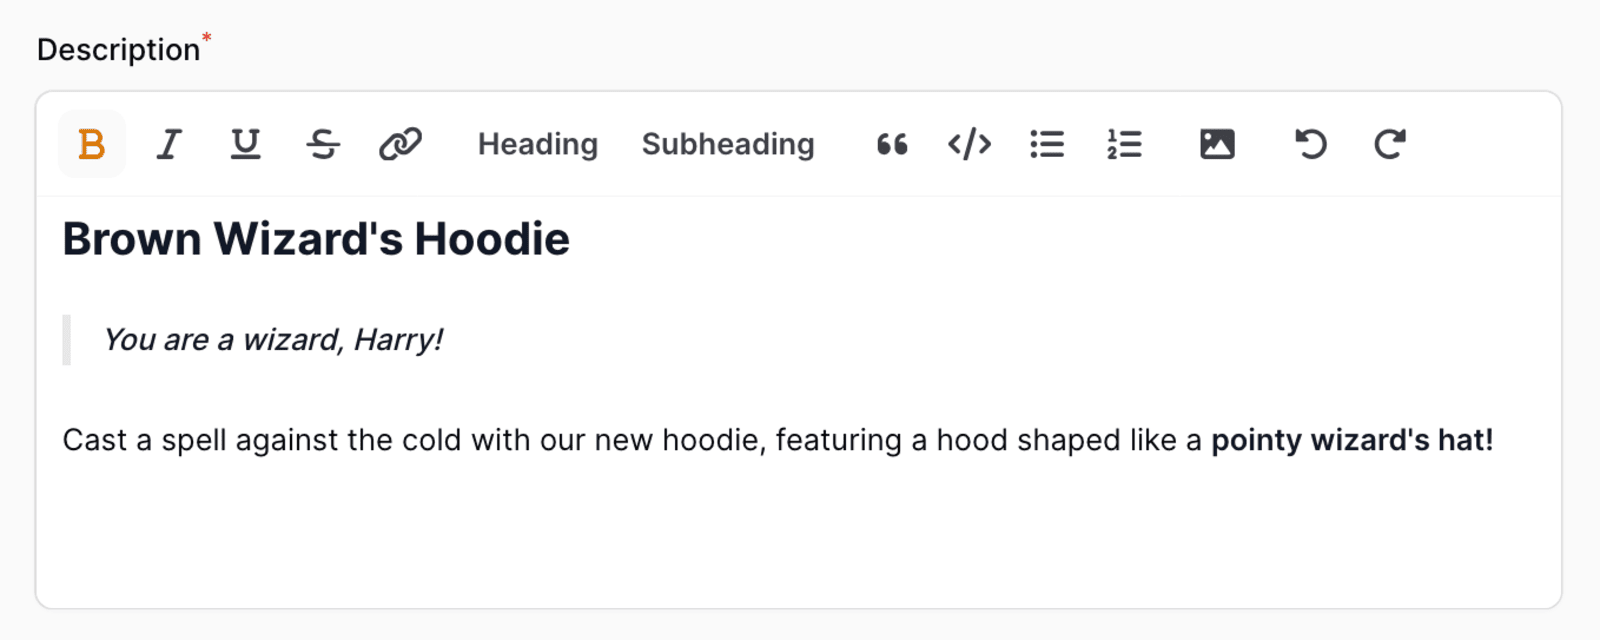
If you don't need certain buttons, you can easily hide them using disableToolbarButtons:
Forms\Components\RichEditor::make('description')
    ->required()
    ->disableToolbarButtons([ // [tl! highlight:4]
        'attachFiles',
        'strike',
        'underline'
    ])
Add a Tags Input
Next, let's replace the tags textarea with a tags input component. This is another useful built-in component, and using it is as simple as:
-Forms\Components\Textarea::make('tags')
+Forms\Components\TagsInput::make('tags')
Here's what it looks like:

Now, the tags will be saved as an array in the tags column of our products table, like this:
["Fantasy Apparel","Cozy Fit","Pointy Hood","Magic","Wizard"]
Enable the Image Editor
Filament created a file upload field for us, so we can upload the thumbnail of this product:
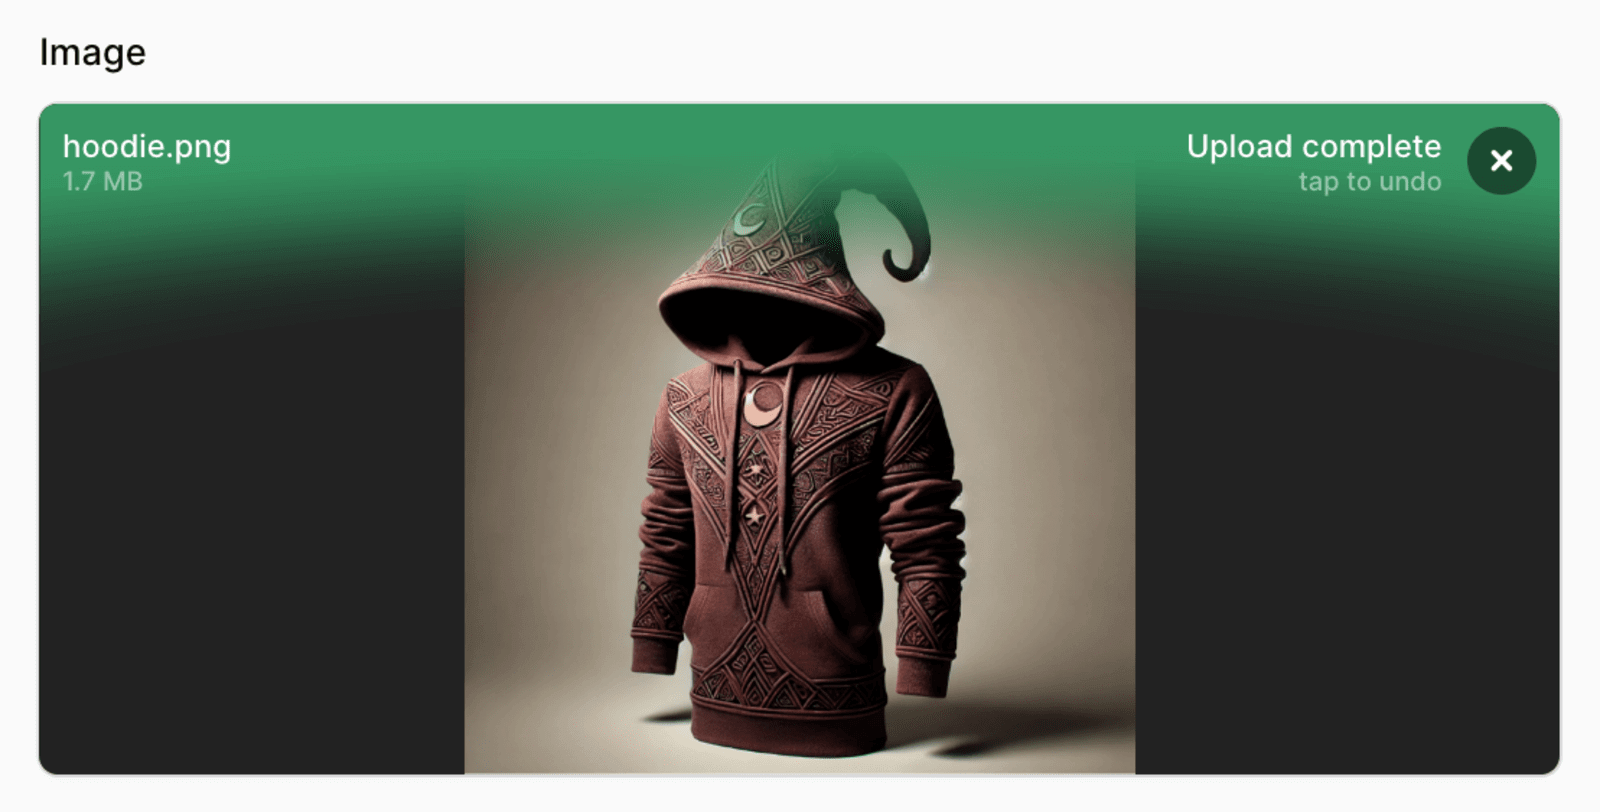
Under the hood (pun intended), Filament uses the Filepond JavaScript library for the file uploader. By default, the image will be stored in the default storage disk of your Laravel project, but you can easily customize it.
If you don't see the image after saving, check for CORS errors:
- Ensure your
APP_URLmatches the URL you're using to test. For example, if you're using Valet or Herd, then you should haveAPP_URL=http://demo-filament.test - If you're hosting images on a separate domain, such as an S3 bucket, make sure your CORS headers are configured properly.
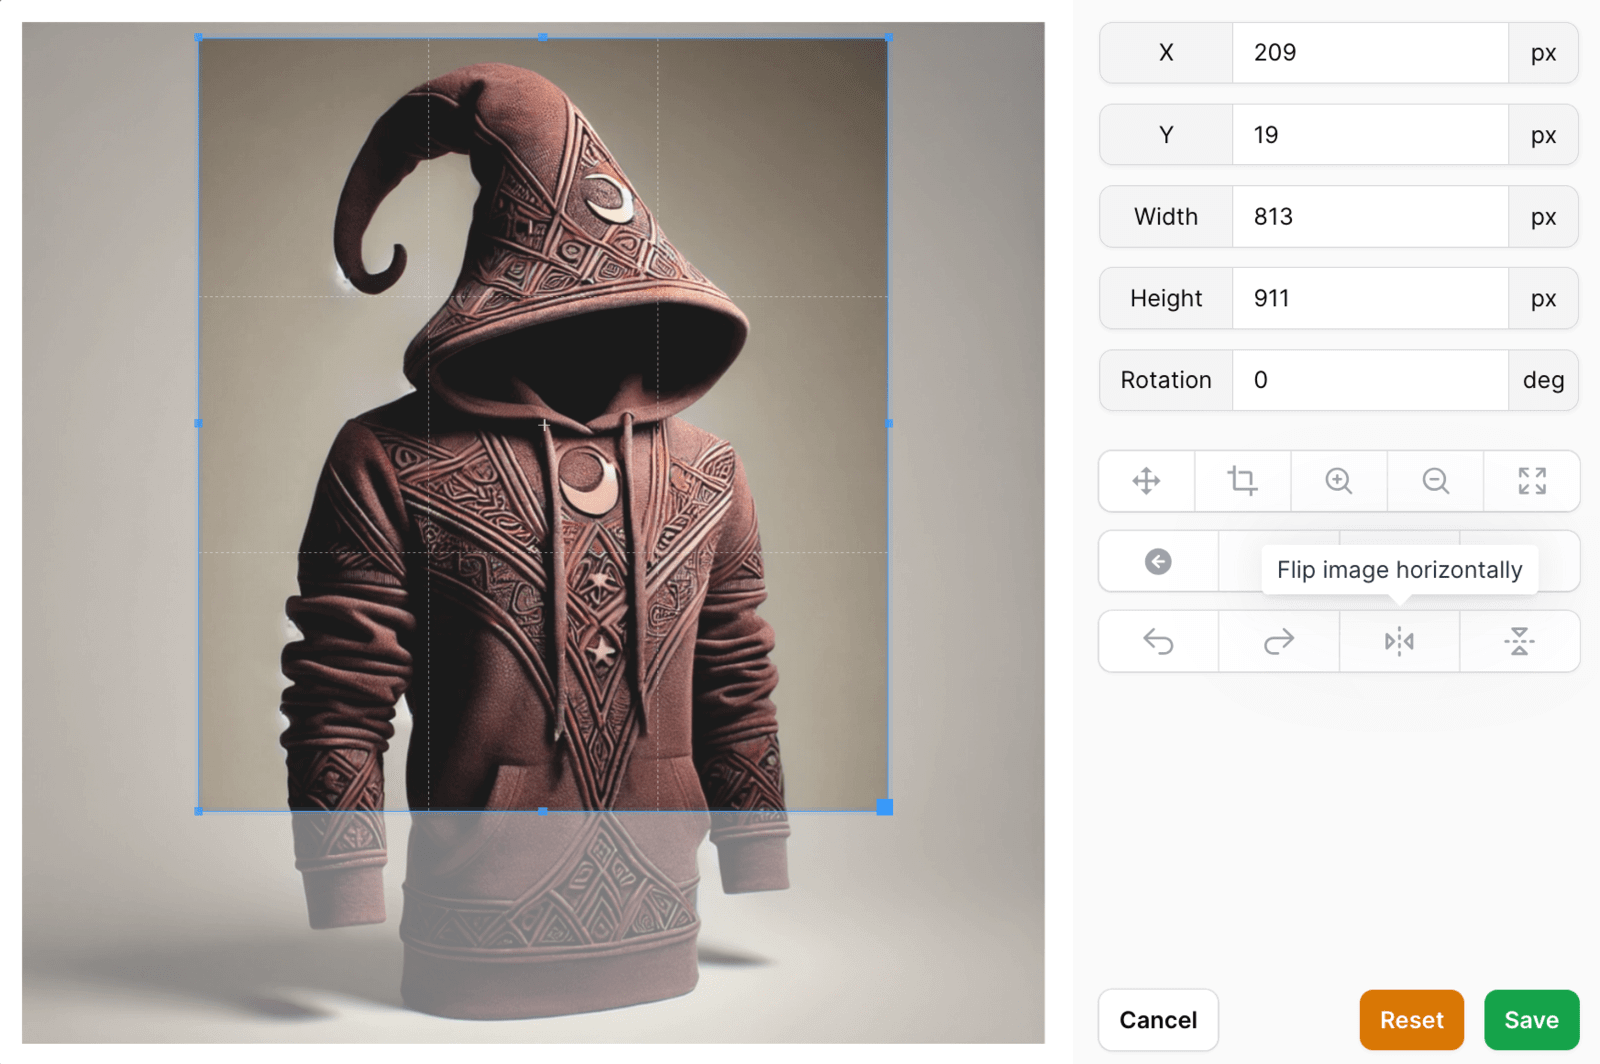
Now, let's enable an image editor:
Forms\Components\FileUpload::make('image')
    ->image()
    ->imageEditor(), // [tl! highlight]
Refresh the page, and you'll notice a small button with a pencil icon on the image thumbnail. Clicking it opens a modal with an image editor, where you can crop, flip, rotate, and move the image, then save your changes.
Tweak the Layout
Our form looks great! Let's give it a final touch by reordering the fields. Adjust the order of the elements in the array passed to the schema function to list them in this order: name, price, description, image, tags, and category.
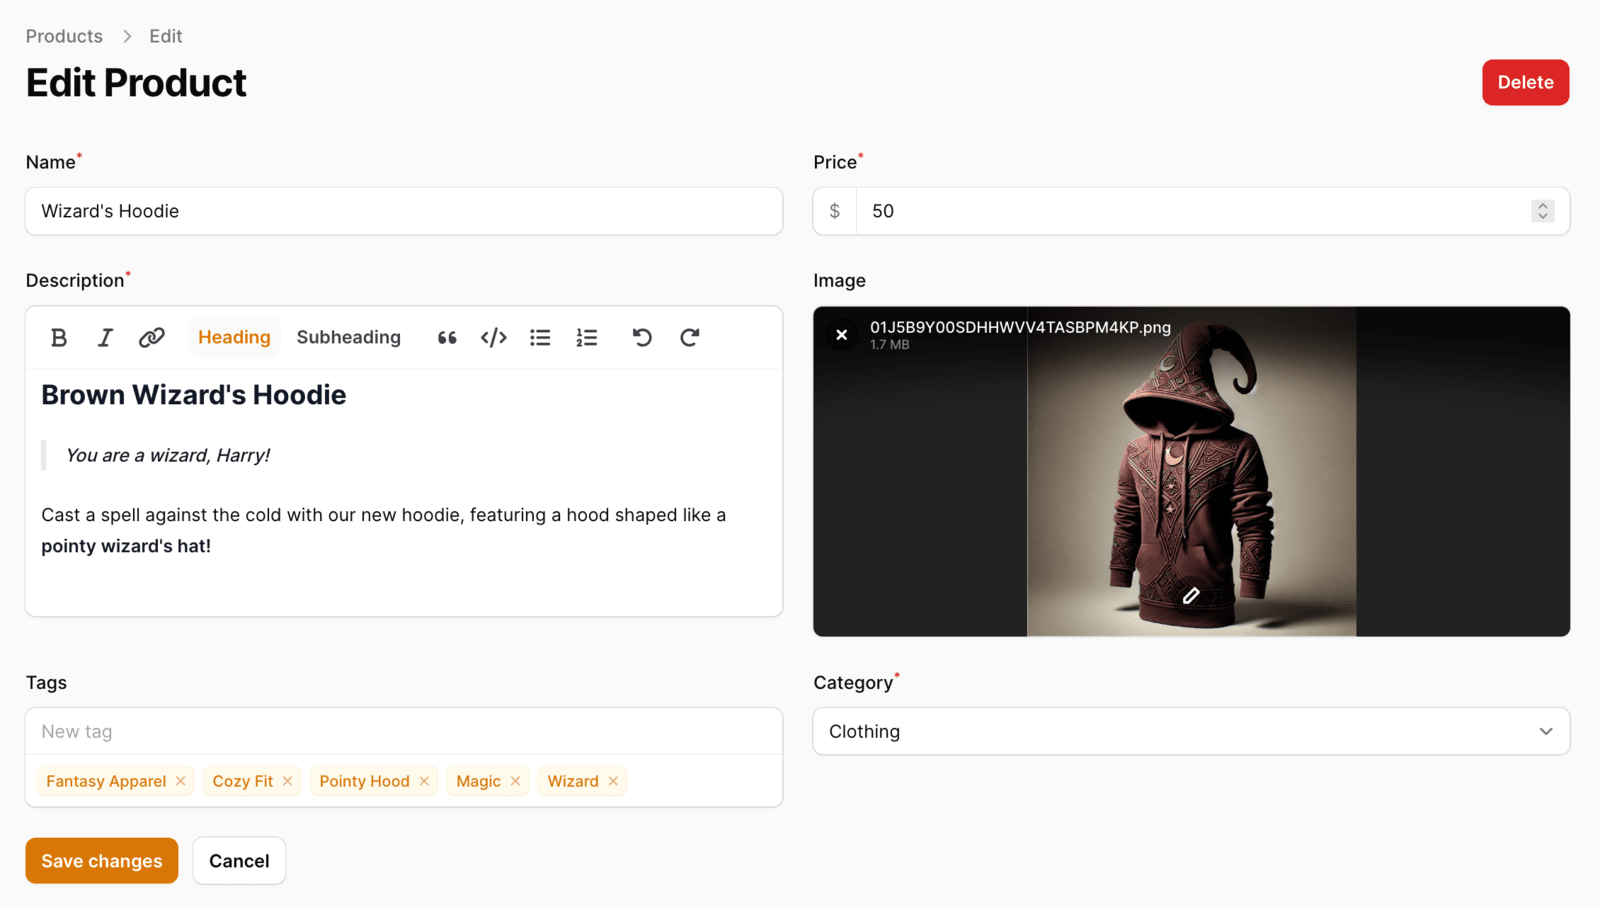
By default, all Filament forms have two columns on large screens. If you want to change this, use the columns method:
public static function form(Form $form): Form
{
    return $form->schema(...)->columns(1);
}
Alternatively, if you want a single field to span multiple columns, you can use the columnSpan method:
TextInput::make('name')->columnSpan(2)
Or use columnSpanFull to make it full width:
TextInput::make('name')->columnSpanFull()
How to Manage Relationships
Our Product model has three relationships:
- A
belongsTorelationship with the Category model. Each product belongs to a category. - A
belongsToManyrelationship with the Feature model. Each product can have multiple features, and each feature can be associated with numerous products. - A
hasManyrelationship with the Review model. A product can have many reviews, but each review belongs to a single product.
Let's set up Filament to manage relationships from the edit product page.
Belongs-To Relationship
This is actually quite simple—and it's already done for us! As we've seen earlier, the generate command automatically sets up a select dropdown for choosing the category on the product form.
If your models have belongsTo relationships and you're using Laravel's naming conventions for your table columns, you'll automatically get this kind of select dropdown when you generate resources.
Select::make('category_id')->relationship('category', 'name')
Belongs-To-Many Relationship
Let's start by creating records from the Feature resource page. We'll use these when managing a product's features. You might have many, but for this tutorial, around five will do:
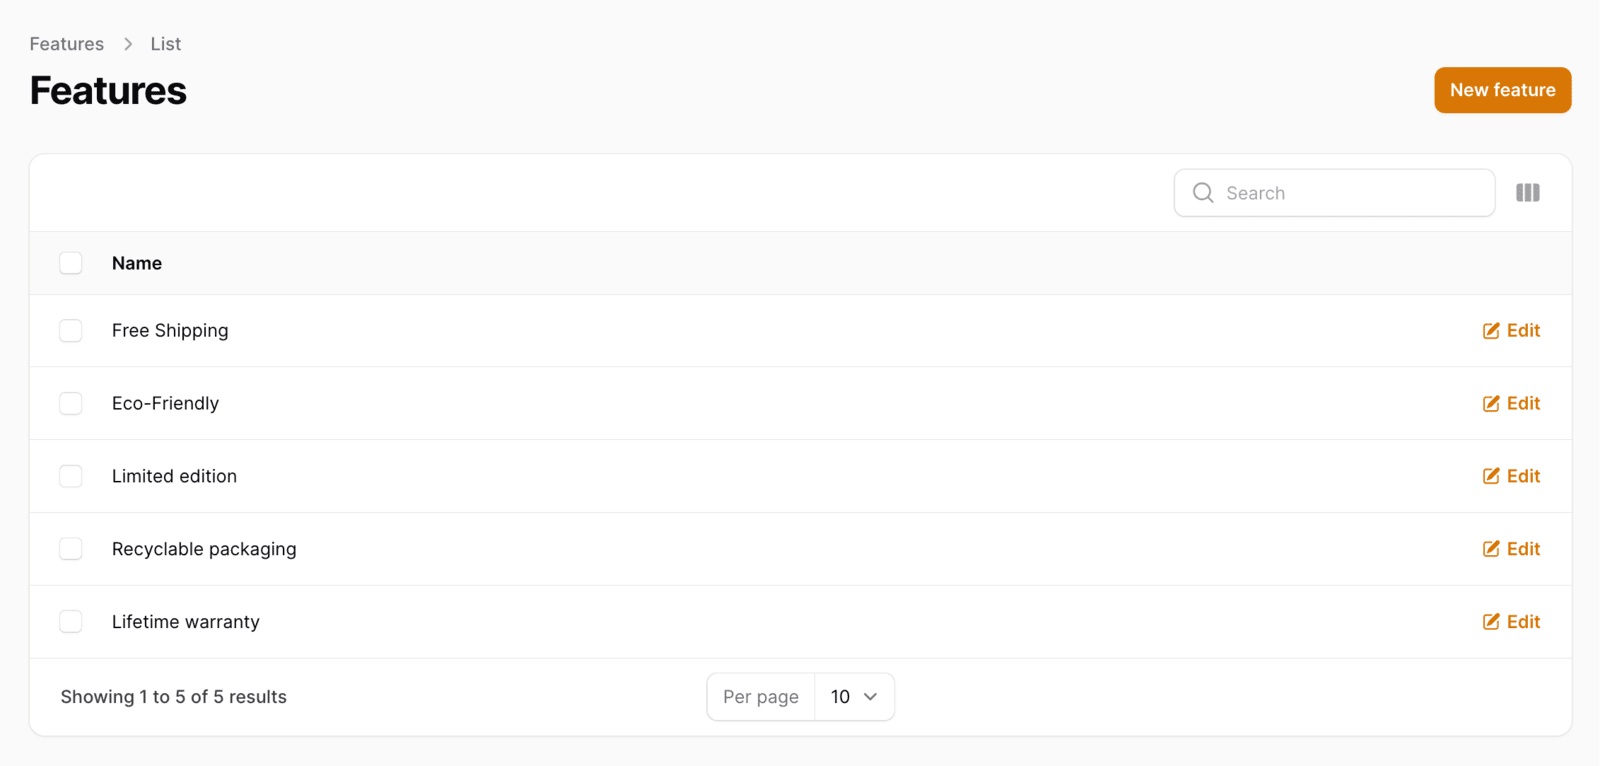
We aim to manage a product's features directly from its edit page. To do this, we can use Filament's checkbox list. This component will display a list of checkboxes, making it easy to quickly associate features with a product.
To implement this, navigate to the form method in the ProductResource and add the following code at the bottom:
public static function form(Form $form): Form
{
    return $form
        ->schema([
            // Other fields...
            Forms\Components\CheckboxList::make('features') // [tl! highlight:1]
                ->relationship(titleAttribute: 'name')
        ]);
}
Now, when you visit the page to create or edit a product, you'll see a list of checkboxes at the bottom of the form for selecting available features:
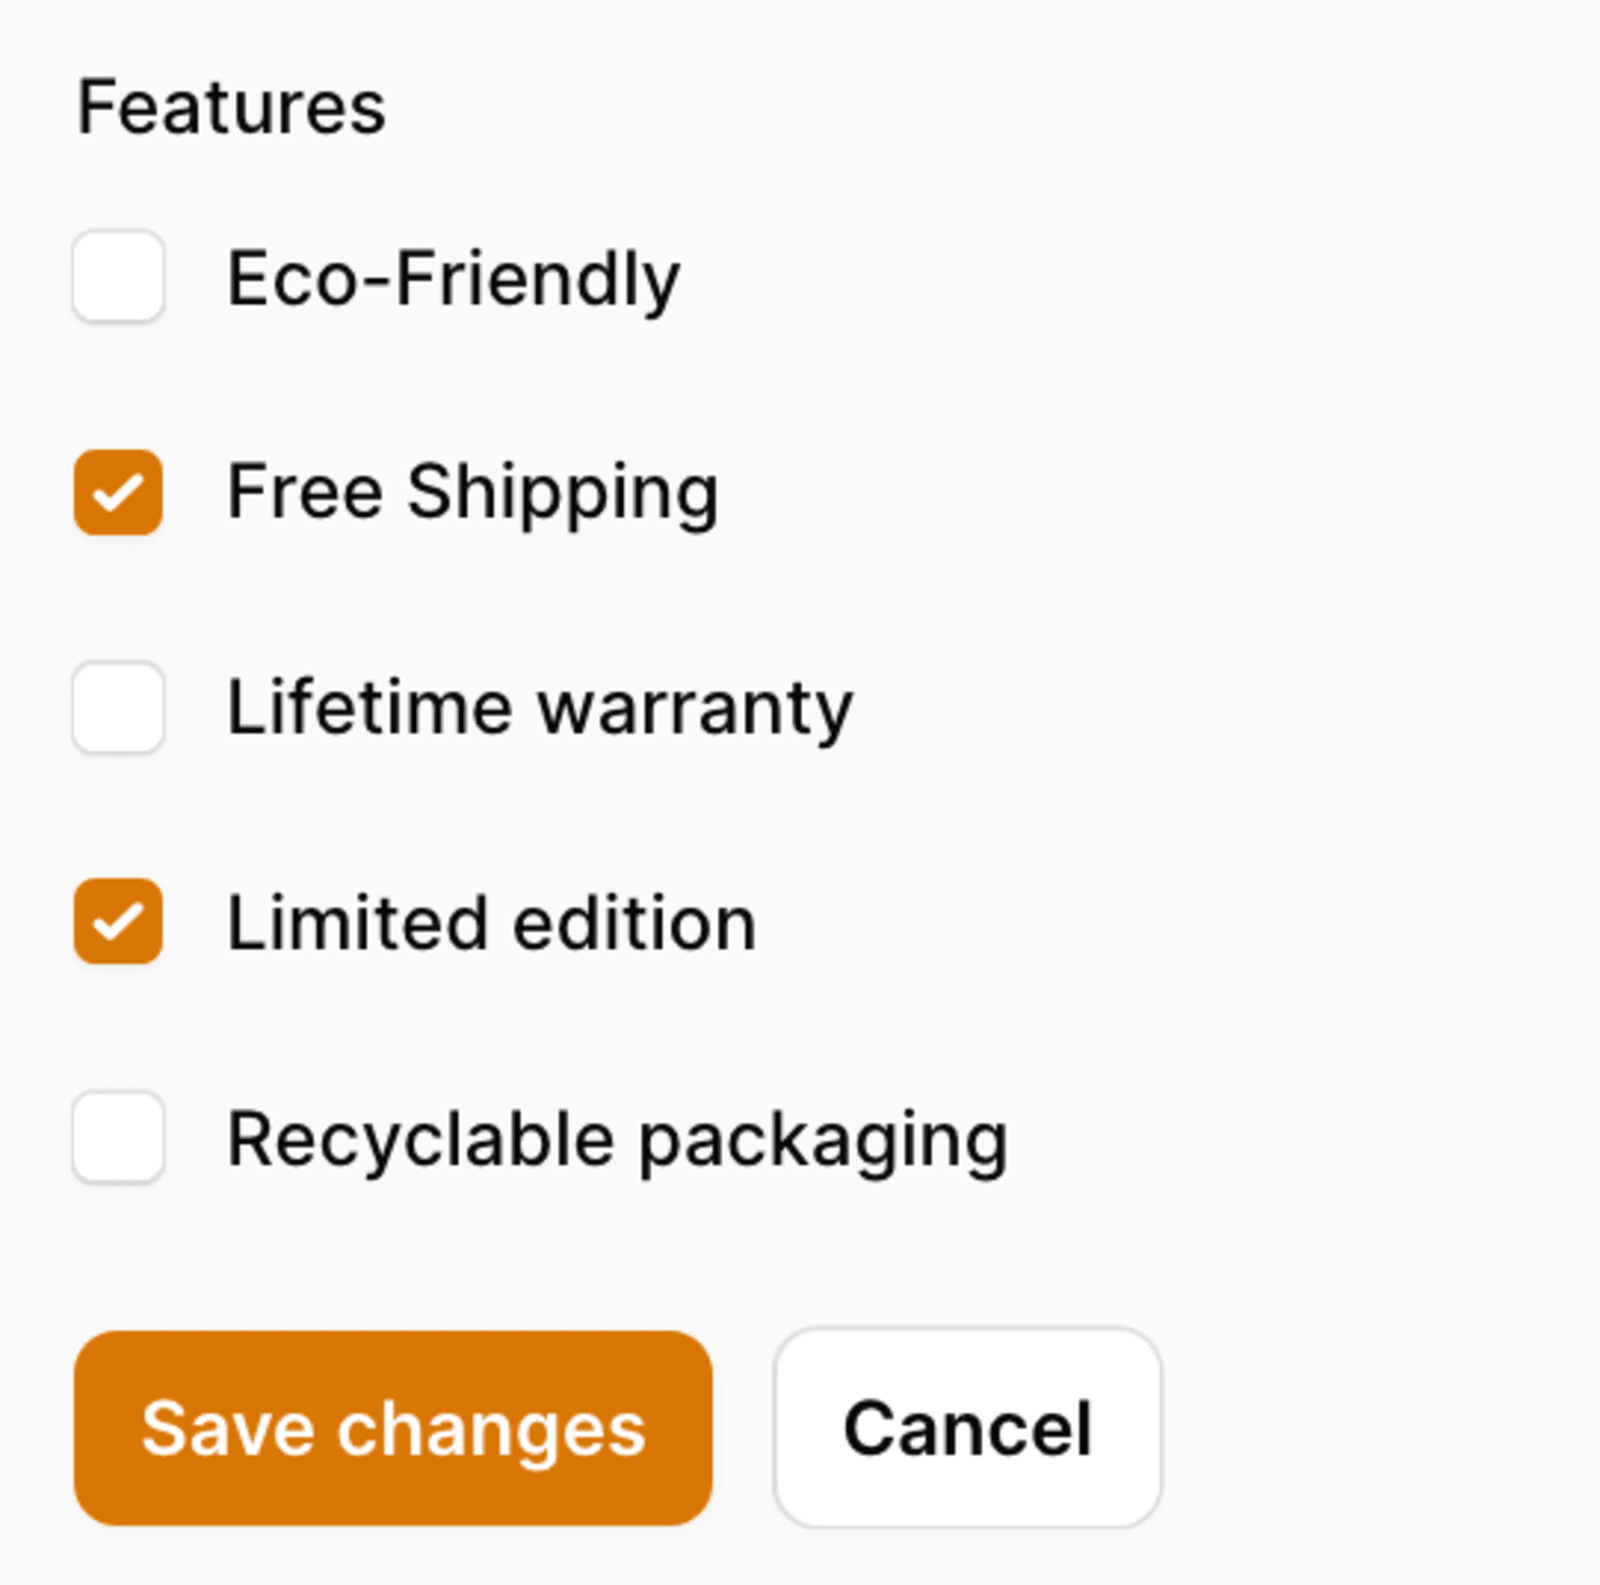
If you have many records, you can display them in two columns using the columns method. Additionally, you can add a search input to find records more quickly with searchable:
Forms\Components\CheckboxList::make('features')
    ->relationship(titleAttribute: 'name')
    ->columns(2) // [tl! highlight:1]
    ->searchable()
This is how it looks:

If you check two features (for example, the features with IDs 1 and 3) and save the changes, the pivot table for the relationship (feature_product) will be updated. This is equivalent to calling $product->sync([1, 3]):
+------------+------------+
| feature_id | product_id |
+------------+------------+
|          1 |          1 |
|          3 |          1 |
+------------+------------+
Has-Many Relationship
A product can receive reviews, likely submitted by buyers through a form on your store's website. These reviews may be displayed on the product page, and their ratings may contribute to its average rating. However, for them to count, they need to be approved first. This means we need a way for admins to quickly read, approve, or delete these reviews.
To manage this one-to-many relationship, we'll use a relation manager, a class that defines a form and table for the relationship within the context of its parent.
Let's create the manager for the product reviews with this command:
php artisan make:filament-relation-manager ProductResource reviews title
Here's a breakdown of the parameters:
ProductResourceis the name of the resource class where we want to use the relation manager.reviewsis the name of the relationship we want to manage.titleis the attribute used to identify related records.
Filament will create the manager and save it in the following location:
app/Filament/Resources/ProductResource/RelationManagers/ReviewsRelationManager.php
The terminal output will remind us to:
Make sure to register the relation in
ProductResource::getRelations().
Alright, let's do that:
public static function getRelations(): array
{
    return [
        RelationManagers\ReviewsRelationManager::class, // [tl! highlight]
    ];
}
Now, when you visit a product, a table listing its reviews will appear below the main form:
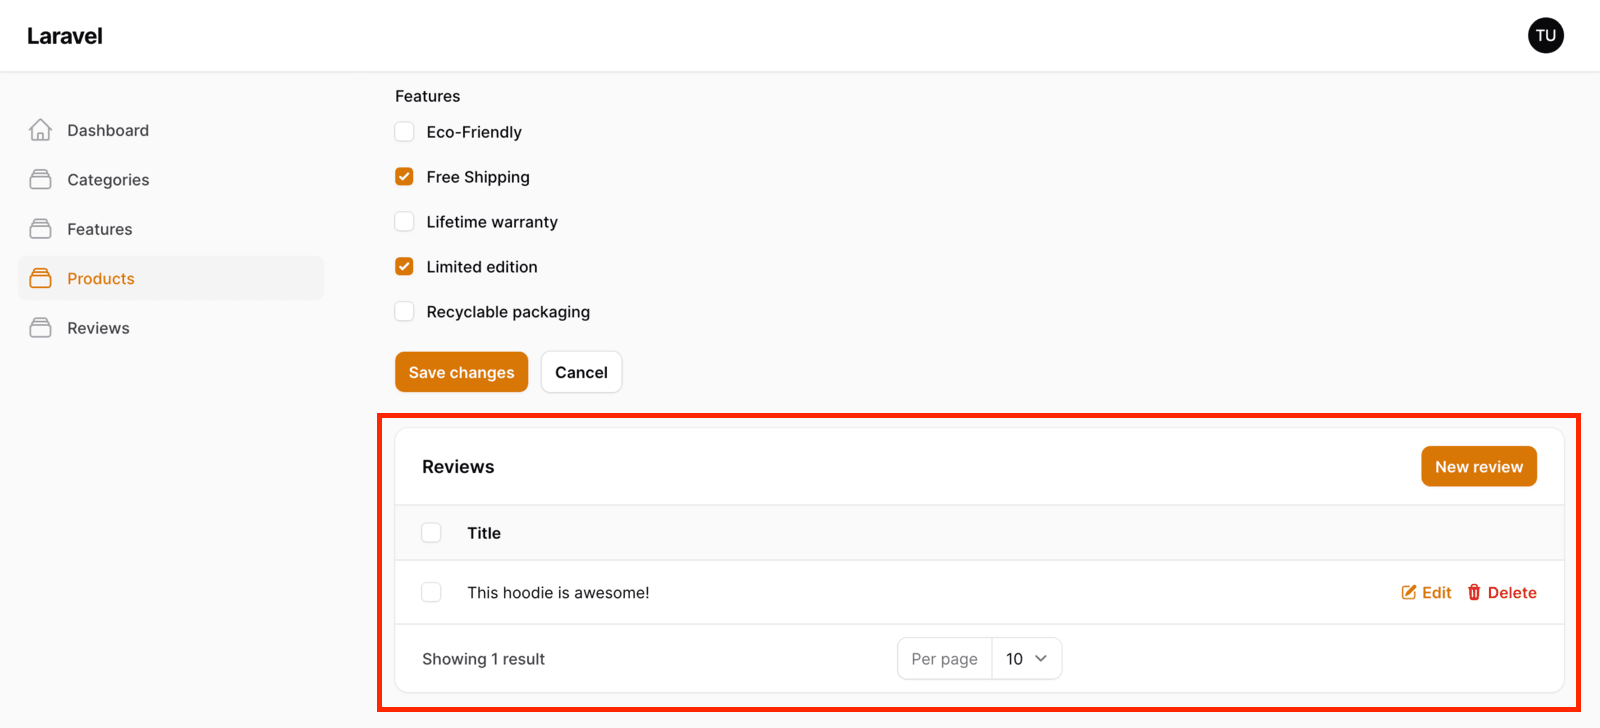
Clicking the "Edit" button on any row opens a modal where you can edit the review. By default, this form includes only the title field we specified in the command we ran to generate the manager.
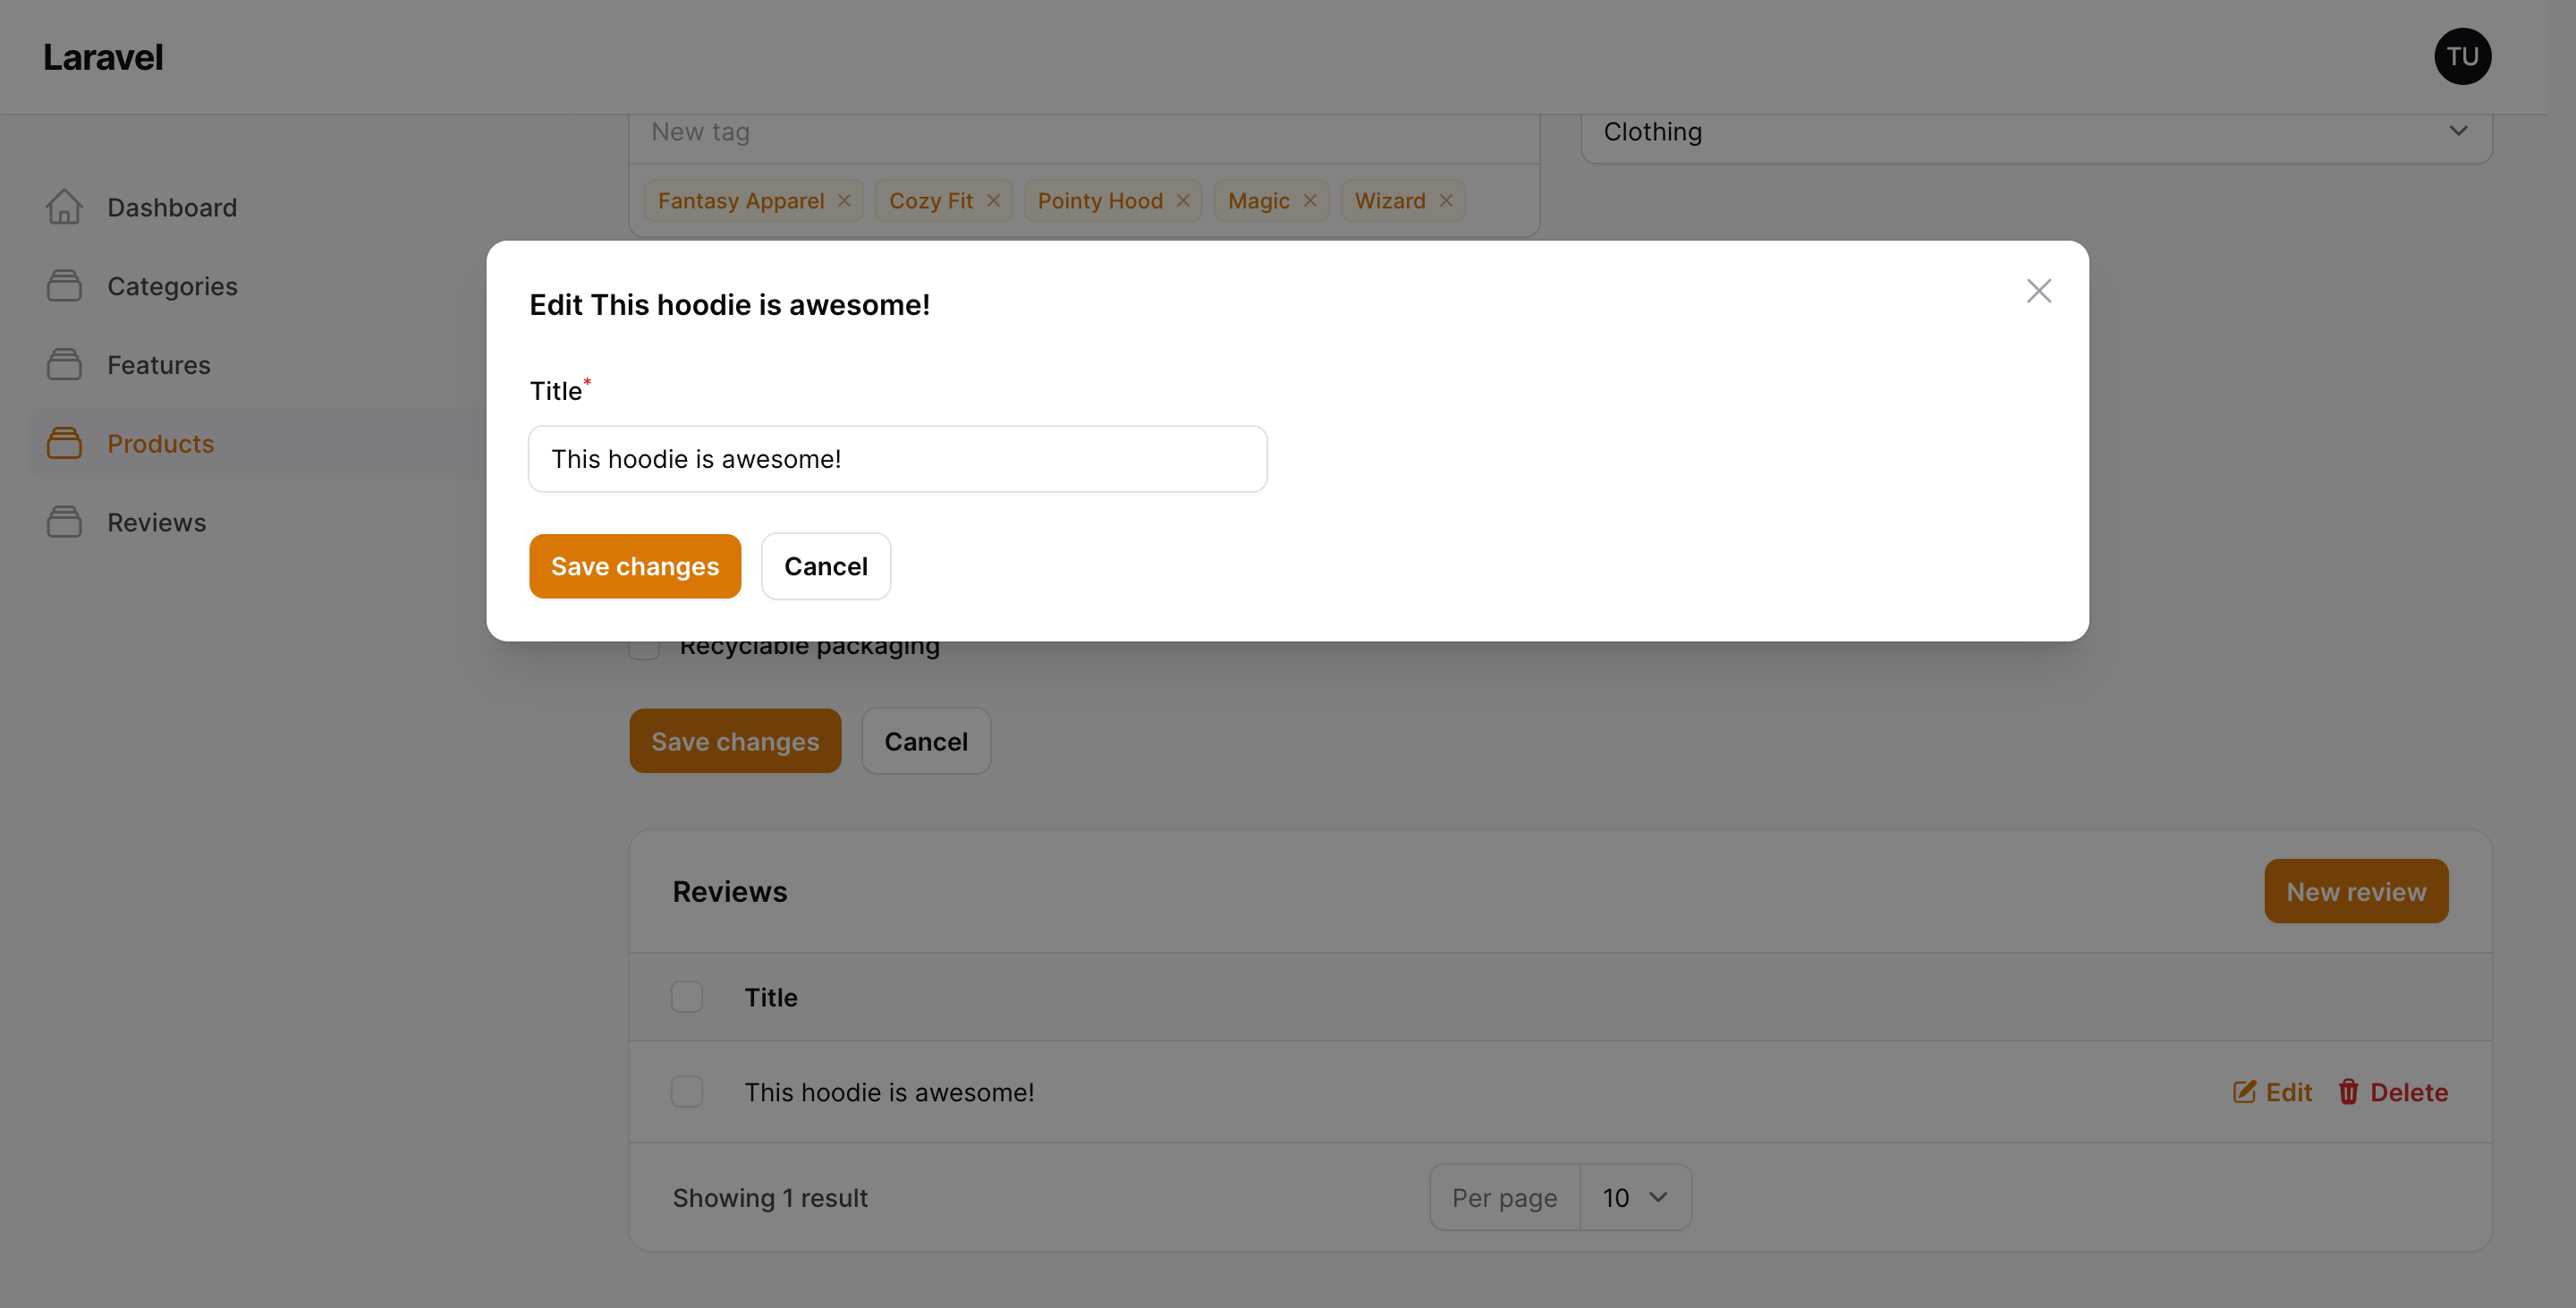
We want to use this modal to view the title and content of the review, as well as to approve it. So open ReviewsRelationManager and edit the form method:
public function form(Form $form): Form
{
    return $form
        ->schema([
            Forms\Components\TextInput::make('title')
                ->required()
                ->maxLength(255),
            Forms\Components\Textarea::make('content') // [tl! highlight:6]
                ->required(),
            Forms\Components\TextInput::make('rating')
                ->required()
                ->numeric(),
            Forms\Components\Toggle::make('approved')
                ->required(),
        ])
        ->columns(1);  // [tl! highlight]
}
This adds the content textarea, the rating input and the approved toggle, and adjusts the form layout to show fields in a single full-width column. Now, the modal form should look like this:
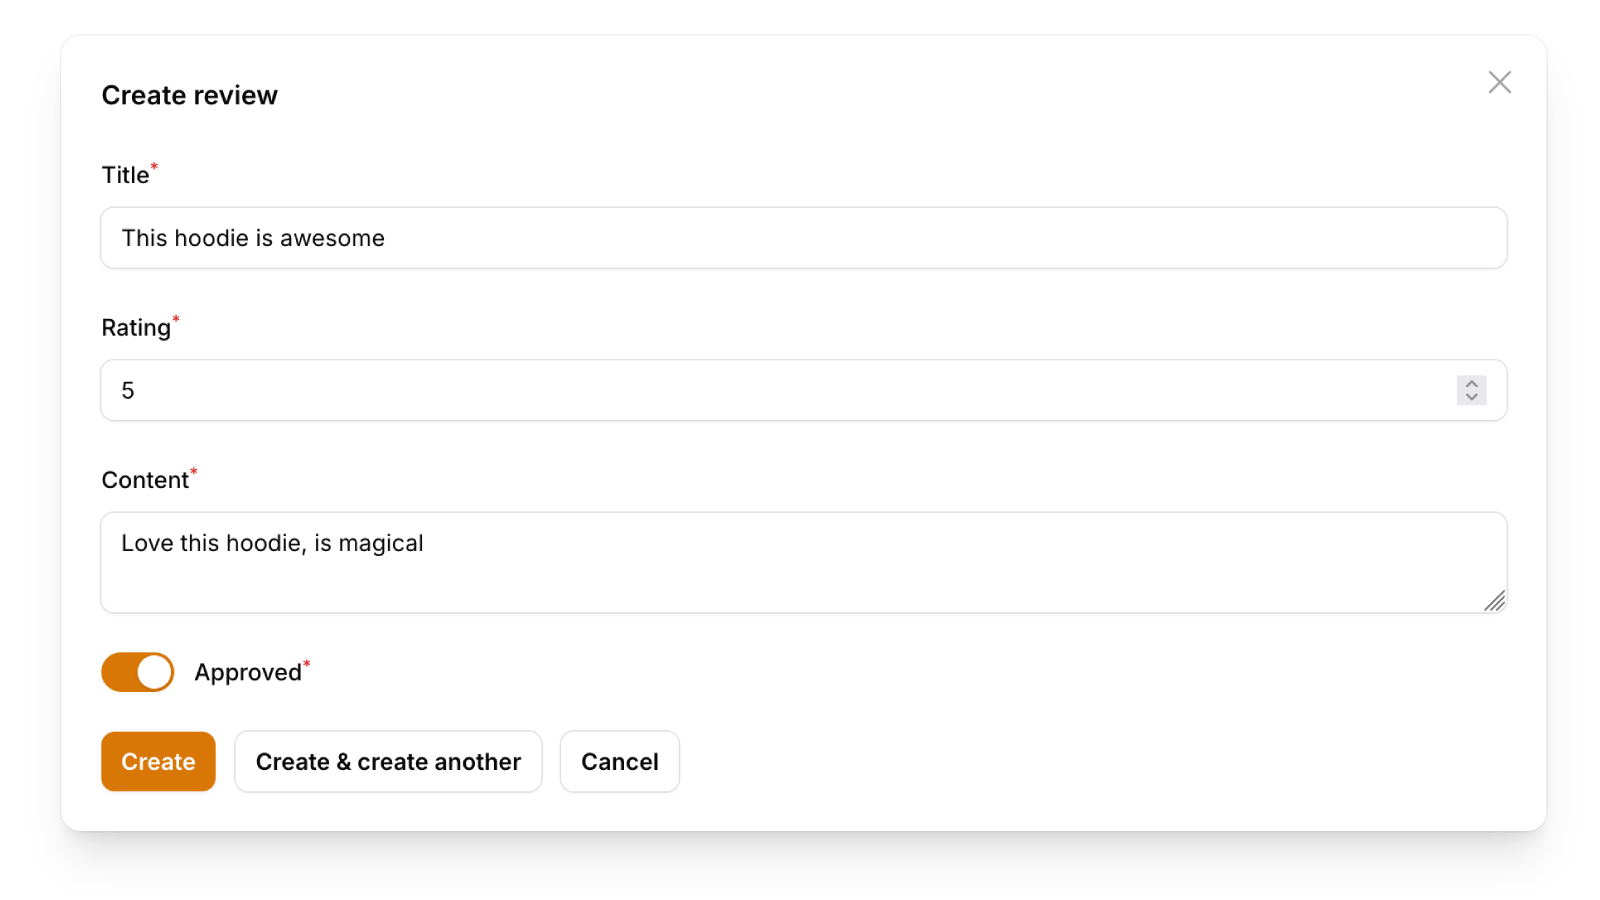
Great! Now you can manage all the reviews for a product directly from its edit page.
How to Improve Tables
Filament does an excellent job when it comes to scaffolding tables. For example, here's the Reviews table:
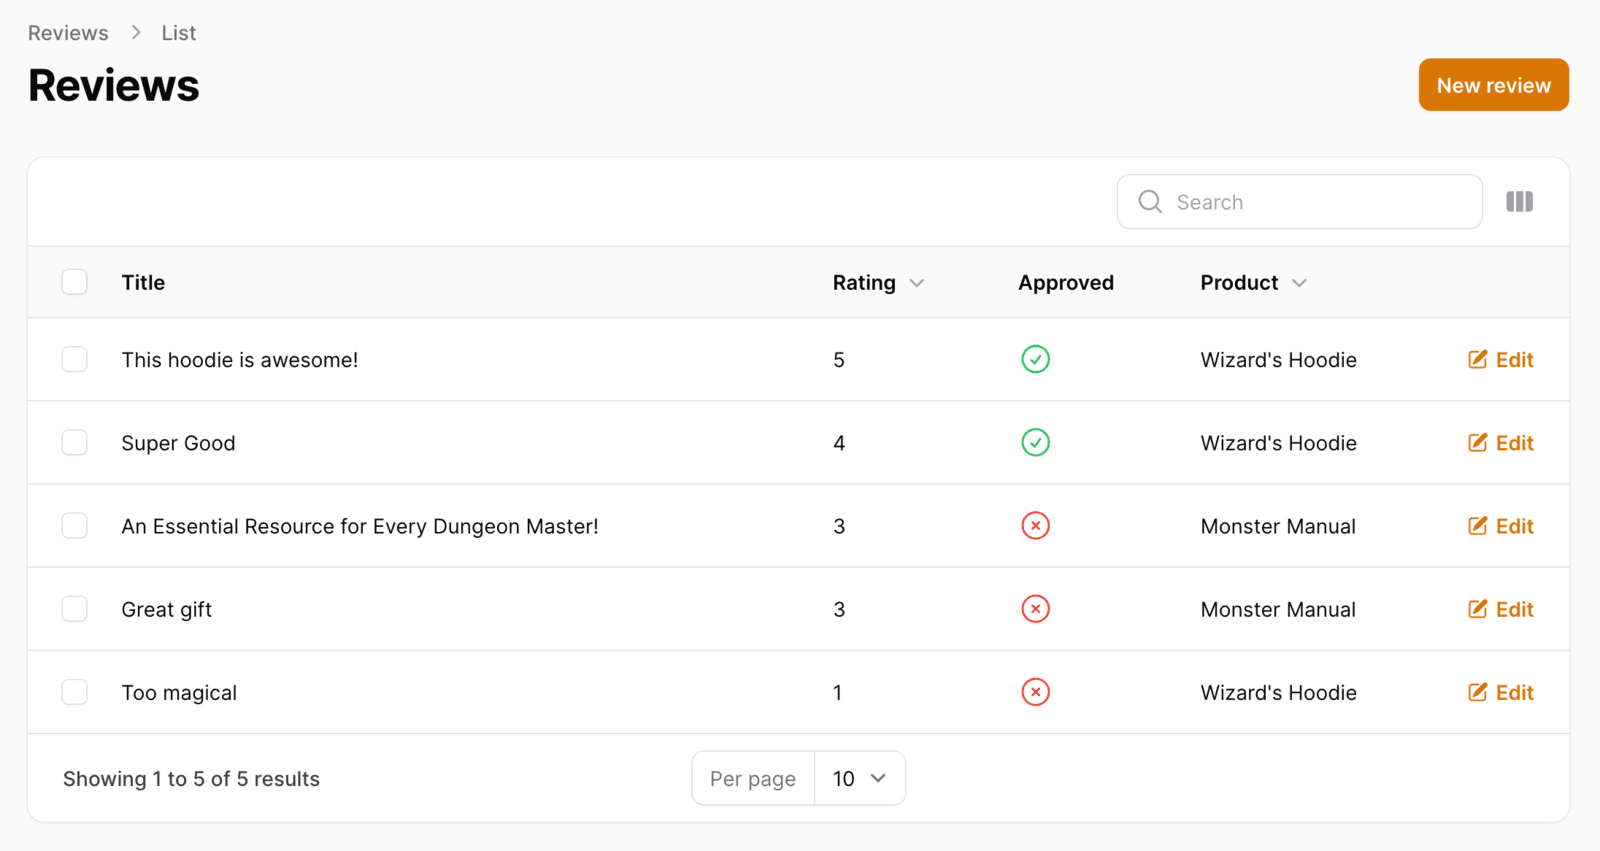
As you can see, it includes all the main columns, even displaying a nice icon for the boolean "Approved" column. However, we can always tweak it to better suit our needs. Let's explore how to add a filter and a bulk action to enhance the table.
Filters
Suppose we want to list only the reviews that have yet to be approved. To do this, navigate to the ReviewResource and locate the table method. This method calls the columns function, which we're already familiar with, and a filters function, where we'll add our custom filters.
public static function table(Table $table): Table
{
    return $table
        ->columns([
            // All the columns...
        ])
        ->filters([
            // Add filters here!
        ]);
}
Creating a filter is straightforward. The Filter query receives a query builder that allows us to specify conditions for selecting the records to display in the table.
->filters([
  Tables\Filters\Filter::make('not_approved') // [tl! highlight:2]
    ->query(fn (Builder $query): Builder => $query->where('approved', false))
    ->label('Not approved')
])
After adding this code, reload the page. You'll see a "filter" button to the right of the search input. Clicking it will open a box displaying all available filters, including the "Not approved" filter we just created.
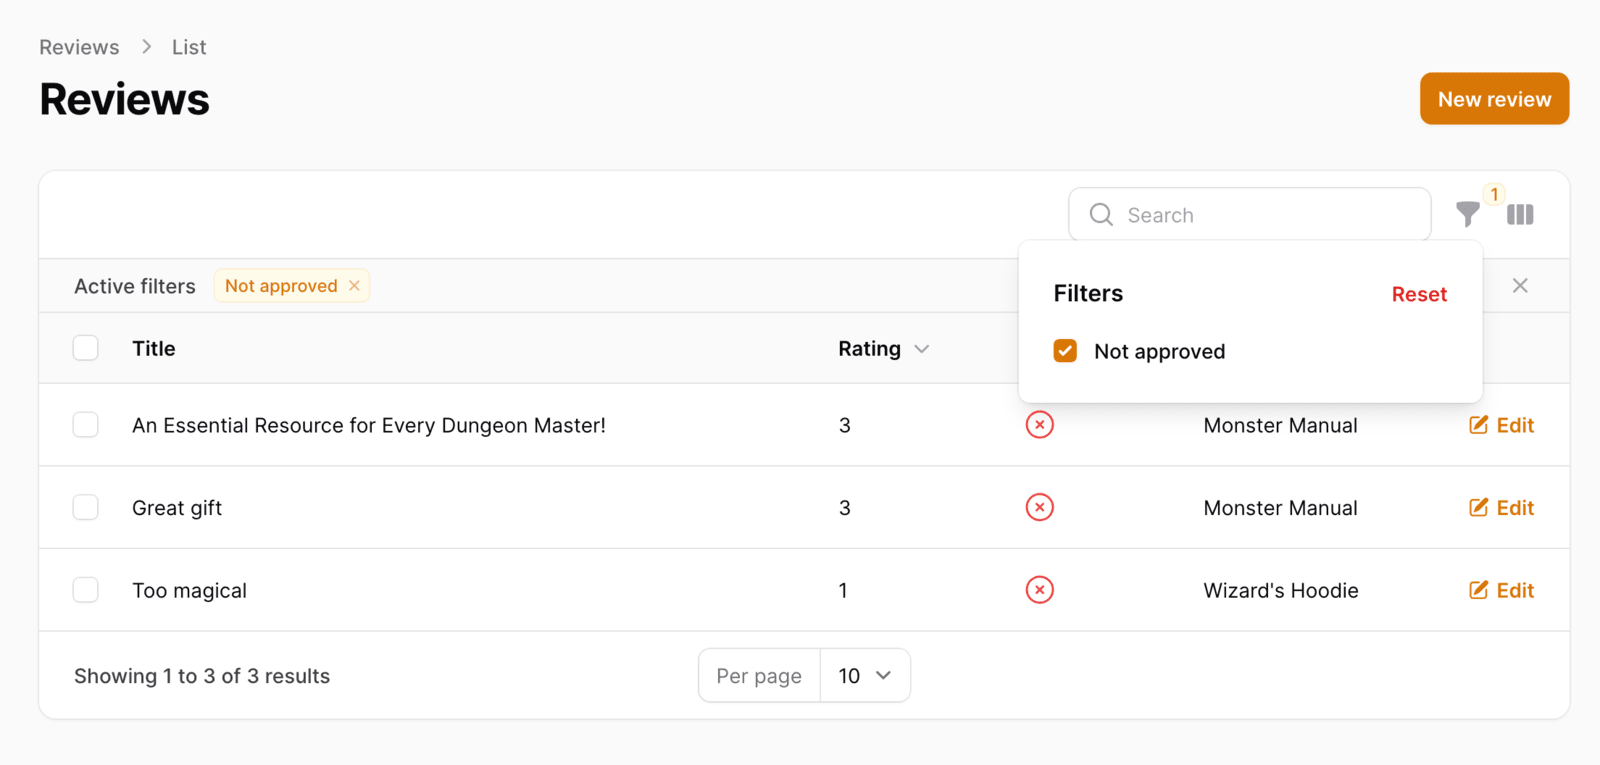
You can create additional filters, such as one to show only 5-star reviews. The Filament documentation provides all the guidance you need to give it a try.
Actions
It would be useful to approve multiple reviews simultaneously, so let's create a bulk action for this. Start by adding the necessary classes at the top of ReviewResource:
use Illuminate\Database\Eloquent\Collection;
use Filament\Tables\Actions\BulkAction;
Next, locate the bulkActions function within the table method (a few lines below the filters we edited earlier). Add the following code:
->bulkActions([
    Tables\Actions\BulkActionGroup::make([
        Tables\Actions\DeleteBulkAction::make(),
        BulkAction::make('approve')  // [tl! highlight:3]
            ->icon('heroicon-m-check')
            ->requiresConfirmation()
            ->action(fn (Collection $records) => $records->each->approve())
    ]),
]);
This code adds an "Approve" button to the "Bulk Actions" menu. The button will have a "check" icon from the Heroicons library. When clicked, it will trigger a confirmation dialog. If confirmed, the action will loop through the selected records and call the approve method on each one. You can define that method in your Review model like this:
public function approve()
{
    $this->update(['approved' => true]);
}
Now, reload the panel and select some reviews:
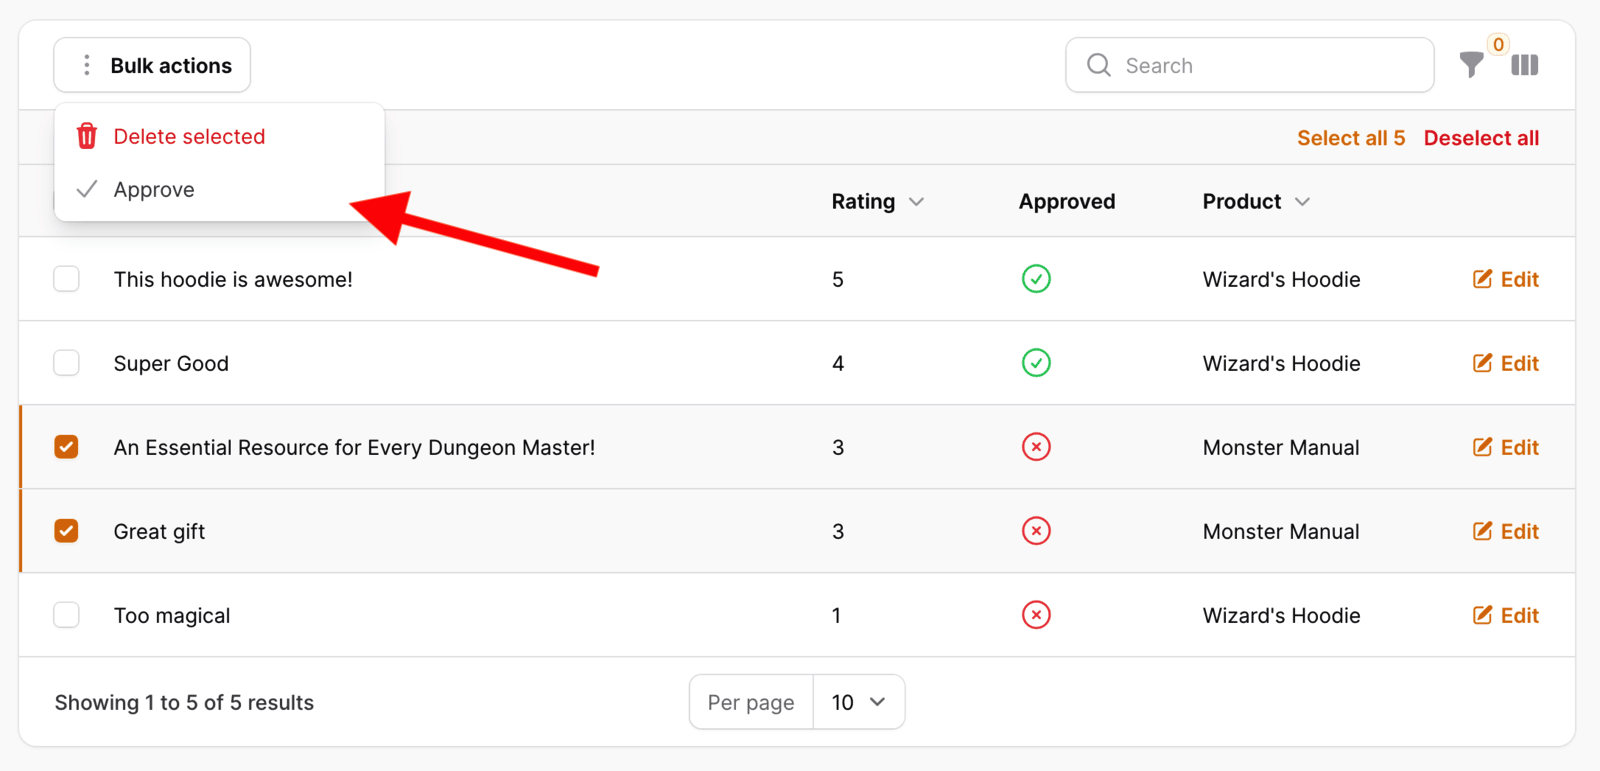
Perfect, the button is there! Once you click it and confirm the action, the selected reviews will be approved.
Conclusion
And there we have it! An admin panel ready to use in minutes. And we've only scratched the surface—Filament can offer a lot more. If you liked it, please explore the documentation.
To learn more tips and tricks, an excellent resource is the Filament Daily channel by Povilas Korop. Be sure to check it out!
Would you like more Filament-related content? Let us know. And if you need help with Filament development, don't hesitate to contact us.
Until next time!
in your inbox:
let’s talk.
Thank you!
We appreciate your interest.
We will get right back to you.
