Five Practical Tips to Improve Search in Laravel Apps With Typesense


Typesense is making waves in the search landscape. Since its inclusion as an officially supported driver for Laravel Scout, Typesense has quickly become a go-to choice for developers looking to integrate full-text search into their Eloquent models in Laravel.
What is Typesense? It's a fast, open-source, and self-hosted search engine designed to provide a powerful alternative to popular solutions like Algolia and Meilisearch. Typesense combines high performance with ease of use, offering developers the flexibility to build robust, scalable search features without the constraints of licensing fees or reliance on third-party services.
This article compiles essential tips to help you tackle common full-text search tasks with Typesense. Whether you discovered Typesense through Aaron Francis's channel, Tighten's previous article, or are hearing about it for the first time—welcome! Today, we'll dive into installing and configuring Typesense in a Laravel application and then cover key topics:
- How to sort records
- How to use filters effectively
- How to tweak typo tolerance
- How to access the raw Typesense response
- And how to use facets for better filtering
By the end of this guide, you'll have a solid grasp on enhancing your website or application's search capabilities with precision and power.
Let's jump in!
How to Install and Configure Typesense in Your Laravel Project
If you've already set up Typesense in your Laravel application, feel free to skip ahead to the tips. Otherwise, let's walk through the setup steps together to get everything running smoothly.
Install Typesense
First things first—let's get Typesense installed in our system. The installation process varies based on your operating system, so check out the Typesense documentation for detailed instructions. Here, we'll go through the installation steps for an Ubuntu server:
curl -O https://dl.typesense.org/releases/27.1/typesense-server-27.1-amd64.deb
sudo apt install ./typesense-server-27.1-amd64.deb
After installation, Typesense generates an API key that you'll need to connect to your Laravel app. If you installed it on Ubuntu, run this to retrieve it:
cat /etc/typesense/typesense-server.ini
Look for a line like this:
api-key = BIO2PGT4B3xpauGBpkIX4p8jAHltKBlxEY5VD3EKFtTZP6jq
Tip: If you install Typesense locally on a Mac via Homebrew, the default API key is
xyz.
This key is essential for secure communication between your Laravel application and Typesense. Keep it at hand, as you'll need it for your .env configuration.
Once installed, you can start the Typesense service. On Ubuntu, run the following command:
sudo systemctl start typesense-server.service
Install Laravel Scout
Next, we need a way for Laravel to connect to the Typesense server—enter Laravel Scout! This package makes integrating your Laravel models with the search engine easy.
You can install Laravel Scout on any existing Laravel application, but for this article, we'll start with a fresh one:
composer create-project laravel/laravel demo-typesense-tips
cd demo-typesense-tips
Now we can go ahead and install Laravel Scout:
composer require laravel/scout
Great! Now, let's publish the Scout configuration file using the vendor:publish Artisan command.
php artisan vendor:publish --provider="Laravel\Scout\ScoutServiceProvider"
You'll notice a new file is created in the path config/scout.php. We'll edit that file shortly. But first, let's add these variables to our .env file:
# Our Scout driver is Typesense
SCOUT_DRIVER=typesense

# This is our Typesense API key
TYPESENSE_API_KEY=BIO2PGT4B3xpauGBpkIX4p8jAHltKBlxEY5VD3EKFtTZP6jq
With that done, we're ready to start making our models searchable.
Make a Model Searchable
In your application, you might want to add search capabilities to several models—like products, articles, or posts. For this guide, let's imagine we have a movie database. Our goal is to make the Movie model searchable.
To keep the focus on the search tips, we'll keep the database structure simple. Here's a sample migration to create the movies table:
public function up(): void
{
    Schema::create('movies', function (Blueprint $table) {
        $table->id();
        $table->string('title');
        $table->enum('rating', ['G', 'PG', 'PG-13', 'R', 'NC-17']);
        $table->integer('year');
    });
}
Looks good! Now let's move to our model:
<?php

namespace App\Models;

use Illuminate\Database\Eloquent\Factories\HasFactory;
use Illuminate\Database\Eloquent\Model;
use Laravel\Scout\Searchable;

class Movie extends Model
{
    use HasFactory, Searchable;

    public $timestamps = false;

    protected $fillable = ['title', 'rating', 'year'];

    public function toSearchableArray(): array
    {
        return ['id' => (string) $this->id] + $this->toArray();
    }
}
Key details for making a model searchable:
- Use the
Searchabletrait from Laravel Scout. - Define a
toSearchableArraymethod that returns an associative array of the fields you want to index. Note that Typesense expects the primary key to be a string. While we're indexing all fields here, you can exclude any fields not needed for search to save space in Typesense storage.
With our model ready, we can complete the configuration in config/scout.php. Open the file and locate the "Typesense Configuration" section. You can leave the client-settings as they are by default and focus on model-settings. Since we want to index and search our Movies model, here's the configuration we'll set up:
'model-settings' => [
  Movie::class => [
      'collection-schema' => [
          'fields' => [
              ['name' => 'id', 'type' => 'string'],
              ['name' => 'title', 'type' => 'string'],
              ['name' => 'rating', 'type' => 'string'],
              ['name' => 'year', 'type' => 'int32'],
          ],
      ],
      'search-parameters' => [
          'query_by' => 'title',
      ],
  ],
],
Let's review this snippet:
- In
collection-schema, we list thefieldswe want to index along with their corresponding data types. Note that we useint32for theyearfield, as Typesense does not useintegeras a type but instead supportsint32orint64. - In
search-parameters, we specify the field toquery_by. Here, we're searching movies bytitle, but if you want to search by multiple fields, you can list them separated by commas (e.g.,title,description).
With our setup complete, it's time to import records from the database into Typesense. But first, let's make sure we have data in our database! For this tutorial, you can populate your movies table by either seeding it with fake records using a factory or by using this seeder with sample data (400 movies), which is especially suited for this guide.
Once your movies table is populated, run the import command:
php artisan scout:import "App\Models\Movie"
And that's it! We're ready to test it out.
Make a Search Endpoint
Let's set up a basic search route. In routes/web.php, add:
<?php

use Illuminate\Support\Facades\Route;
use App\Http\Controllers\MovieController;

Route::get('movies', [MovieController::class, 'index'])->name('movies.index');
Then create the controller to handle it:
<?php

namespace App\Http\Controllers;

use App\Models\Movie;
use Illuminate\Http\Request;

class MovieController extends Controller
{
    public function index(Request $request)
    {
        $movies = Movie::search($request->input('q'))->get();
        return $movies;
    }
}
Run your Laravel application and navigate to /movies?q=ringo. You'll see a JSON response of movies matching the term "ringo," such as:
[
  {
    "id": 341,
    "title": "The Lord of the Rings: The Two Towers",
    "rating": "PG-13",
    "year": 2002
  },
  {
    "id": 340,
    "title": "The Lord of the Rings: The Return of the King",
    "rating": "PG-13",
    "year": 2003
  },
  {
    "id": 339,
    "title": "The Lord of the Rings: The Fellowship of the Ring",
    "rating": "PG-13",
    "year": 2001
  }
]
Fantastic! Typesense is now fully integrated with your Laravel application through Laravel Scout. You can perform searches and retrieve matching records. Plus, typo tolerance works: we get movies with "Ring" in the title, even though we searched for "ringo."
But how can we make the search even better? Let's dive into some tips to optimize and customize your search feature.
Tip 1: How to Sort Records
We're retrieving the "Lord of the Rings" movies, but they're not in the correct order. We don't want to see Sauron defeated before Frodo even leaves the Shire (oh, spoilers!), so let's fix that.
Let's allow users to send sort_field and sort_dir as query string parameters and use Laravel Scout's orderBy method to sort the records properly.
public function index(Request $request)
{
    $movies = Movie::search($request->input('q'))
      ->when($request->has('sort_field'), function ($query, $field) use ($request) {
          return $query->orderBy($field, $request->input('sort_order', 'asc'));
      })
      ->get();

    return $movies;
}
Now, when we visit /movies?q=ringo&sort_field=year, we'll get the trilogy listed in order of release.
Typesense supports sorting on both numeric and string fields, but there are a few differences in setup.
- Numeric and boolean fields are sortable by default. This means you can sort results by these fields (e.g.,
year) without any extra configuration. - String fields require a bit more setup. By default, they aren't sortable because sorting large collections of strings can be resource-intensive. To make a string field sortable, you'll need to modify the Typesense collection schema.
To enable sorting on a string field, set the sort option to true for that field in your schema:
'collection-schema' => [
    'fields' => [
        ['name' => 'id', 'type' => 'string'],
        ['name' => 'title', 'type' => 'string', 'sort' => true],
Remember that you'll need to re-import the records whenever you change the schema:
php artisan scout:import "App\Models\Movie"
To avoid needing to re-import, set the sort option to true on any string fields you anticipate sorting by from the beginning.
Tip 2: How to Use Filters Effectively
Imagine you want to filter your movie search results by year. It might seem logical to perform the search first and then filter the results by year like this:
public function index(Request $request)
{
    $movies = Movie::search($request->input('q'))->get();

    if ($request->input('year')) {
        $movies = $movies->where('year', $request->input('year'));
    }

    return $movies;
}
For instance, visiting /movies?q=ringo&year=2003 with our seed data will return one result: The Lord of the Rings: The Return of the King. It matches the search term (thanks to typo tolerance) and has a release year of 2003.
At first glance, this might seem to work perfectly. However... it is not. Let me explain.
Let's add movies that match the search term more accurately, with the string "ringo" in their title—for example, ten movies about Ringo Starr, the drummer of The Beatles. I don't know who would like to see ten movies about Ringo, but let's add them anyway to prove the point!
// Add 10 movies titled "The Legend of Ringo [1-10]" with a release year of 2024
collect(range(1, 10))->each(fn($i) => Movie::create([
    'title' => "The Legend of Ringo $i",
    'rating' => 'PG',
    'year' => 2024,
]));
Now, reload /movies?q=ringo&year=2003. Surprisingly, The Return of the King is missing! Instead of one result, we get an empty array. Why does this happen?
The issue lies in how search results are fetched. When get is called, only the first page of results is returned. By default, Typesense limits each page to 10 records. So, the $movies collection will contain only ten records.
In our example, those first ten records will be the recently added Ringo Starr movies from 2024. The film "The Return of the King" falls on page two, given that its title doesn't exactly match the search term.
Filtering $movies by the year 2003 returns an empty collection, since none of the entries on page one match that year.
To fix this, apply filters directly in the search query. This leverages Typesense's filtering capabilities, ensuring results are accurate across the entire dataset—not limited to the first page.
Laravel Scout provides a where method that allows you to apply filters as part of the search request before executing the query with get. This way, Typesense returns only results matching your search term and the specified year filter before pagination kicks in. Here's how it looks:
public function index(Request $request)
{
    $movies = Movie::search($request->input('q'))
        ->when($request->has('year'), function ($query, $year) {
            return $query->where('year', $year);
        })
        ->get();

    return $movies;
}
With this change, filtering is handled as part of the search process, so you get a complete and accurate set of matches—even if your dataset is large. You don't need extra configuration for this to work; just remember to include all fields you would like to filter by in the Typesense schema.
Tip 3: How to Tweak Typo Tolerance
In many search applications, users often make typos or have slight spelling variations in their queries. Typesense's typo tolerance feature helps by allowing matches even when there are minor differences in spelling. For instance, in our demo, searching for "ringo" returns results for "Lord of the Rings." However, a search for "rango" fails to return results due to its higher typo distance.
By default, Typesense allows only one typo in the search term. To make your search more forgiving, you can increase the typo tolerance to accommodate terms that deviate further. For example, enabling up to 2 typos allows searches like "rango" still to match "Lord of the Rings" movies.
To configure this, Laravel Scout offers the options method, which allows you to pass additional options to the search driver. In this case, you want to set num_typos to 2:
public function index(Request $request)
{
    $movies = Movie::search($request->input('q'))
        ->options(['num_typos' => 2])
        ->get();

    return $movies;
}
With this adjustment, the results will include records up to 2 typos away from the original search term. Searching for "rango" now will return the Ringo movies, the "Lord of the Rings" movies, and even "The Lone Ranger."
Increasing typo tolerance enhances the search experience by accounting for user errors and offering more relevant results, particularly for mobile users or longer search terms. However, setting typo tolerance too high might lead to irrelevant matches, potentially diminishing the precision of your search results.
Tip 4: How to Access the Raw Typesense Response
The Laravel Scout get method returns a collection of models, making it convenient to iterate and render them in templates, much like Eloquent query results. However, consider using the raw method if you need more details about the search. This method provides the complete Typesense response object, including rich metadata such as the total matches, highlighting details, scoring information, and even the search execution time in milliseconds.
Here's how you can switch to raw:
public function index(Request $request)
{
    $movies = Movie::search($request->input('q'))->raw();

    return $movies;
}
Let's try it out. Visit movies?q=king+return to see a detailed JSON response like this:
{
  "facet_counts": [],
  "found": 1,
  "hits": [
    {
      "document": {
        "id": "340",
        "rating": "PG-13",
        "title": "The Lord of the Rings: The Return of the King",
        "year": 2003
      },
      "highlight": {
        "title": {
          "matched_tokens": ["Return", "King"],
          "snippet": "The Lord of the Rings: The <mark>Return</mark> of the <mark>King</mark>"
        }
      },
      "highlights": [...],
      "text_match": 1157451471172665300,
      "text_match_info": {
        "best_field_score": "2211897737216",
        "best_field_weight": 15,
        "fields_matched": 1,
        "num_tokens_dropped": 0,
        "score": "1157451471172665465",
        "tokens_matched": 2,
        "typo_prefix_score": 0
      }
    }
  ],
  "out_of": 410,
  "page": 1,
  "request_params": {...},
  "search_cutoff": false,
  "search_time_ms": 13
}
Here are the key response components:
facet_counts: Lists facets if they are enabled. Facets organize results by categories, which we'll explore in the next tip.found: The total number of documents matching the query.hits: An array of matched documents. Eachhitincludes:document: The actual movie data, containing all indexed fields.highlight: Snippets with matched terms highlighted using<mark>tags.highlights: Detailed highlighting for all matched fields.text_match: A numeric score representing the relevance of the match.text_match_info: Detailed breakdown of how the score was calculated.
out_of: The total number of documents evaluated during the query.page: Indicates the current page of results, useful for paginating through large datasets.request_params: Contains the parameters used to execute the search.search_cutoff: Shows if the search was stopped early for performance reasons. A value offalsemeans the entire dataset was evaluated.search_time_ms: The time taken to execute the search, in milliseconds (e.g., 13 ms in this example).
Using raw provides deeper insights into search results, including how Typesense ranks and highlights documents. This data can help with:
- Debugging: Troubleshoot issues in search relevance or performance.
- Search Tuning: Adjust settings for better relevance and speed.
- Feature Development: Build advanced features like custom pagination, detailed search term highlights, or filtering based on facets.
And talking about facets!
Tip 5: How to Use Facets for Better Filtering
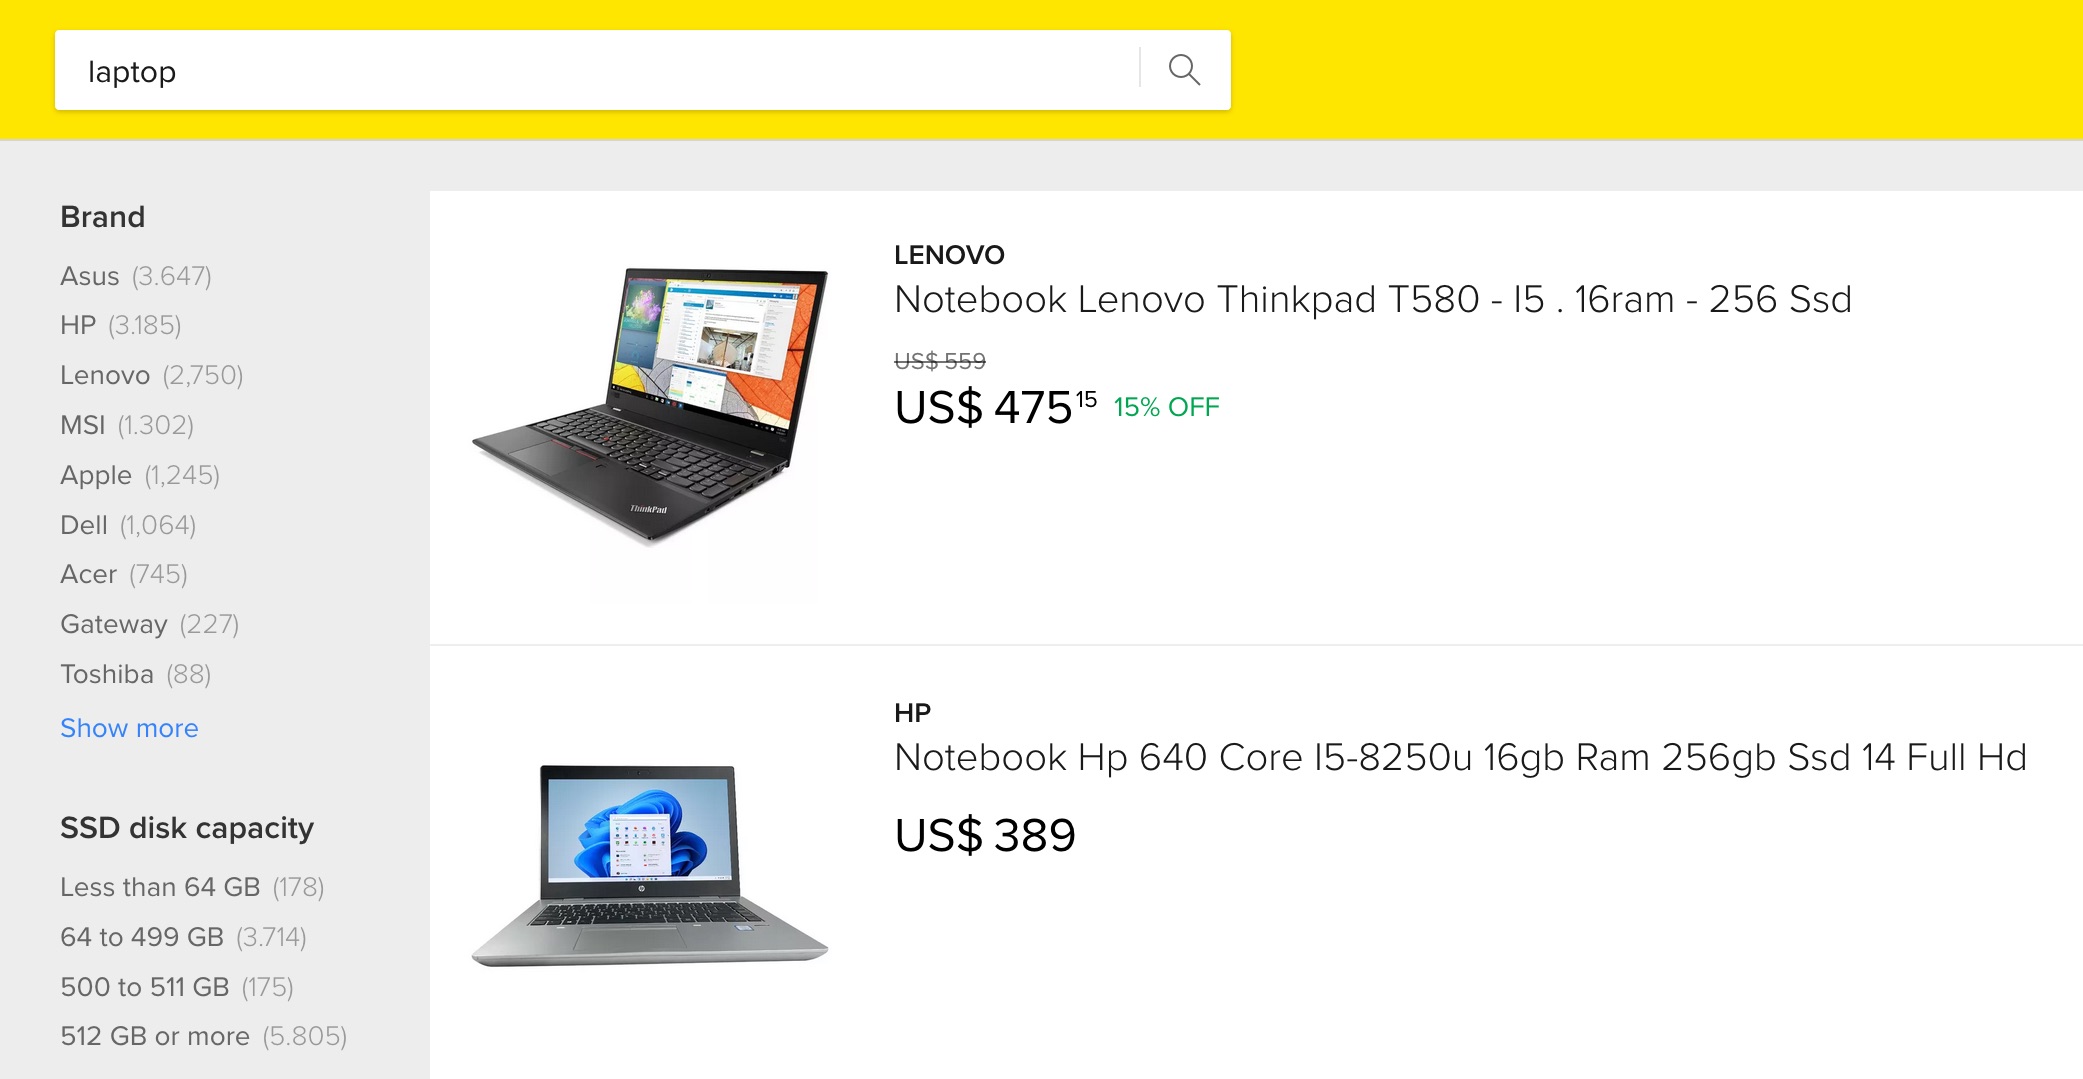
Have you ever searched on an online shop and seen a sidebar with filters showing how many results are in each category? For instance, when looking for a laptop, you might see a count of matches for each brand.
These quick filters, called facets, are aggregate counts of values. Adding facets to a query makes Typesense return counts of matching documents for each facet value. Typesense also calculates additional metrics like min, max, sum, and average values alongside counts for integer fields.
To use facets in Typesense, you must define the desired facet fields in your collection schema. For our movies collection, we can set year and rating as facet fields:
'collection-schema' => [
    'fields' => [
        ['name' => 'id', 'type' => 'string'],
        ['name' => 'title', 'type' => 'string', 'sort' => true],
        ['name' => 'year', 'type' => 'int32', 'facet' => true],
        ['name' => 'rating', 'type' => 'string', 'facet' => true],
    ],
],
Next, use the options method to specify which fields to facet_by and retrieve the raw response object:
public function index(Request $request)
{
    $movies = Movie::search($request->input('q'))
        ->options(['facet_by' => 'year,rating'])
        ->raw();

    return $movies;
}
Now, if we visit /movies?q=star, we'll see a JSON response containing facet details:
{
  "facet_counts": [
    {
      "counts": [
        {
          "count": 2,
          "highlighted": "2018",
          "value": "2018"
        },
        {
          "count": 2,
          "highlighted": "2016",
          "value": "2016"
        },
        ...
      ],
      "field_name": "year",
      "sampled": false,
      "stats": {...}
    },
    {
      "counts": [
        {
          "count": 12,
          "highlighted": "PG",
          "value": "PG"
        },
        {
          "count": 11,
          "highlighted": "PG-13",
          "value": "PG-13"
        },
        ...
      ],
      "field_name": "rating",
      "sampled": false,
      "stats": {...}
    }
  ],
  ...
}
To allow users to refine results further, we can render a template where each facet value is a clickable link. First, let's update our controller to receive year and rating as input, and return a view instead of a JSON response:
public function index(Request $request)
{
    $movies = Movie::search($request->input('q'))
        ->options(['facet_by' => 'year,rating'])
        ->when($request->has('year'), function ($query, $year) {
            return $query->where('year', $year);
        })
        ->when($request->has('rating'), function ($query, $rating) {
            return $query->where('rating', $rating);
        })
        ->raw();

    return view('movies.index', ['movies' => $movies]);
}
Then, create the Blade template:
@if(!empty($movies['facet_counts']))
  <h2>Filters</h2>
  @foreach($movies['facet_counts'] as $facet)
    <h3>{{ ucfirst($facet['field_name']) }}</h3>
    <ul>
      @foreach($facet['counts'] as $item)
        <li>
          <a href="{{ route('movies.index', array_merge(request()->all(), [$facet['field_name'] => $item['value']])) }}">
            {{ $item['value'] }} ({{ $item['count'] }})
          </a>
        </li>
      @endforeach
    </ul>
  @endforeach
@endif

<div class="movies">
  <h2>Results</h2>
  @if(!empty($movies['hits']))
    <ul>
      @foreach($movies['hits'] as $hit)
        <li class="movie">
          <div>Title: {{ $hit['document']['title'] }}</div>
          <div>Year: {{ $hit['document']['year'] }}</div>
          <div>Rating: {{ $hit['document']['rating'] }}</div>
        </li>
      @endforeach
    </ul>
  @else
    <p>No movies found.</p>
  @endif
</div>
Great! Now the user will see a list of filters, each with a link to refine the search:
<li><a href="/movies?q=star&year=2016">2016 (2)</a></li>
<li><a href="/movies?q=star&year=2018">2018 (2)</a></li>
...
Facets help users narrow search results in a structured and visually intuitive way, improving both the usability and efficiency of your search functionality, particularly in large collections where users need to refine results to find what they're looking for.
Conclusion
I hope this article helps you enhance the search functionality on your site and serves as a starting point to explore the many features Typesense offers.
Be sure to check out their excellent documentation, and if you'd like to see more content about Typesense, let us know 😉
See you next time!
in your inbox:
let’s talk.
Thank you!
We appreciate your interest.
We will get right back to you.